DIY Pineapple Face Mask Recipes for Glowing Skin

pineapple-face-mask-recipes

You’ll ditch those pricey cosmetics by the end of this article. Well, don’t go on my words literally.

I never shared a healthy or delicious relation with pineapple, but as they say, time changes everything and here am writing this article about benefits of pineapple face mask.

It was its tart taste and the fact that they eat you back, which isolated me from enjoying this fruit. However, things aren’t same when you use it over the skin. Nutrients packed in this fruit can treat acne, fade wrinkles, enhances collagen production, help to get rid of warts and the list goes on.

Before you jump to conclusion that this is an excellent facial mask, let me give few more reasons on why you must use pineapple facial.

You can skip this and head to the recipe here.

What Are the Benefits of Pineapple Face Mask for Skin?

Like other natural remedies, pineapple is stuffed with vitamins that guard your skin against ailments and make them supple.

  • Vitamin C and potassium crammed in this fruit exhibit antioxidant activity, which helps to thwart free radicals that damage cell membrane.
  • Bromeliad is an enzyme in pineapple that can cleanse impurities and dead skin cells accumulated over the skin.
  • Anti-inflammatory property helps to reduce inflammation caused by minor ailments.
  • Treats acne blemishes. Vitamin C stimulates healing, while anti-inflammatory agents reduce further acne lesions.
  • Antibacterial and anti-fungal properties are essentially important to treat skin ailments, which are housed in this homemade pineapple facial mask.
  • It also hydrates your dry skin and forms a protective layer.
  • Nutrients in this fruit help to reduce dark spots, fine lines and lighten the appearance of acne scars.
  • Vitamin C, which enhances collagen production help to retain the elasticity of your skin making it look young.
  • Bromelain improves your skin complexion and makes it firm. You can expect a clear and fairer skin.
  • The exfoliating ability of this face mask is excellent, dead cells and pollutants can be easily cleansed.

DIY Pineapple Face Mask Recipes

Being happy and stress-free is the secret ingredient of homemade facial recipes. Try to make this recipe on holidays, so that you’ll really enjoy turning your home to a spa.

Before applying the face mask, make sure you cleanse the impurities and pat dry with soft cloth.

If you’ve acne or blackheads, exposing your face to steam can do wonders.

#1 Papaya and Pineapple Face Mask

papaya-and-pineapple-face-mask

Papain is an enzyme crammed in papaya that helps to exfoliate dead cells. Both pineapple and papaya combine to hydrate your skin and make it clear.

Ingredients:

  • Pineapple – 1
  • Ripe papaya – ½
  • Honey – 1 tablespoon

You can skip using honey.

  1. Peel the skin of papaya and pineapple.
  2. Blend both fruits in with a juicer, till you obtain thick paste like consistency.
  3. Wash your face as mentioned above and apply the facial mask evenly all over the face.
  4. Avoid applying around the eye, instead, place two sliced cucumbers on eye lids.
  5. Leave it to dry naturally for 20 minutes and then rinse it off.

#2 Homemade Pineapple Facial

This quick and instant recipe needs not more than 1 minute to use.

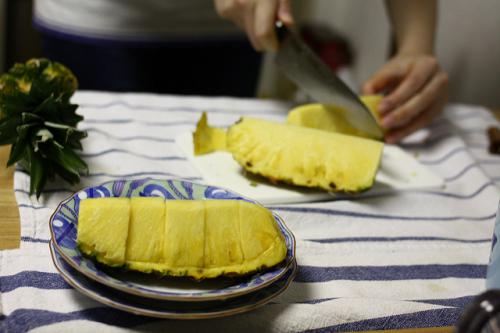
  • Peel pineapple skin and slice them into pieces.
  • Wash your face and pat dry with a cloth.
  • Take 1 sliced piece of pineapple and gently rub over the face.
  • Leave for 5-10 minutes and then wash with cold water.

Optionally, moisturize your face with olive oil or rose water.

#3 Honey and Pineapple Face Mask for Dry Skin

Religious and historical books documented benefits of honey. So, there is no need for me extol its uses.

Healing, antibacterial, anti-inflammatory, antiseptic and moisturizing ability of raw honey is something that entices me a lot. I prefer raw honey to treat minor ailments.

  • Mash fresh pineapple pieces and add honey to the paste.
  • To make it smooth, you can add olive oil.
  • Now, after mixing thoroughly apply the mask over prewashed face.
  • Rinse it off after 15-20 minutes.

Also read: Kiwi fruit face mask

#4 Green Tea, Papaya and Honey Face Pack

Scientific research states that regular consumption of green tea can reduce inflammation over the skin. Vitamin C, antioxidants and anti-inflammatory activity of green tea can effectively treat skin ailments.

To reap all these benefits, you can use it topically.

  • Mash pineapple and papaya pieces to obtain a thick
  • Now add honey and green tea (after brewing tea) to the paste.
  • Cleanse your face and apply the mask evenly.

#5 Pineapple and Gram Flour Mask for Acne

Gram flour or besan is extensively used to cleanse impurities and dead cells. It can also treat oily skin, acne and fade dark spots.

  • Peel and slice the fresh pineapple into pieces.
  • Grind these small pieces to a smooth
  • Add 2 tablespoons of gram flour to the pulp and mix thoroughly.
  • Wash the skin with water and pat dry using a clean cloth.
  • When the skin is still damp, apply the mask evenly and allow it to dry naturally.

Also read: 7 Homemade Face Mask for Glowing Skin

#6 Sandalwood and Pineapple Face Mask

Sandalwood powder is extensively used for religious purposes. Nutrients in this innate ingredient can treat acne, fade stretch marks, reduce dark spots, tighten skin and help to obtain glowing face.

  • Take 3 small pieces of sliced pineapple and mash into a smooth
  • Add 2 tablespoons of sandalwood powder and apply it over acne affected the skin.
  • You can also use this mask as a spot treatment.

#7 Pineapple and Strawberry

The rich concentration of vitamin C in strawberry helps to nourish skin, treat blemishes, control excess sebum production and revitalize skin.

Vitamin C also improves the elasticity of your skin.

  • Grind 1 strawberry and 2 sliced pineapple pieces to form a smooth
  • Optionally you can add a little water to make the paste smooth.
  • Now, apply the mask on the face and around the neck.

#8 Aloe Vera Gel and Pineapple
aloe-and-pineapple-face-mask

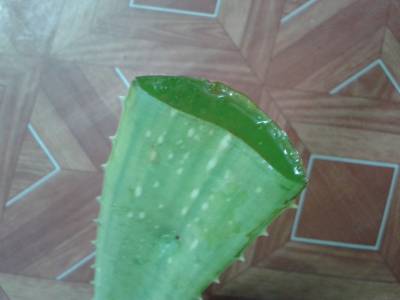
This sticky gel is known for its healing properties. You can actually ingest this gel to reap its healing ability. It does taste good, but you can blend it with orange juice.

For topical application, peel its skin and rub the gel over the face.

  • Mash or grind both pineapple cubes and aloe vera gel into a smooth
  • This face mask may not smell good because of aloe gel, but benefits can’t be ignored.
  • Now massage gently in circular motion over the face.

#9 Cucumber, Pineapple, and Milk Cream

Cucumber is renowned for its hydrating and cooling ability. Have you ever been to a spa? Two sliced cucumbers are placed over eyes for cooling effect.

To get benefited from this ingredient, you can just rub sliced cucumber over the skin. Leave for few minutes and rinse it off.

  • Make a smooth paste by grinding small pieces of pineapple and cucumber.
  • Once you get a thick paste, add 1 tablespoon of fresh cream and mix thoroughly.
  • Apply the mask over prewashed face and leave it to dry naturally.

#10 Egg White, Honey and Pineapple Mask

Egg white can help to remove blackheads, treat acne and shrink large skin pores.

  • Remove egg yolk and collect egg white in a bowl.
  • Place 3-4 sliced pieces of pineapple in food processor.
  • Grind to smooth paste.
  • Add egg white and raw honey to it and blend once more.
  • Now, ask your partner to apply this natural homemade facial mask to apply over the skin using a brush.

Important Tips on Using Homemade Facials

As eating raw fruits are good for your overall health, similarly applying fresh fruits will benefit your skin.

You’ll not experience overnight results from the homemade face mask, but surely vitamins and minerals stuffed in these recipes will penetrate deep into the skin to enhance its functioning.

  • Initially, start the face mask recipe once or twice in a week.
  • What worked for me may or may not work for you. So, papaya and pineapple recipe didn’t work, then try honey and pineapple face mask.
  • Avoid ingredients that may irritate your skin.
  • In case, if any face mask recipe is making your skin dry, then avoid its use.
  • Drink enough water, ingest vitamin rich diet and do regular exercise.
  • Wear sunscreen cream while going out and also avoid harsh chemical filled soaps.
  • Long exposure to mobile phones, computers, and TV screen may result in dark spots.

Just using pineapple face mask will not do wonders, as mentioned ingest nutritious diet.

Avoid stress, stay happy and stay beautiful. 🙂

Save

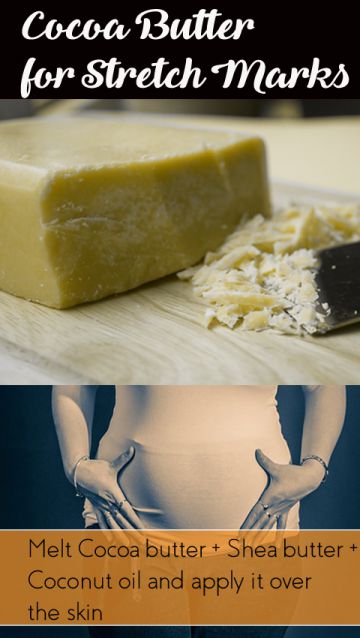
Cocoa Butter for Stretch Marks – 5 DIY Recipes (No.5 is Excellent)

You may not realize but you smeared cocoa butter over your skin many times. Not just delicious chocolates, cosmetic industries incorporate this meltable oil. Cocoa butter for stretch marks is one among the renowned natural remedies.

Extensively used in all type of chocolates this edible vegetable fat is extracted from the cocoa bean. The moisturizing activity of this pale-yellow fat can fade linear marks.

But, how can a substance that is used to allure taste buds help to get rid of stretch marks?

What Causes Stretch Marks?

As you grow, connecting fibers under the skin stretch slowly. But, with sudden growth due to puberty, pregnancy or weight gain, these fibers overstretch and tear at several places.

Initially, this breakage can be seen over the skin in purple or red colored lines. However, with time they turn silver white. (1)

It’s a bitter truth that you can’t permanently treat stretch marks. Anyhow, experts say that with time and topical application of creams you can lighten their appearance.

Also read: How to use vitamin C to fade stretch marks

How Cocoa Butter for Stretch Marks Works?

A study was carried out with 210 women, out of which 175 completed the study, which concludes that topical application of cocoa butter didn’t show any significant change than placebo lotion. (2)

So shall I stop here?

Beauty experts say that it’s no harming in using it because nutritional benefits of this natural ingredient are enticing.

  • The hydrating ability of cocoa butter improves your skin’s ability to stretch without tearing.
  • Prominent healing properties present in it can help to heal stretch marks and fade its appearance over the skin.
  • Antioxidant agents help to thwart free radicals that damage skin cell membrane.
  • Polyphenols are type compound present in cocoa butter, which can improve the elasticity of the skin, enhance collagen production and promote healing of rashes and stretch marks.
  • Fatty acids packed in cocoa butter are known to deeply moisturize the skin and lighten the appearance of stretch marks.

Regularly massage cocoa butter in circular motion to improve the elasticity of the skin and make it more pliable.

How to Use Cocoa Butter for Stretch Marks?

cocoa-butter-for-stretch-marks

Beauty experts recommend going with unrefined, pure cocoa butter, which doesn’t include any chemical preservatives and fragrances.

Cocoa Butter for Stretch Marks During Pregnancy

Hormones are released during pregnancy to soften the ligaments and connective fibers making them prone to stretch marks.

Thighs, breast or tummy are common places where you’ll see these linear lines. According to official reports, 8 out of 10 women get stretch marks during pregnancy. (3)

  • Place pure cocoa butter jar in hot water. (Because it is solid at room temperature)
  • Wash your skin to remove impurities and apply the cocoa butter evenly in circular
  • Regular application prior to stretch marks is recommended.

Shea Butter, Cocoa Butter, and Almond Oil

To make it more effective, you can blend other natural ingredients. Vitamins and minerals incorporated in this recipe will moisturize, rejuvenate and improve the elasticity of the skin.

This whipped body butter may effectively treat stretch marks, as it also contains an essential oil that proves to be good at fading these linear lines.

  • Raw shea butter – ½ cup
  • Pure cocoa butter – ½ cup
  • Almond oil – ½ cup
  • Organic coconut oil – ½ cup
  • Lavender essential oil – 20 drops

You may increase or decrease the quantity of these ingredients depending on your use.

  • Mix all listed ingredients in a bowl except essential oils.
  • Melt the ingredients by placing it over heat.
  • After cooling add essential oils and mix thoroughly.
  • Store in a glass jar and place it in the fridge for an hour.
  • Now take and whip with a hand mixer till you obtain fluffy.
  • Store and apply the whipped butter over the skin.

Coconut Oil, Shea Butter and Cocoa Butter for Stretch Marks

If you thing above recipe is difficult for you to make, then try this simple recipe.

  • Take equal amount of shea butter, cocoa butter and coconut oil in a bowl.
  • Melt the ingredients by placing them in hot water or double boiler.
  • Add few drops of vitamin E oil to the mixture.
  • Let it cool down.
  • Now wash your skin with mild soap to remove dead cells.
  • Pat dry and apply the mask over the skin.
  • Leave it to dry naturally.

Cocoa Butter and Olive Oil

  • Take required amount of cocoa butter and melt it by placing the jar in hot water or heat it.
  • Add 2 tablespoons of extra virgin olive oil and 1 teaspoon of coconut oil to the mixture while heating.
  • Remove from heat and add 5 teaspoons of mineral water to cool it down.
  • Apply the mask over the skin in circular motion.

Cocoa Butter Cream for Stretch Marks

If you want to try something from cosmetic industries, then go with Palmer’s cocoa butter formula with Vitamin E. You can read its review here.

Tips to Treat Stretch Marks Using Cocoa Butter

  • Drink enough water to hydrate your skin from the inside.
  • Always use pure and unrefined cocoa butter.
  • Include vitamin rich diet to improve healthy functioning of the skin.
  • Kiwi fruits, oranges, papayas, sweet potatoes and strawberries are rich in vitamin C that makes your skin fabulous.
  • Almonds, hazel nuts and avocados are rich in vitamin E that promotes healthy skin.
  • Omega-3 &6 fatty acids supplement also helps to hydrate the skin and reduce inflammation.
  • Avoid processed food, dairy products, fried products, poor quality supplement, artificial sweeteners, heavy gluten, excess caffeine and excess sugar.
  • Avoid using cocoa butter and other recipes listed above if you are allergic to any of these ingredients.
  • Apply natural moisturizer before going to bed; this will improve your skin’s elasticity.
  • Application of cocoa butter during pregnancy may help to prevent stretch marks.

Experts say that with time stretch marks may disappear naturally.

Note: Cocoa butter for stretch marks may or may not lighten stretch marks. But, it can prevent further stretch marks.

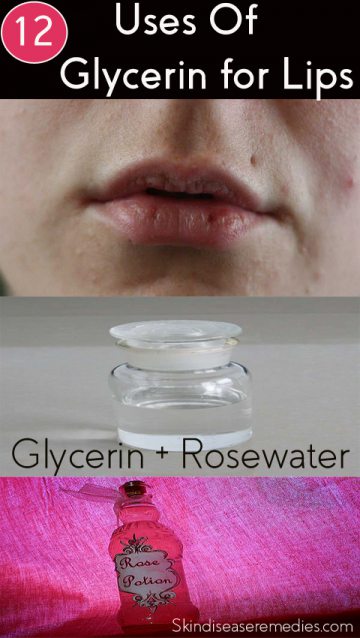
12 Awesome Benefits of Glycerin for Lips (3 DIY Recipes Included)

Ladies! Forget those costly media promoted lip balms. Instead, you can replace them with a simple colorless liquid.

Yes, am talking about glycerin, also known as glycerine. This sweet liquid can moisturize your skin and lips.  Fascinating uses of glycerin for lips allured cosmetic industries to include this water soluble ingredient to their products.

Why Do Lips Get Dry, Chapped and Dark?

The common tendency of lips towards dryness and peeling is due to loss of moisture. Unlike your skin, lips are very sensitive and they are open to harmful UV rays, wind and cold.

Apart from these environmental factors, when you become sick breathing air through mouth make your lips dry.

People who don’t use lip balm lick their lips to moisture. Well, this may hydrate your dry lips for few seconds, but they do more harm. (1)

Smoking, ailments, certain medications, dehydration, allergies and other ailments can make your lips dark.

12 Amazing Benefits of Glycerin for Lips

Humectant and versatile properties of this colorless liquid are prominently used in wide range of applications including pharmaceuticals, cosmetic, and food industries.

Apart from hydrating your lips, glycerin can heal and reduce inflammation. Below listed are common uses of this sweet liquid.

#1 Removes Dead Skin

With lots of external aggression, it’s no surprise that lips become dry and dark. Peeling skin on lips isn’t recommended, though most of us can’t stop ourselves from doing it.

Instead, apply glycerin on lips before going to bed. Assorted properties in it will moisturize and exfoliate dead skin.

This simple remedy can turn your dark lips to pink. You can use a cotton ball or your fingers to apply glycerin.

#2 Moisturize Lips

glycerin-for-lips

Everyone desire to have pink and soft lips, because it enhances your physical appearance. Without moisture, your lips turn dark and may bleed.

Glycerin moisturizes your lips and leaves them clean, pink and supple.

#3 Treats Mouth Sores and Ulcers

Mouth ulcers are harmless, however, they’re uncomfortable and you may experience burning sensation while eating.

Cheeks, lips, and tongue are common places where these red-bordered patches appear. They normally take 10 days to heal, but inflammation caused by these patches can’t be tolerated.

Glycerin is one of the effective home remedies that can treat mouth ulcers and sores.

#4 Helps to Fade Dark Spots on Lips

Long exposure to sunlight, smoking, allergic reaction, high intake of caffeine, repeated licking of lips and vitamin B deficiency results in a black spot on lips.

With regular application of glycerin, you can get rid of these dark spots or blemishes from lips.

#5 Avoid Irritation on Lips

Extreme dryness chapped lips and dark spots may cause irritation or inflammation on your lips.

Irritation can be triggered by an allergic reaction, in most cases, glycerin may work for you.

Note: In the case of allergic reaction you must consult a physician. Glycerin application can soothe to some extent, but it can’t reduce allergy.

#6 Treat Bleeding Lips (Cracked Lips)

Don’t lick or peel your lips when they are dry or chapped. The saliva dries your lips further and may result in bleeding.

Glycerin application will exfoliate dead skin and cleanse your lips. The moisturizing ability of this versatile liquid will stop bleeding and enhance healing.

#7 Makes your Lips Soft and Clean

Though humectant property of glycerin is renowned, it is not the only ability of this colorless liquid.

It’s healing and exfoliating properties make your lips soft and supple.

#8 Help to Getting Rid of Dark Lips

When you don’t care your lips, impurities, the wind and dead cells make the sensitive skin on lips to turn dark.

Particularly in winter, you must regularly apply glycerin before going to bed.

#9 Postpone Aging Signs

As you grow, skin manufacture less collagen and it loses its elasticity. As a result, wrinkles, fine lines appear on the skin.

The outer layer of lips is very thin, as you age it become progressively thinner. Like you supply natural oils to your face, lips too need external things to keep them healthy.

Glycerin will help you out to keep lips look healthy and it also protects from external factors.

#10 Make your Lips Pink Naturally

Unlike your skin, lips don’t have melanin. This natural pigment is responsible for your skin color and it also protects from UV rays.

Your lips are covered by exceptionally thin skin called stratum corneum, which allows the reddish color visible on lips due to the concentration of blood vessels.

Cold weather, smoking, and other food habits form a dark layer on lips. Glycerin not just exfoliates them as mentioned above; it has the ability to turn your lips back to natural pink.

#11 Glycerin for Dry and Chapped Lips

Extreme dryness makes your lips chapped. The tendency to peel lips starts and you can’t stop yourself from licking those chapped lips.

Moisturizing property exhibited by glycerin will help to get rid of dry and chapped lips.

#12 Makes Your Lips Healthy

You may assume that glycerin can only moisturize. No, this sweet liquid is packed with exceptional healing properties. By hydrating your skin and lips, you’re actually forming a protective layer around them.

Apart from that, cleansing, toning and cell regenerating properties of glycerin can’t be ignored.

To some extent, it can act as a sunscreen. The nutritional ability of this ingredient can treat acne, avoid aging signs, heals minor burns and injuries.

How to Use Glycerin for Lips

You can just take glycerin from a local drug store, clean your lips with water and apply glycerin with your fingers.

This simple recipe will work effectively.

However, if you want to make it more effective, there are many other safe natural ingredients that can be included.

Glycerin and Lemon for Lips

Bleaching activity of lemon juice is renowned. You can use this solution over lips and skin to obtain clear glowing face.

Excess use of lemon juice on the face can leave your skin sensitive to sunlight.

Mix 1 teaspoon of glycerin with 1 teaspoon of lemon juice. Alternatively, you can mix 1 tablespoon of rose water or distilled water.

Also read: Glycerin and Lemon for Face

Castor Oil and Glycerin for Lips

Am not sure if you tasted castor oil, it is something most of you don’t like to.

But, healing and moisturizing benefits of this grandmother’s ingredient can’t be ignored.

For dark or dry lips, mix ½ teaspoon of castor oil and ½ teaspoon of glycerin. You can add lemon juice to this mixture.

Glycerin and Honey for Dark Lips

I need not throw light on extolling uses of honey for overall health. Not just skin and lips, this natural ingredient can do wonders to treat health ailments.

Take required amount of raw honey, lemon juice and mix it with glycerin. Make sure you don’t lick this natural ingredient. J

You can replace glycerin with aloe vera gel in this recipe.

Homemade Lip Balm with Glycerin

Things you’ll need:

  • Beeswax pastilles – 2 tablespoons
  • Coconut carrier oil – 2 tablespoons
  • Essential oil – 2 drops
  • Glycerin – 1 tablespoon

Glycerine makes your lip balm soft and silky.

Blend beeswax pastilles with coconut carrier oil and microwave for 3-4 minutes. Meanwhile, mix glycerin and essential oil in a bowl.

Once beeswax mixture is melted, add glycerin solution to it and mix thoroughly for 30 seconds.

Now, transfer the lip balm to your own lip balm pot and use after it reaches room temperature. (Source)

Important Tips: Glycerin for Lips

Though internal consumption of glycerin is safe, excess consumption may lead to side-effects. Also if you’re allergic to glycerin or any other ingredients used in above recipes, stop using them.

  • Initially, start with glycerin without any ingredient to see if it works for you.
  • Avoid peeling, licking of dry lips.
  • Drink enough water to hydrate your skin from the inside.
  • Avoid smoking, alcohol and other food irritants that may turn your lips dark.
  • Canker sores, mouth ulcers and sores can be treated by regular application of glycerin. However, do consult your physician to treat these ailments.
  • You can use above recipes over skin to obtain soft, clear and glowing face.
  • If you’ve sensitive skin, blend distilled water with glycerin before applying over the lips.
  • Before applying lipstick, apply a thin coat of glycerin to protect your lips form chemical ingredients.
  • Minor injuries or burns can be healed with this colorless liquid.

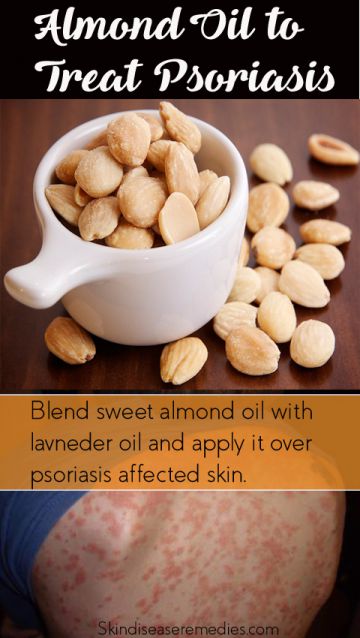
How to Use Almond Oil for Psoriasis (7 DIY Recipes Included)

I always check ingredients list at the back of every product and interestingly most of them incorporate natural substance. This curiosity made me research about the use of almond oil for psoriasis.

The quest to treat chronic ailments takes me to natural remedies.

It’s not that I hate over-the-counter medicines, but I love innate ingredients and I personally use them to treat minor health and skin ailments.

Psoriasis is a chronic skin disorder that not only results in dry flare-ups over the skin but shatters your social life.

Though scientist says that you can’t permanently treat psoriasis, which is true. A consistent treatment regimen will show a positive effect on these dry patches.

What Causes Psoriasis on Scalp and Skin?

The main cause of this skin ailment is unknown.

But, researchers hold immune system to trigger rapid growth rate of skin cells.

When the skin fails to shed them quickly, a layer of dead cells are formed. These dry patches are accompanied by itching and inflammation. (1)

Jump to: How to Use

Is Almond Oil Good for Psoriasis

almond-oil-for-psoriasis

Fact that almond oil can treat psoriasis and scalp psoriasis is just the tip of an iceberg.

This innate oil is known for its immense healing properties. To reap its nutritional benefits cosmetic manufacturers incorporate it into their products.

  • Anti-inflammatory activity of this oil helps to reduce inflammation triggered due to psoriasis.
  • Emollient property packed in almond oil penetrates deep into the skin and hydrates dry itchy patches. It also eliminates itchy patches by locking moisture over the skin.
  • Analgesic activity exhibited by this homemade remedy can relieve pain caused by repeated itching on psoriasis flare-ups.
  • Sweet almond oil can be ingested which helps to boost your immune system. It stimulates the production of defensive elements that guards your skin against
  • The exfoliating activity of this homemade mask can remove dead cells and other impurities.
  • Vitamin A, E, and B residing in this miraculous oil improve absorption of your skin and avoid blocking of skin pores.
  • Fatty acids and vitamin E housed in almond oil can make your skin soft and free from wrinkles.
  • Almond oil is an anti-hepatotoxic remedy that restrains liver damage and helps in its smooth functioning.
  • Regular massage with almond oil mask will improve blood circulation and you’ll feel relaxed.
  • Antioxidant ability of sweet almond oil can protect your skin from harmful UV rays. (2)

Note: Mentally prepare yourself that treating psoriasis is not one-time solution. You must undergo thorough medical regimen.

You must regularly use this remedy to see positive result. Stop using it, if you experience a reaction after topical application.

How to Use Almond Oil for Psoriasis?

Before using it over the face, patch test.

You can use sweet almond oil internally, but most beauty experts say that topical application will show great impact over psoriasis flare-ups.

The reason why I love natural remedies is that you can add or remove ingredients that may irritate your sensitive skin.

Below are different recipes to treat psoriasis. Go with the one, which suits your skin. J

Sweet Almond Oil for Psoriasis

Wash psoriasis affected apart with water to cleanse. Don’t be harsh or scratch while washing.

Pat dry with a soft cloth and evenly apply sweet almond oil over the skin.

Experts recommend blending this oil with other essential oil to dilute them. You can use helichrysum essential oil with sweet almond oil.

After topical application leave it to dry naturally.

Also read: Flaxseed oil for psoriasis

Remove Dead Skin From Psoriasis

As mentioned above, avoid extreme scrubbing or rubbing over psoriasis affected part.

  • Take 1 tablespoon of almond oil and add 1 teaspoon of sugar to it.
  • Gently massage over the psoriasis patches and then rinse it off.
  • Alternatively, you can mix gram flour powder with almond oil.

Almond, Gram Flour, and Lemon Juice

Like above mask, even this homemade mask recipe can help to cleanse dead cells and impurities.

  • Instead of almond oil, crush 4-5 almonds and add 1 teaspoon of milk to it.
  • Also, add few drops of lemon juice and required amount of gram flour to the mixture.
  • Apply it over psoriasis affected part for natural exfoliation.

If you’ve severe psoriasis flare-ups that can be irritated with exfoliation, then avoid this recipe.

Almond Oil for Psoriasis (Ultimate Homemade Recipe)

If you want to make your remedy more effective, then try this recipe with all essential oils and home available ingredients.

  • Sweet almond oil – 6 tablespoons
  • Lavender oil – 11 drops
  • Geranium oil – 10 drops
  • Patchouli oil – 4 drops
  • Frankincense oil – 10 drops
  • Mandarin oil – 3 drops
  • Ylang Ylang oil – 1 drop
  • Clary sage oil – 1 drop
  • Bergamot oil – 9 drops

Add listed ingredients in a bowl and mix thoroughly. The effectiveness of this remedy depends on the quality of essential oils you used in it.

Wash the area and apply this ultimate natural remedy over psoriasis affected part.

Almond Oil and Bergamot Oil for Psoriasis

Various studies back the effectiveness of essential oils. If you want to try a simpler version to treat psoriasis, try this remedy.

  • Take 1 drops of bergamot oil with 5 ml of sweet almond in a bowl.
  • Alternatively, you can add 1 drop of lavender oil and frankincense oil.
  • Gently apply over psoriasis affected part and leave it to dry naturally.

Almond Oil for Scalp Psoriasis

50 percent of people with psoriasis will have it over the scalp.

Dry inflamed patches will be formed over the scalp. It results in hair loss and ruins your appearance. Persistent itching is very painful. (Source)

  • Blend almond oil with amla oil and apply it over prewashed scalp.
  • Ask your partner to apply the oil over the scalp with fingertips.
  • Leave it to dry naturally.
  • Avoid chemical incorporated dyes or cosmetics over the scalp.

Best time to apply this hair mask is after washing your hair when they are still damp or before going to sleep.

Almond Oil and Lavender Oil for Hair

Scalp psoriasis results in dry hair and scalp. Emollient property residing in these natural oils will hydrate the dry scalp.

  • Blend 4 tablespoons of sweet almond oil with 4-5 drops of lavender essential oil in a container.
  • Heat the container in hot water for about 10-15 minutes.
  • Use a mild shampoo to wash your hair.
  • When the hair is still damp, apply this oil mixture evenly over the scalp.

You can mix extra virgin olive oil, castor oil, mint or rosemary oil with sweet almond oil.

Almond Oil for Nail Psoriasis

Though there is no evidence of almond oil to be effective over nail psoriasis. Assorted nutrients in this innate oil can hydrate dry cuticles and its anti-inflammatory ability helps to reduce psoriasis inflammation.

Dip a cotton ball in sweet almond oil and apply it over cuticles and around the nail plate. As this natural remedy isn’t associated with any side-effects you can use it twice over the nails.

Side-Effects of Almonds

Too much of anything isn’t health.

Over dose of almonds can results in various side-effects like gastrointestinal issues, headache, dizziness, weight gain, allergic reaction and stimulate bacterial growth.

People who’re allergic to almond oil must avoid using it. Instead you can use lavender oil, Eucalyptus oil, tea tree oil or other home remedies to treat psoriasis.

Tips and Precautions to Treat Almond Oil for Psoriasis:

Regular application of these home remedies may help to reduce flare-ups, but you must stay away from irritants that trigger the inflammation.

  • Blend almond oil with other natural oils.
  • Avoid ingredients that can irritate your sensitive skin. (Patch test before using any of the remedy listed above)
  • Foods like gluten, condiments, citrus fruits, alcohol, red meat and junk foods must be avoided.
  • Avoid extreme exfoliation or scratching.
  • Don’t stop using medication or other treatment.
  • Avoid using chemical included cosmetic products and direct sun exposure.
  • Wear sunscreen with SPF 15 while going out.
  • In cold seasons, moisturize your skin with natural oils regularly.
  • Consult dermatologist regularly.

Image source

Save

Save

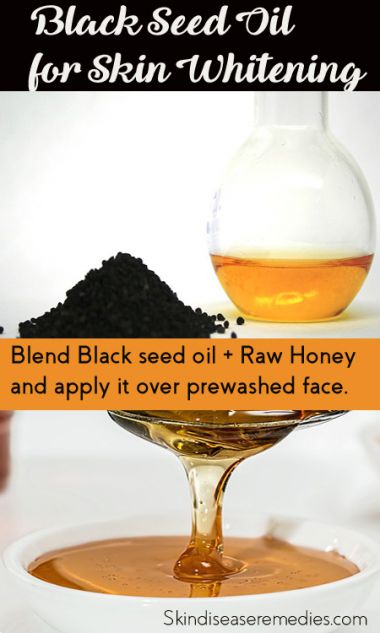
Black Seed Oil for Skin Lightening – 3 Home Remedies Included

black-seed-oil-for-skin-whitening

Its immense nutritional benefits are backed by religious and historical books. Ingest its seeds or topically use black seed oil for skin whitening; you’ll be benefited with its nutrients.

Without any side-effects, this natural remedy has sustained its position in treating health and skin ailments.

Regularly chew its seeds with honey to treat various health ailments. For cosmetic benefits, you can topically apply its oil.

Day to day more and more women are experiencing the beauty perks by natural remedies.

Expensive cosmetic creams, unfortunately, don’t fulfill their claims. Though they incorporate natural ingredients to allure customers, chemical preservatives may strip natural oil over the skin.

Why Do Dark Spots Appear on the Face?

Your skin gets its color from a pigment called melanin. When some external and internal factors influence the production of this pigment dark patches/spots, discoloration are formed.

Apart from dark spots; freckles, acne scars, discoloration, age spots and other ailments ruins your appearance.

Skin bleaching is a cosmetic approach to reduce these dark patches and obtain a flawless skin. Natural remedies got significant exposure in media because of its exceptional nutritional benefits.

Benefits of Black Seed Oil for Skin Whitening

When you ingest vitamin rich diet, they reflect over the skin.

Vitamin C, E, A, fatty acids, antioxidants and other nutrients enhance the healthy functioning of the skin.

Fortunately, black seed oil is packed with all these essential nutrients.

  • A study states that nutrients in black seed oil can inhibit melanin production, which helps to obtain glowing skin. (1)
  • Vitamin A and amino acids packed in this oil reduce scars and dark spots.
  • Anti-inflammatory properties exhibited by black seed oil can heal minor burns and strengthen the immune system.
  • Antioxidant agents housed in this oil thwart free radicals that damage cell membrane.
  • Assorted vitamins in this natural ingredient stimulate cell regeneration; enhance collagen production, fades scars and dark spots.
  • Linoleic acid present in the oil helps to hydrate your skin and protects it from impurities.

How to Use Black Seed Oil for Skin Whitening?

Don’t expect overnight results. Natural ingredients penetrate deep into the skin and restore its normal functioning.

You can simply use black seed oil over prewashed face regularly before going to bed. To make it more effective, beauty experts recommend blending other innate ingredients with it.

Black Seed Oil and Honey Face Mask

Honey is prominent for its humectant and healing activity.

I personally use raw honey to treat cough. Though it’s discussed in historical books and religious scriptures, use of honey will not bring instant result on the same day. It took few days or 2 weeks to treat the ailment for me. But, the effect was long lasting.

  • Take heated and grounded black seeds in a bowl.
  • Add raw honey to it and apply evenly all over the face.
  • Leave it to dry for 20 minutes and then rinse it off.

If you don’t want to use honey over the skin, mix black seeds with honey and ingest regularly.

In case you don’t have black seeds, add black seed oil with honey and apply it over the skin.

Apple Cider Vinegar and Black Cumin Seeds

ACV is renowned for treating various ailments. Apply few drops of ACV over acne lesion or wart to treat them.

To reap benefits from black seed oil ground slightly heated black cumin seeds and mix it with required amount of ACV.

Stop using ACV if your skin gets irritated.

Sesame Oil and Black Seed Oil

Vitamin E residing in sesame oil acts as a sunscreen. Sesamol housed in this oil exhibit antioxidant property that can reduce wrinkles and fine lines.

  • Mix required an amount of sesame oil with black seed oil.
  • Prior to that, cleanse your face with water or mild cleanser to remove impurities or cosmetic cream.
  • Pat dry with a soft cloth and apply the mixed solution over the face.
  • Allow it to dry naturally.

Lemon Juice and Black Seed Oil for Skin Whitening

Bleaching and acidic property of lemon juice are renowned. However, excess use of lemon juice may make your skin sensitive to sunlight.

  • Add few drops of lemon juice to black seed oil and massage it over the skin.
  • After 15-20 minutes, rinse it off with water.

Black Seed Oil Side Effects

Though there are no serious ailments linked with its use, few women claim that it result in issues during menstruation and pregnancy.

Excess use may be problematic for you. So initially patch test before using it over the face and don’t exceed the dosage level while ingesting this oil.

Important Points

This fantastic natural remedy can elevate overall functioning of the skin. But, do consider changing your lifestyle.

Avoid smoking, alcohol and cosmetic creams that include harmful chemical ingredients.

Drink enough water, do regular exercise and ingest vitamin rich diet.

As mentioned earlier, what you eat will reflect on your skin.

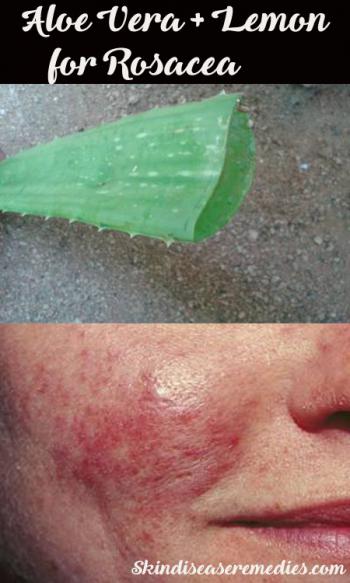
Aloe Vera for Rosacea -How to Use (7 DIY Recipes Included)

aloe-vera-for-rosacea

Rosacea is a skin ailment that commonly develops at the age of 20, but severe signs can be seen after 30 years. Redness, large bumps and in some cases visible blood vessels are seen on the skin.

Though there is no permanent cure for this chronic skin ailment, using aloe vera for rosacea will reduce flushing and restore skin barriers.

Jump to: Aloe vera and Rosacea

What Causes and Who Gets Rosacea on Face?

According to the US government people who’ve rosacea are mostly between the age group of 30 to 50.

Fair skinned people are prone to this ailment. People with another skin complexion may also experience these symptoms.

The main cause of rosacea is unknown. But studies show that genetics, immune system, stress, excess exposure to sunlight and infectious germs can trigger this ailment. (Source)

You may wonder why I shouldn’t use cosmetic creams.

Media promoted cosmetic products include chemical preservatives along with natural extracts. In some cases, these harsh chemicals may actually aggravate rosacea condition.

If the products are more organic and include mild preservatives that go well with your skin, then you can use it. However, patch test before using it.

And if you’re a natural lover, opt for aloe vera gel.

Related: How to Use vitamin e oil to treat rosacea

Benefits of Aloe Vera Gel for Rosacea (Why I should use it?)

Due to its immense nutritional value aloe plant has been prized to be effective healing remedy. Use it topically or ingest its gel with any juice, nutrients in this plant will leverage overall functioning of your skin.

  • Anti-inflammatory and soothing property exhibited by this gel will relieve inflammation and redness over the face.
  • The moisturizing ability of aloe gel will reduce dryness and sensitivity caused by this skin ailment.
  • Renowned for its healing properties, topical application of this gel will restore your skin barrier and treat rosacea symptoms.
  • Vitamin C and E housed in this natural remedy will have the ability to lighten blemishes, reduce aging and enhance collagen production.
  • When mixed with lemon juice this home remedy can lighten scars and large bumps left by rosacea.
  • Assorted nutrients in this gel will accelerate healing of rosacea flare-ups and reduce redness.
  • Antioxidant agents residing will thwart free radicals that can damage skin cells.

Add this safe and effective home remedy to your beauty regimen.

Note: Treating rosacea varies based on its triggers. Aloe gel may reduce or even cause an allergic reaction in some people, patch test before using it on the face.

How to Use Aloe Vera for Rosacea?

Simply peel aloe’s leaf with a knife and rub gently over rosacea-affected skin.

Seems very simple?

To make it more effective you can blend other natural ingredients.

Aloe Vera Gel and Olive Oil

This moisturizing pack will hydrate, reduce inflammation and lighten redness over the skin.

  • Blend 1 teaspoon of aloe gel with ½ teaspoon of extra virgin olive oil.
  • Add 1 teaspoon of oatmeal and mix the ingredients thoroughly.
  • Wash the affected part with water to cleanse impurities.
  • Evenly massage the mask over the skin and leave it for 20 minutes to dry.
  • You can rinse it off after that.

Aloe Vera Gel and Lemon Juice for Rosacea

Antibacterial, bleaching, and other nutrients in this homemade mask will reduce bumps and stimulate cell growth.

  • Take fresh aloe gel and mix 3 drops of lemon juice it.
  • Gently massage the gel on the face.
  • Alternately, you can blend both ingredients and apply the paste on the rosacea affected

Vitamin E Oil, Witch Hazel, and Aloe Gel

This particular recipe is to protect your skin from harmful UV rays. Excess exposure to sunlight may trigger rosacea as mentioned above.

  • Mix required an amount of witch hazel, vitamin E oil and aloe gel paste in a bowl.
  • Apply it over prewashed face and rinse it off after 20 minutes.

Aloe and Honey

The combination of these both ingredients will effectively bring all necessary vitamins to your skin.

Swelling, itching, inflammation and redness can be reduced by this innate recipe.

Blend both ingredients and apply it over the rosacea-affected skin.

Soothing Moisturizer

Hydrating your skin is an effective way to treat skin ailments. With natural moisture, your skin will be able to thwart infectious germs and form a protective layer.

Mix almond oil, jojoba oil, aloe vera gel and other essential oil (few drops) in a bowl.

Apply the mixture over the skin and leave it dry for 20 minutes.

Green Tea and Aloe Vera Gel for Rosacea

This herbal tea can be used topically and it works great to reduce rosacea symptoms.

Blend water, green tea and some aloe gel to tighten skin pores, reduce redness and to get rid of acne like bumps.

Where to Buy Aloe Vera Gel?

To reap all benefits listed above, experts recommend opting for a fresh aloe plant in your garden.

If in case you don’t have one, borrow it from your neighbor.

Else try these aloe vera gel products – Aubrey organics pure aloe gel, Ocean potion skin care aloe gel and Fruit of the earth aloe vera gel.

Factors that Trigger Rosacea Flare-ups

Foods include: Liver, yogurt, vanilla, avocados, citrus fruits, soy sauce, chocolates and eggplant must be avoided.

Hot baths, overheating, excess exposure to sunlight and saunas can trigger this skin ailment.

Stress, anxiety, frequent flushing, alcohol, chemical filled creams, certain medications and other factors can trigger this skin ailment.

Aloe Vera Side Effects

Excess use or in hypersensitive people ingredients in aloe gel can trigger an allergic reaction.

Anthraquinone is a compound found in the gel that can cause diarrhea, stomach cramps and dehydration if ingested. Other symptoms like hives, rashes and swollen skin can be experienced in some cases.

Important Points

  • Don’t expect overnight results with aloe gel.
  • Along with this remedy include vitamin rich diet and avoid foods that can trigger rosacea.
  • Wear natural sunscreen cream while going out.
  • Avoid using chemical filled creams that may irritate your skin.
  • Drink enough water and consult a doctor to treat rosacea.

Did you ever use aloe vera for rosacea; share your recipe in comments.

Save

Save

Save

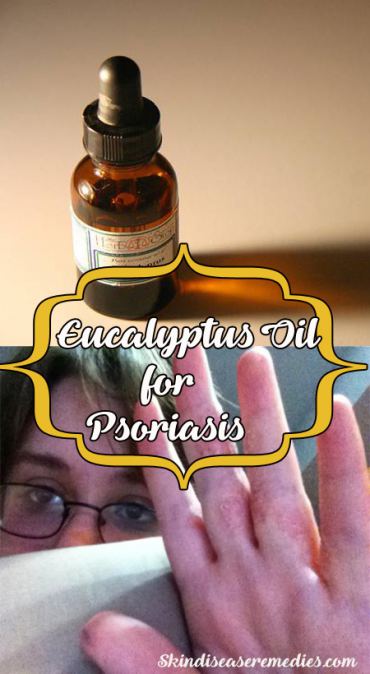
Eucalyptus Oil for Psoriasis – How to Use (3 DIY Recipes Included)

eucalyptus-oil-to-treat-psoriasis

Scaly, itchy and dry patches over the skin and on the scalp are common signs of psoriasis. However, regular massage with eucalyptus oil for psoriasis will reduce inflammation and scaly patches.

As new skin cells are generated, your skin sheds dead cells. In a person with psoriasis, the immune system signals to skin cells to grow at rapid pace.

Your body fails to shed these cells and a pile of dead cells are formed over the skin.

Who Get and What Causes Psoriasis?

According to American Academy of Dermatology, whites are more often to get psoriasis than other races.

Only in the US, there are about 7.5 million people with this chronic skin ailment. If anyone in your family has psoriasis, most probably you may also get these dry itchy patches.

Unfortunately, the main cause of psoriasis is not known. However, stress, medicines, genetics, food, cold weather and cuts can trigger psoriasis. (Source)

Benefits of Eucalyptus Oil for Psoriasis

This essential oil is obtained through a steam distillation process of dried leaves of the eucalyptus tree. It’s sweet and woody smell can soothe stress and elevate your mood.

Eucalyptus essential oil has immense nutrients that can enhance your overall skin functioning.

  • Antibacterial properties residing in this essential oil can restrain infectious germs and help to treat various ailments. (1)
  • Healing ability of the oil can fasten the healing process of psoriasis patches.
  • Analgesic property helps to relieve pain and reduce scaly skin.
  • Vasodilator activity of eucalyptus oil helps to improve blood circulation and relax your skin.
  • The university of Maryland Medical explained eucalyptus oil can effectively treat wounds, injuries and insect repellents. (2)
  • Anti-inflammatory and antiviral agents in it can reduce psoriasis inflammation and thwart infection.
  • Antiseptic property helps to treat minor burns, blisters, bumps, psoriasis and other skin ailments.

Note: Before you proceed further, let me disclose that there is no scientific evidence that proves ability of eucalyptus oil to treat psoriasis. Natural remedies aren’t associated with any serious side-effects, so giving it a try may work for you.

How to Use Eucalyptus Oil for Psoriasis

eucalyptus-oil-for-psoriasis

Itching is often linked with dry skin.

When your skin loses its natural moisture infectious germs invade and trigger the infection.

However, this may not be same in all cases.

Hydrating with essential oils will relieve itching and locks the lost moisture over the skin. Other assorted vitamins and minerals residing in this essential oil can enhance overall functioning of your skin.

Direct use of eucalyptus essential oil must be avoided. You must dilute it with a carrier oil before topical application. This is same with all essential oils.

Also, don’t consume eucalyptus oil until you discuss with your physician.

  1. Wash psoriasis affected part with water to remove impurities.
  2. Pat dry using a soft cloth.
  3. Don’t be harsh while cleansing.
  4. Mix few drops of eucalyptus oil with coconut oil and apply it over dry itchy patches.
  5. Leave them to dry naturally.

Nutrients in the oil penetrate deep into the skin and restrain infection.

Eucalyptus Oil and Almond Oil

The excellent thing about homemade remedies is that you can avoid ingredients that can irritate your skin.

Diluting this essential oil with almond oil will not only make it more effective but it goes well with your sensitive skin.

Almond oil is known for its moisturizing and healing properties. You can also use this recipe for scalp psoriasis.

  • Take required amount of almond oil in a bowl.
  • Add few drops of eucalyptus essential oil to it.
  • Apply the mixed lotion over prewashed skin.
  • Avoid lukewarm water while washing, as it triggers itching.

Eucalyptus Oil for Scalp Psoriasis

Research states that atleast 50 percent of people with plaque psoriasis have scalp psoriasis.

There are different recipes over the web, which you can try over the scalp.

  • Blend 5ml of eucalyptus essential oil with 50 ml of olive oil.
  • Cleanse your hair with mild shampoo if possible.
  • When the hair is still damp, apply the mixed lotion over the scalp.
  • Allow it to dry naturally.

Eucalyptus Oil and Vinegar

Psoriasis triggers itching over scaly patches, which may result in inflammation.

  • Dilute this essential oil with 50 ml of vinegar and 1 liter of distilled water.
  • Rinse your hair to remove any hair products applied over the scalp by cleansing.
  • Gently massage the eucalyptus oil and vinegar solution before going to bed.

Homemade Eucalyptus Oil for Psoriasis

As mentioned, about 50 percent people with psoriasis will have scalp psoriasis, am sharing this ultimate mask to treat this chronic skin ailment.

  • Mash one fully ripe avocado and add ¼ cup of coconut milk to it.
  • Also add ¼ cup of coconut oil, few drops of lavender oil and eucalyptus essential oil to it.
  • Store this homemade mask and apply it over the scalp.

To reduce stress, take hot water in a tub and place it beside your bed. Drop few drops of eucalyptus essential oil to the water.

Side-Effects of Eucalyptus Oil

Don’t use this essential oil without diluting. Internal consumption of eucalyptus oil can be toxic.

However, small amounts can be taken with food.

Topical application over children’s skin may result in skin irritation. Even adults must blend carrier oil before applying it over the face.

Though it’s marked safe for pregnant women by WebMD.com, it’s safe to consult a physician before using it.

Diabetic patients must use this oil with utmost care. Studies show that it might lower blood sugar levels too much.

Avoid its use if you’re under medication or after surgery.

Important Points

Psoriasis is a chronic skin ailment, which can’t be treated permanently.

Yes, you read it right. Even steroid creams or medication prescribed by physicians can’t do this.

However, these medications and home remedies can reduce psoriasis symptoms. But, when you ingest food or get exposed to irritants dry scalp patches appear once again.

Discuss with your physician on how to prevent this skin ailment and also take vitamin rich food.

Alcohol, excess exposure to the sun, cold weather, stress, obesity, smoking and certain medications must be avoided to treat psoriasis. (More on diet and psoriasis)

Did you ever use eucalyptus oil for psoriasis? Please share your experience in comments.

Image source: 1, 2

Save

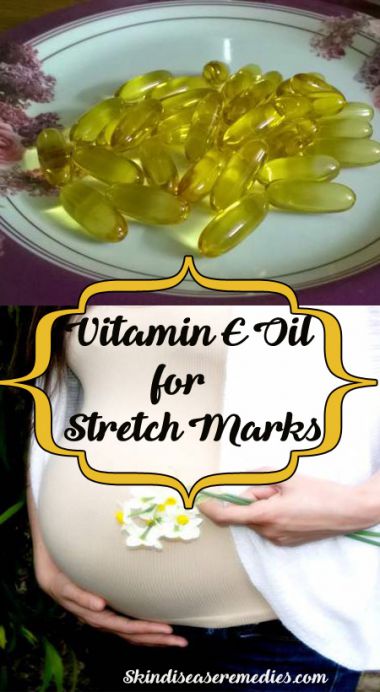
How to Use Vitamin E Oil for Stretch Marks

vitamin-e-oil-for-stretch-marks

Can vitamin E oil prevent stretch marks?

70% of girls and 40% of boys develop stretch marks during puberty.  It isn’t associated with any ailment, but certainly it’s a cosmetic concern. In this article, you’ll learn how to use vitamin E oil for stretch marks.

According to researchers, you can’t permanently get rid of these narrow streaks. However, regular application of cosmetic creams, natural home remedies, and nutritious diet can lighten their appearance.

What Causes Stretch Marks?

As you grow, connecting fibers in the dermis layer stretches slowly. With sudden weight gain or loss, these fibers stretch beyond its limit resulting in breakage.

The tear can be seen through upper layer as red or purple lines, which turn to silver white with time.

Puberty, pregnancy, the sudden gain in weight, hormonal change, alcohol consumption, genetics and other factors result in these long narrow streaks.

Does Vitamin E Oil Help to Get of Stretch Marks?

Why should I go for vitamin E oil when there are many cosmetic creams that claim to treat stretch marks?

Media promoted beauty creams are incorporated with chemical preservatives that can irritate your sensitive skin. (Source: 1, 2)

Homemade remedies are safe because you make it. You can avoid ingredients that can stimulate allergic reaction on your skin. Apart from this, an innate ingredient like vitamin E oil is packed with lots of beauty benefits.

Important Note: There is not strong evidence to support the benefit of vitamin E for stretch marks. However, there are anecdotal reports claiming to be effective.

Benefits of Vitamin E Oil for Stretch Marks

Immense uses of vitamin E oil include boosting the immune system, preventing cardiovascular problems, avoid skin cancer, heal minor burns and treat cystic fibrosis in babies.

To reap its exceptional nutritional value, even cosmetic creams incorporate them. Without any ado, let check what it has for your stretch marks.

  • Moisturizing is the prominent property of vitamin E oil, which helps to get rid of dry skin. Enough moisture allows skin to heal stretch marks.
  • National Institute of Health Office of Dietary Supplements states that antioxidant activity of this oil thwarts free radicals that damage cell membrane.
  • With its antioxidant agents, vitamin E can efficiently lighten scars, stretch marks and flush away free radicals.
  • Assorted nutrients residing in this oil promotes healing of broken tissues underneath the skin.
  • Regular massaging with the oil mixed with other oils improves blood circulation in that part of the skin.
  • Vitamin E oil penetrates deep into the skin and enhances collagen production to improve skin’s elasticity, stimulate cell regeneration and makes your skin soft.
  • Anti-inflammatory activity of this oil inhibits platelet aggregation.
  • Blocks free radicals that result in stretch marks by its antioxidant activity.

Beauty experts recommend blending other antioxidants or vitamin C with vitamin E oil to prevent any side-effects, because heavy antioxidants in vitamin E oil may result in breakouts if you’ve acne prone skin.

How to Use Vitamin E Oil to Prevent Stretch Marks?

vitamin-e-oil-prevent-stretch-marks

There are many ways to use this oil. If your skin goes well with cosmetic cream, select the one which includes vitamin E.

Note: Patch test before using pure vitamin E oil over the skin.

Topical application of vitamin E oil or other creams may improve your skin’s elasticity, but stretch marks can also be caused by hormonal imbalance. For which topical application has no effect.

So, beauty experts also recommend ingesting nutritional diet to make your skin healthy. These measures can prevent stretch marks at-least to some extent.

#1 Pure Vitamin E Oil for Stretch Marks

You can get vitamin E lotion from a local drug store or get vitamin E capsules. Puncture the capsules and massage the oil over stretch marks.

Pure vitamin E oil is very effective according to few anecdotal claims. However, you must patch test before using it.

#2 Vitamin E Oil and Vitamin C

Dr. Broumand says that blending vitamin C with vitamin E oil shown excellent benefit for your skin.

It can moisturize, protect your skin from UV rays, lighten the appearance of stretch marks, reduce wrinkles and thwart free radicals.

  • Wash your skin with water to cleanse impurities and dead skin cells.
  • Pat dry using a soft cloth.
  • Mix required amount of both oils in a bowl and gently massage in circular motion over the skin.
  • Leave it to dry naturally.

To avoid greasiness, it’s better to apply it at night.

#3 Vitamin E Oil and Olive Oil

You can replace olive oil with a carrier oil. The thickness of vitamin E oil may trigger acne breakouts, so it better to blend other oils with it.

  • Break vitamin E capsule and add it to required amount of olive oil.
  • Apply the lotion over prewashed skin.
  • Leave it to dry naturally.

Vitamin E Oil for Stretch Marks During Pregnancy

Though there are no strong studies to back the claims of vitamin E oil use for stretch marks. One study showed significant benefit for reducing stretch marks.

Stretch marks are not solely caused by stretching; hormonal changes also result in these lines. Topical application of vitamin E oil may or may not affect stretch marks.

But there are anecdotal reports backing the claim that this oil can lighten the appearance of stretch marks.

Before using this oil over the skin, you must consult your doctor. Few people may be hypersensitive towards ingredients in the lotion.

  • Blend vitamin E oil with vitamin C or olive oil as mentioned above and gently massage over the body.
  • You can also use cosmetic creams that are incorporated with vitamin E.
  • Some beauty bloggers also suggest ingesting vitamin E oil capsules. But, pregnant women must avoid it and discuss with the doctor.

Vitamin E Oil with Body Moisturizer

You can just add some vitamin E oil to your favorite body lotion and regularly massage over the skin.

You can get vitamin E cream for stretch marks over the drug store.

Side Effects of Vitamin E Oil

Even home remedies may trigger a reaction if they don’t go well with your skin.

Skin inflammation, itching, and rashes over the skin have been reported with topical application of vitamin E oil. Oily skin people may experience acne breakouts with excess use of this oil.

However, people who’re sensitive to vitamin E are very rare.

Conclusion

Like other home remedies, this recipe also has no scientific proof to back the claims. However, anecdotal reports claim to be effective.

Blend vitamin E with vitamin E oil for stretch marks. Don’t use it regularly if you’ve oily skin.

Share your best homemade recipe to prevent stretch marks.

Save