15 Gorgeous Fall Nail Ideas to Try This Season

As the air gets crisper and the leaves start to turn, it’s the perfect time to embrace the warmth of autumn in your nail looks. This season’s trending nail styles are all about rich tones, cozy vibes, and nature-inspired details that capture the magic of fall. Here are 15 gorgeous fall nail ideas that will elevate your seasonal style.


1. Moody Matte Maroons

Nothing says fall like rich maroon shades. Try a matte finish to add sophistication and depth to your nails. Maroon pairs beautifully with subtle metallic or matte black accents for a touch of glam.

Tip: Apply a matte top coat to any maroon polish to get the look!


2. Olive Green Elegance

Olive green is a standout shade for fall, offering a unique twist on traditional autumn colors. This earthy, muted hue brings a fresh, natural vibe and pairs well with gold or dark brown accents.

Idea: Try olive green on all nails, then add gold foil details to a couple of accent nails for extra flair.


3. Burnt Orange Ombre

Ombre nails in shades of burnt orange mimic the look of fall leaves and add a warm, gradient effect to your nails. Start with a deep, rusty orange at the base and blend into a lighter orange for a cozy, glowing look.

Tip: Use a makeup sponge to blend the colors for a flawless ombre.


4. Forest-Inspired Greens and Browns

Create a forest-themed nail set using greens, browns, and touches of gold. This look is perfect for nature lovers who want to carry the beauty of fall foliage with them wherever they go.

Design Tip: Use a toothpick or thin brush to create tiny leaves or branches on a couple of accent nails.
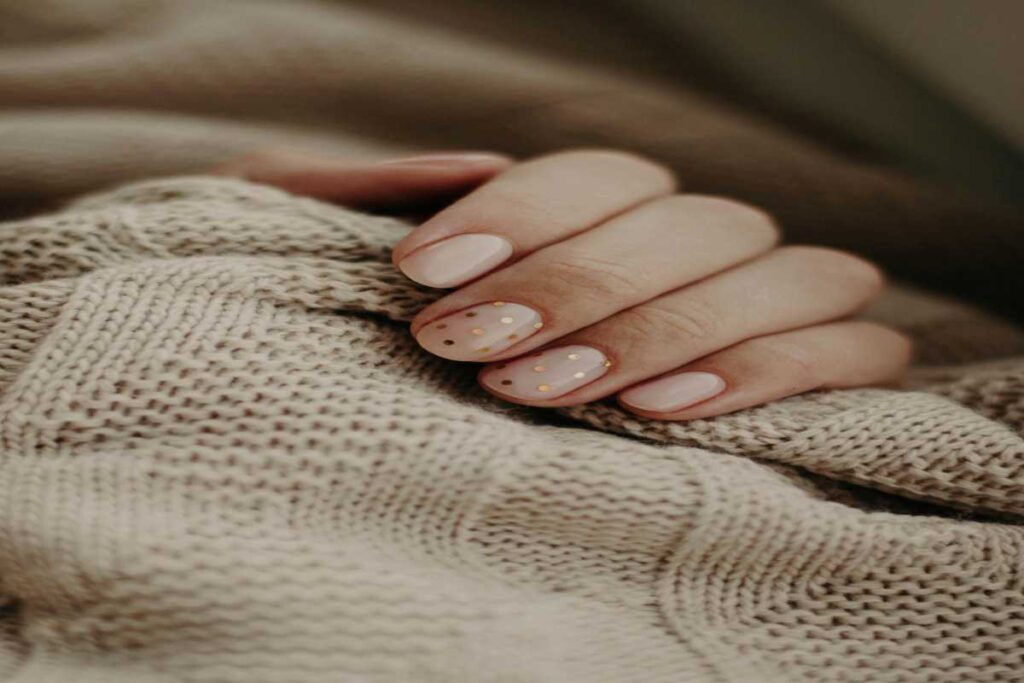

5. Plaid Patterns

Plaid is a quintessential autumn print, and it looks fabulous on nails! A plaid accent nail in shades of brown, beige, and cream adds a seasonal, preppy touch.

Tip: Use nail tape or thin nail brushes to create precise plaid lines.


6. Warm Mustard Yellow

Mustard yellow is a perfect balance of warmth and brightness for fall. This color looks stunning on its own or paired with brown and rust accents. It’s an unexpected choice that feels cheerful yet seasonal.

Idea: Pair mustard nails with small black dots or line details for a minimal, chic design.


7. Rustic Brown and Gold Foil

Brown nails with gold foil accents add an elegant and rustic touch to your fall nail style. Choose a rich chocolate or caramel brown and add touches of gold foil for a high-contrast, eye-catching effect.

Tip: Gold foil sheets or metallic nail polish can be used to create this look.


8. Pumpkin Spice Gradient

Get inspired by everyone’s favorite fall flavor with a pumpkin spice gradient. Use shades of orange, brown, and beige for a stunning ombre effect that’s cozy and festive.

Design Tip: Start with a light beige base on one end and blend into a warm orange at the tip.


9. Dark Floral Accents

Floral doesn’t have to be just for spring. Dark florals in moody shades like burgundy, black, and purple can add a romantic touch to fall nails.

Idea: Try a dark base color with tiny floral designs in lighter or contrasting colors for an elegant touch.


10. Warm Terracotta Tones

Terracotta is a popular shade that embodies the warmth of fall. This orange-brown color looks chic and sophisticated on its own or with subtle gold accents.

Tip: A terracotta shade with a glossy finish will bring out the richness of this color beautifully.


11. Sparkling Copper Tips

Add a twist to the classic French manicure with copper-tipped nails. A clear or nude base with metallic copper tips is perfect for a subtle but festive look.

Idea: Pair this design with copper accessories to make your nails pop even more.


12. Vibrant Wine Tones

Deep red and wine shades are a classic choice for fall. These colors add a touch of drama and elegance to any outfit, and they look beautiful on all skin tones.

Design Tip: For a little extra sparkle, try adding a layer of glitter to one or two accent nails.

13. Neutral Mocha Nails

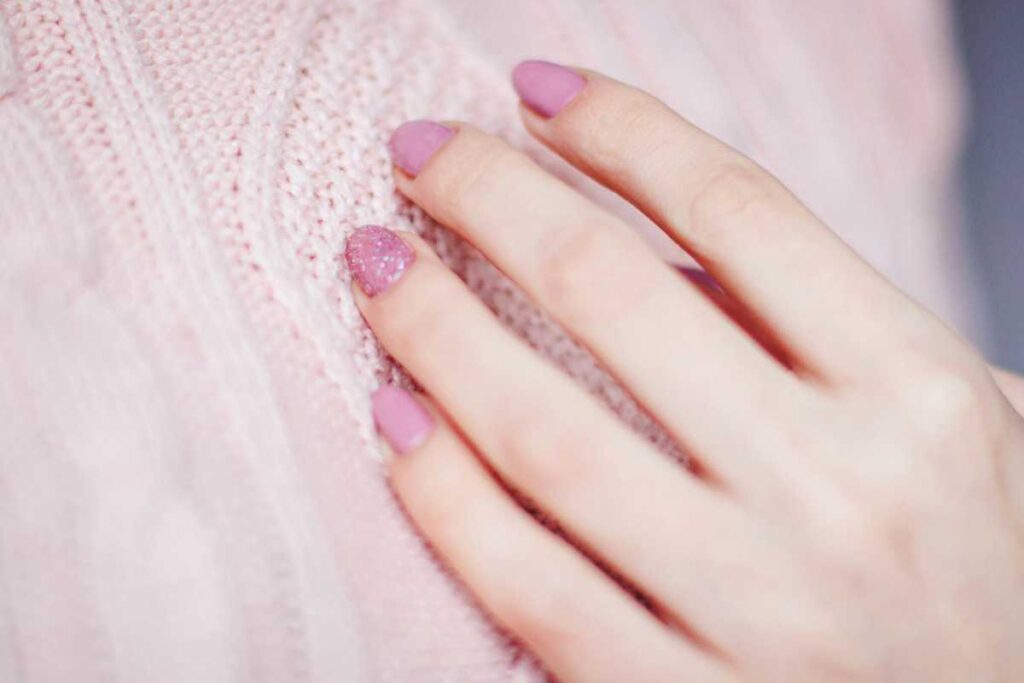
For a more minimalist look, neutral mocha shades are both chic and versatile. These taupe and brown hues can be styled with sweaters, boots, and other fall fashion staples.

Idea: Add a matte top coat for an extra cozy, suede-like finish.


14. Dusty Blue with Gold Accents

Dusty blue isn’t a typical fall color, but it adds a fresh twist to seasonal tones. Pair it with gold accents to create a contrast that feels luxurious and modern.

Design Tip: Gold foil or thin gold lines on top of a dusty blue base will elevate this look.


15. Deep Purple and Plum

Purple and plum shades are rich, royal colors perfect for autumn. These colors add a mysterious, moody vibe to your nails and pair well with both matte and glossy finishes.

Tip: Try layering a deep purple polish with a plum glitter top coat for a stunning, dimensional look.


Final Thoughts

This fall, embrace the season with nail art that reflects the beautiful colors and cozy vibes of autumn. From earthy tones to moody shades and playful patterns, there’s no shortage of ways to let your nails shine. Whether you love a bold look or prefer something more understated, these fall nail ideas are sure to keep you looking chic all season long.

How to Fix a Broken Nail at Home: 5 Ways That Actually Work

A broken nail can be a frustrating experience, whether it’s from an accident, wear and tear, or simply being too active. Fortunately, you don’t need to visit a salon or a professional to address this issue. With a few simple tools and techniques, you can fix a broken nail at home. Here are five effective methods to repair a broken nail quickly and easily.


1. Use a Tea Bag or Coffee Filter

One of the most popular methods for repairing a broken nail is using a tea bag or coffee filter. This method is simple and uses materials you likely have at home.

What You’ll Need:

  • Tea bag (black tea works best) or coffee filter
  • Scissors
  • Nail glue or clear polish
  • Tweezers (optional)

Steps:

  1. Prepare the Patch: Cut a small piece of the tea bag or coffee filter to fit over the broken area of your nail. The piece should be slightly larger than the break.
  2. Apply Nail Glue: Carefully apply a thin layer of nail glue to the broken area of your nail. If you don’t have nail glue, clear nail polish can work in a pinch.
  3. Place the Patch: While the glue is still wet, place the tea bag or coffee filter patch over the break. Press it down gently with your fingertip or tweezers to ensure it adheres well.
  4. Seal the Repair: Once the glue has dried (about 5-10 minutes), apply another layer of glue or clear polish over the top of the patch for extra strength.
  5. File and Shape: Once everything is dry, gently file the edges to smooth out the surface and shape your nail as desired.

Benefits:

This method is a quick and effective way to repair a broken nail, and it blends in well, especially when using clear polish over it.


2. Use a Nail Strengthener or Hardener

If you have a broken nail that isn’t too severely damaged, a nail strengthener can help reinforce the nail while it heals.

What You’ll Need:

  • Nail strengthener or hardener
  • Nail file

Steps:

  1. File the Nail: Gently file any jagged edges around the break to prevent further tearing and to create a smooth surface.
  2. Apply Nail Strengthener: Apply a generous coat of nail strengthener or hardener over the entire nail, focusing on the broken area.
  3. Allow to Dry: Let the strengthener dry completely. You can apply a second coat for added durability.

Benefits:

Nail strengtheners are designed to help reinforce and protect nails, which can help prevent future breaks and promote healthier nail growth.


3. Use Clear Nail Polish and a Paper Towel

This quick fix utilizes clear nail polish and a small piece of paper towel or tissue to stabilize the broken area.

What You’ll Need:

  • Clear nail polish
  • Paper towel or tissue
  • Scissors

Steps:

  1. Prepare the Patch: Cut a small piece of paper towel or tissue that fits over the break.
  2. Apply Clear Polish: Brush a thin layer of clear nail polish over the broken area of your nail.
  3. Place the Patch: While the polish is still wet, place the paper towel or tissue patch over the break.
  4. Seal It: Apply another layer of clear polish over the patch, sealing it in place.
  5. Dry and File: Allow the polish to dry completely before gently filing the nail to smooth the surface.

Benefits:

This method is easy and quick, and the paper towel adds a bit of strength to the repair.


4. Use Super Glue

Super glue can be a helpful tool for fixing broken nails, especially if the break is deeper and needs extra support.

What You’ll Need:

  • Super glue (preferably nail glue)
  • Nail file
  • Clear nail polish (optional)

Steps:

  1. File the Nail: Carefully file down the broken area to create a smooth edge and remove any jagged pieces.
  2. Apply Super Glue: Put a small amount of super glue on the broken area, making sure it covers the break.
  3. Hold in Place: Gently press the two sides of the nail together and hold for a few seconds until the glue sets.
  4. Seal the Repair: Once the glue has dried, you can apply a layer of clear nail polish over the top to reinforce the repair.

Benefits:

Super glue creates a strong bond and can provide a durable fix for more severe breaks.


5. Temporary Fake Nail or Tip

If your broken nail is very short or completely broken, you may opt for a temporary fake nail or tip for a quick fix.

What You’ll Need:

  • Fake nail or nail tip
  • Nail glue
  • Nail file

Steps:

  1. Choose the Right Size: Select a fake nail or tip that matches the size and shape of your broken nail.
  2. Apply Nail Glue: Put a small amount of nail glue on the back of the fake nail or tip.
  3. Press On: Position the fake nail over the broken nail and press down gently. Hold it in place for a few seconds until it adheres.
  4. Shape and File: Once the glue is dry, file and shape the fake nail to match your other nails.

Benefits:

This method provides an instant solution and allows you to continue with your daily activities without worrying about the broken nail.


Conclusion

Fixing a broken nail at home doesn’t have to be a hassle. With these five effective methods, you can quickly and easily address the issue and prevent further damage. Whether you choose to use a tea bag, nail strengthener, super glue, or a temporary fake nail, these techniques can help restore the look and function of your nails. Remember to treat your nails gently and avoid harsh chemicals to promote healthier nails in the long run. Happy nail fixing.

How to Use Coconut Oil for Cuticles – 5 DIY Methods

cuticle oil for cuticles

Having healthy and well-moisturized cuticles makes a big difference for your manicure. On the other side, cracked and dry cuticles hurt you. Luckily, there are many natural oils to treat; coconut oil for cuticles is one among them.

A thin skin surrounding and protecting your nail plate from infectious bacteria is known as cuticle. Like your skin, cuticles are a barrier to your nails, which guard nail plate against infectious germs without this you can’t expect healthy nails.

Most of us cut or pick dry cuticles out of ignorance. Experts condemn this act, as cutting cuticles will leave a small gap through which fungi may invade to trigger infection.

Extolling benefits of coconut oil for dry skin enticed experts to try this cheap yet effective remedy on nails, and it’s confirmed that coconut oil for cuticles is an excellent home available moisturizer.

What Causes Dry Cuticles?

Most people experience minor issues with cuticles, which are easily treated.

External factors like low humidity, cold weather and wind strip moisture from cuticles leaving it dry and cracked. Apart from this few chemical incorporated lotions, soaps and creams can damage cuticles.

Ailments like nail fungus, eczema and psoriasis also leave your cuticles dry. Few habits like pushing, plucking or cutting cuticles may leave them injured.

Internal factors include lack of nutritious diet and dehydration may result in dry cuticles.

Is Coconut Oil Good for Cuticles?

  • Hydrating properties packed in coconut oil help to moisturize your dry cuticles and make it look healthy.
  • Coconut oil consists of anti-fungal agents that restrain infectious germs from nail plate and avoid fungal infection.
  • Essential fatty acids in coconut oil enhance collagen production and fasten the healing of dry cracked cuticles.
  • Regular application of this oil over dry cuticles can strengthen your nails and avoid hangnails.
  • Topical application of this natural oil helps to remove impurities from the skin.
  • Lauric acid housed in the oil acts as an anti-bacterial agent and protects your nails from bacterial infection.
  • Regular application of pure coconut oil will stimulate the growth of nails.
  • Due to lack of moisture, your nails and cuticles crack ruining your physical appearance. The moisturizing ability of coconut oil will help to cure ridges and cracks.
  • Assorted nutrients in this oil help to restrain mild to moderate atopic dermatitis over nails and skin.

How to Use Coconut Oil for Cuticles?

Who doesn’t want to have healthy and attractive nails?

Along with trimming nails and cleaning them, you need to pamper your cuticles. Dry and hanging cuticles give an unsightly look. Few external and internal factors dry them out. But! No worries. Every home has coconut oil, which is popular for hydrating skin; scalp and now it can be used to moisturize dry cuticles.

While assorted properties residing in coconut oil helps to moisturize dry cuticles, lauric acid restrain bacterial and fungal infection.

#1 Coconut Oil for Dry Cuticles

  • Wash your hands (including cuticles) with a conditioner after a bath.
  • Pat dry with a soft cloth and apply virgin coconut oil around nails and on cuticles.
  • Regular use will do wonders.
  • You can blend essential oils listed below if you’ve a problem with coconut oil smell.

The night is the best time to apply this natural ingredient. Cleanse before going out.

#2 Coconut Oil and Lavender Oil

Solid coconut oil is enough to treat dry cuticles, but if you’d like to make it more effective then mix it with lavender oil.

Renowned for its aromatic smell and hydrating abilities, lavender essential oil can do wonders for your skin.

  • Take 2 tablespoons of melted coconut oil and add 1 drop of lavender essential oil to it.
  • Mix thoroughly and apply it over prewashed cuticles.
  • Leave it to dry naturally and rinse it off with water. (Source)

You can save remaining in a tight container.

#3 Aloe Vera Gel and Coconut Oil

It’s sticky gel prominent for healing and moisturizing properties. Also, the antimicrobial activity of this gel thwarts infectious germs and protects your nails.

Dead cells piled around the nails can be cleansed by this home available remedy.

  • Take 1 tablespoons of coconut oil and mix required amount of aloe vera gel to it.
  • After mixing thoroughly apply it around nails and on cuticles.
  • Allow nutrients in this remedy to act effectively and heal cuticles.

#4 Best Nail Soak with Coconut Oil

Hydrating is one of the most important factors of treating dry cuticles. To make it more effective, you can mix honey and rosemary oil with coconut oil.

Honey is known for its humectant properties, which help to lock moisture in the skin. Anti-inflammatory and anti-fungal properties avoid fungal infection and reduce inflammation.

Rosemary oil thwarts free radicals that damage cell membrane and promotes new skin cells. Moisturizing and astringent abilities of the oil can make it more effective.

  • Mix ¼ cup of virgin coconut oil with ¼ cup of raw honey.
  • Also, add 2-3 drops of rosemary oil to the solution.
  • Wash your fingers and pat dry with a soft cloth.
  • Now, soak your fingers in this solution for about 15 minutes once in a week.

#5 Coconut Oil – the best cuticle oil

This is the ultimate cuticle oil, packed with all innate ingredients.

If you’re like simple things, then go with coconut oil + aloe vera gel. To make the cuticle cream more effective, try this below-mentioned recipe.

To start you need lavender essential oil, eucalyptus essential oil, grapefruit essential oil, vitamin E oil, peppermint essential oil, coconut oil and a bottle to store this cuticle oil.

  • Add 15 drops of lavender essential oil, 10 drops of eucalyptus essential oil, 10 drops of grapefruit essential oil and 5 drops of peppermint oil in a bowl.
  • Mix 1mL of vitamin E oil to it and add required amount of coconut oil to the solution.
  • Shift the oil to empty nail polish bottle and shake well before applying it over the cuticles. (Source)

Tips on Using Coconut Oil for Cuticles

  • Instead of picking or cutting dry cuticles, experts advice to push them back using metal or wooden cuticle pusher.
  • Take experts help if you’re doing it for the first time. If you frequently visit the spa, avoid manicurist from cutting cuticles.
  • Apply coconut oil or any other moisturizer on cuticles before going to bed. This way you don’t have to dip your oil filled nails in a drink or dish.
  • Housewives are recommended to wear rubber gloves while doing household works, as prolonged contact with water may weaken your nails and cuticles.
  • Alternatively, you can apply other cuticle oils to moisturize cuticles.

A simple tip, don’t apply coconut oil on cuticles in a closed bathroom, because it’s difficult to turn the doorknob with oily hands 🙂

Image source

Why I See Black Lines on Fingernails?

Your nails are like 20 mini mirrors to your over health. A slight discoloration or a vertical black line on fingernails reveals that you’re unhealthy. Though they’re not associated with any serious condition, in some cases it may trigger pain and ruin your physical appearance.

When you dig deep into causes of black or brown discoloration of nails, you’ll find various internal and external factors as culprit. Few among them include vitamin deficiency, low intake of nutrients, stress and other health diseases.

Related: Why are fingernails blue?

black lines on fingernails

Melanoma

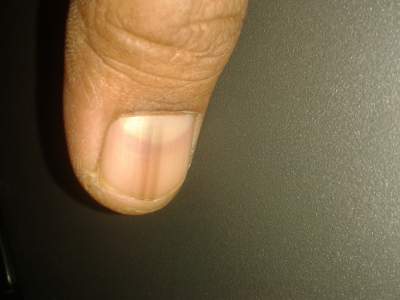
Apart from this, most worrying cause would be nail melanoma known as subungual melanoma. Excess production of melanin at the same part of the nail results in these vertical lines. Dark skinned people are prone to get melanoma. Based on a review in 75% cases big toe or thumb gets affected with black lines.

If you see the vertical line is increasing at the bottom of the nail, you must at once reach dermatologist without delay, because the pigment is penetrating deep into the skin. Based on your age, hereditary and the length of melanoma, doctor carries the treatment.

Also read: 25 Interesting facts about nails – You never knew

An external trauma can also leave a black streak over nails. Likewise deficiency in B12, zinc, calcium and other vitamins in your diet leave your nails discolored. Anyhow, don’t judge by yourself, consult your doctor for diagnosis. In case of nail melanoma, a surgery will be performed this involves removing of complete nail complex.

Like your face, nails also need utmost care. If not you may end up with some really serious health issues. Women need to check out their nails regularly has most of them use chemical filled nail polish to decorate their sensitive nails. Repeated application and removal of nail polish will make your nails weak and brittle.

Black lines on fingernails are serious if the cause is melanoma. So don’t delay and reach your dermatologist right away.

25 Interesting Facts About Nails

interesting facts about nails

Though nails are believed to be windows of your health you seldom have hygienic look at them. This simple part of your body is actually a bit complicated and hides many interesting facts beneath it.

Are you expecting me to expel all those alluring facts in this single post? Sorry! Am not capable of doing so, anyhow on your request I put down few interesting facts about nails.

  1. Brittle nails relieve that your body is feeling stress. Irregular sleeping habits and stress has effect on your nail growth and its health. When you see weak and irregular nails, then take a nap and have medication.
  2. Primates (including humans) are separated by other mammals with nails. Nails are flattened form of claws.
  3. Fingernails serve as a visual advertising of your health. Deficiency in vitamin and minerals can be diagnosed after having a glance at your fingernails. Calcium and zinc deficiency results in white spots on fingernails. However, all white spots are not caused by vitamin deficiency.
  4. Men’s nails grow faster than women’s, except in pregnant women.
  5. Fingernails grow faster than toenails and if you’re right handed person, then right hand nails grow faster than left hand nails. (Why you see dents in toenails and fingernails?)
  6. People in ancient times experienced slower nail growth when compared to present day. Nutrients and vitamins intake may have spurred nail growth.
  7. Did you notice that in summer nails grow faster than winter.
  8. Of all fingers middle fingernail grows faster and slower ones are those on the pinkies.
  9. Fingernails grow about 3.5 millimeters per month, whereas toenails grow 1.6mm per month.
  10. About 10% dermatological problems include nail problems. Nail fungal infection cause half of the nail disorders.
  11. White spots on nails are caused by injuries.
  12. Nails and hairs are made of keratin. Food and vitamins good for your hair is good for your nails. So rich consumption of vitamins and minerals will improve nail and hair condition.
  13. Biting nails is a common practice and is known as onychophagia.
  14. Oxygen penetrates through nail plate to nail bed. Polishing them frequently will make them unhealthy.
  15. We can’t stand nails on a chalkboard because the noise gets amplified by the shape of ear canal, making it uncomfortable to hear. Facts about nail polish will leave your astonished, the chemicals in polish will not only block oxygen but can make your nails weak when you repeatedly use acetone to remove it. (Tips to remove shellac nail polish)
  16. Nail fungus is common nail disorder effecting 20% of the general population. Yellow, blue, brittle and uneven nails are not to be ignored anymore it can lead to serious problem.
  17. Longer the nails are more bacteria invade to cause infection.
  18. Guinness World Record for longest nails documented in 2008 by a Lee Redmond with a total length of 28 feet.
  19. Cuticles locks moisture and blocks virus from invading nail bed. Experts avoid cutting or pushing cuticles.
  20. Hardness of your nails is genetic. Your toenails are twice as thick as fingernails.
  21. Your nails need normal blood circulation, oxygen and nutrients to grow normally. This is why when you get injured your nails fall out. (Natural nail polish remover method)
  22. Nail plates are made of dead cells, while nail bed and cuticles are made of live cells.
  23. Cutting fingernails after sunset is not bad luck; it’s just a superstitious belief.
  24. Placing nails in Coco-cola drink for 4 days will dissolve it, as drinks are corrosiveness.
  25. Nails take ~100 days to grow 1 centimeter.

I invite you to add more interesting facts about nails in comments.

Image source

How to Remove Shellac Nail Polish at Home?

Because of its long lasting results most women love shellac nail polish, but after two weeks when the nail starts growing and affection towards the chemical filled nail polish slowly fades, they start searching nail salons or inquire with friends on how to remove shellac nail polish at home.

Few nail salons may have injected wrong statement in your mind that it’s not safe to remove shellac nail polish at home, but beauty experts try and recommend this simple strategy to wipe nail polish.

We’re going to discuss two simple ways to remove shellac nail polish one with acetone and other without acetone.

Recommended: Natural nail polisher remover

Method: 1 (With Acetone)

how to remove shellac nail polish at homeThings you’ll need

  • Acetone
  • Cuticle oil
  • Manicure stick
  • Warm water, soap and bowl.

Repeated application of acetone will leave your skin dry, so apply cuticle oil around the nail plate extensively to form a protective layer on cuticles.

  1. Take pure acetone in a large bowl so that you can easily dip your fingernails. Highly concentrated acetone will dehydrated your skin, so experts recommend limiting its use. Anyhow, low concentrated acetone may not be effective at wiping nail polish.
  2. Soak your fingernails in acetone solution for about 10 minutes in such a way that little skin is dipped in acetone.
  3. After the mentioned time, use manicure stick and start wiping the shellac nail polish. Start from the nail bottom and completely remove the nail polish. Alternatively, you can start wiping when your nails are still in acetone.
  4. After scraping nail polish wash your hands with warm water and soap. This will remove white residue left behind by these chemicals.
  5. Don’t worry if you see dry skin around nails, repeated application of natural moisturizer will help you hydrate them. You can also apply cuticle oil around the nail plate.

Acetone is effective in removing nail polish but because of its drying effect few skin loving people prefer alternate method which am discussing below.

Also read: What causes dents in fingernails?

Method – 2 (Without Acetone)

Things you’ll need

  • Cuticle oil
  • Cotton pads
  • Acetone free nail polish remover
  • Aluminum foil
  • Cuticle pusher

It’s not going to be easy to remove extremely strong shellac nail polish without acetone, you may want to try the below method more than twice or apply little acetone to fasten the process.

  1. Initially to protect your sensitive skin around the nail plate, apply cuticle oil extensively.
  2. Dip cotton pads or saturate them with acetone free nail polish remover. Best way would be cutting cotton pads to fit the person’s nail so that you can save your skin from drying.
  3. After placing saturated cotton pads, wrap them using aluminum foils. Leave it for about 10 minutes then you can scrap shellac nail polish using cuticle pusher.
  4. For tough shellac nail polish use metallic pusher. You must repeat the process until shellac nail polish gets off.

However, we recommend staying away from this chemical filled nail polish to keep your nails healthy and natural. How do you remove shellac nail polish at home? Please share your steps in comments.

Must read: Why your fingernails turn blue?

Why Are My Fingernails Blue?

Climate has significant impact on your skin. Excess cold may disrupt normal blood circulation in your body resulting in pale or blue fingernails. Pink nails are a sign of healthy and well circulated nails. As mentioned above low blood circulation may turn your pinkish nails to pale blue, another reason according to experts is low levels of hemoglobin in blood.

To know the exact cause of blue fingernails, rub your fingers repeatedly to improve blood circulation. If you don’t see any positive sign then it can be cyanosis, a chronic disease.

Consult your doctor for diagnosis and treatment.

Like minor injuries on nail bed or cuticles you can’t ignore blue fingernails. It may increase exponentially and cause serious trouble. First thing it spoils your appearance, whenever you meet a person first thing you do is shake hand and blue fingernails may raise insecurity in your colleague. People intentionally isolate which will shatter your confidence level. This social isolation is a serious problem than the disease itself.

Asthma, Adult respiratory distress syndrome, cardiac tamponade and Raynaud’s disease are other diseases associated with cyanosis.

How to Use a Cuticle Pusher?

how to use cuticle pusher

Infectious bacteria invade dry cuticles and trigger fungal infection underneath nail plate. Fingernail manicure hydrates your dry cuticles and restrains harmful bacteria.

Cuticles are part of your skin that protects nail matrix like a barrier. Just like your skin, cuticles deserve your utmost attention. Besides manicure and pedicure, you must push cuticles when necessary. Though wooden cuticle pushers are soft and inexpensive, metal cuticle pushers last for longer time.

Utmost care must be taken if not you may end up damaging cuticles. Below is the step by step guide on using cuticle pusher.

Different Ways to Use a Cuticle Pusher

  1. Initially decide to get a wooden or steel cuticle pusher. For sensitive cuticles experts recommend wooden cuticle pusher.
  2. Before pushing cuticles, prepare your nails by moisturizing them. If you try pushing without hydrating them, the cuticle pusher will tear your skin. Use cuticle remover or any essential oil to hydrate the cuticles.
  3. After moisturizing, soak your fingernails in lukewarm water for few minutes to soften them.
  4. Pat dry using soft cloth.
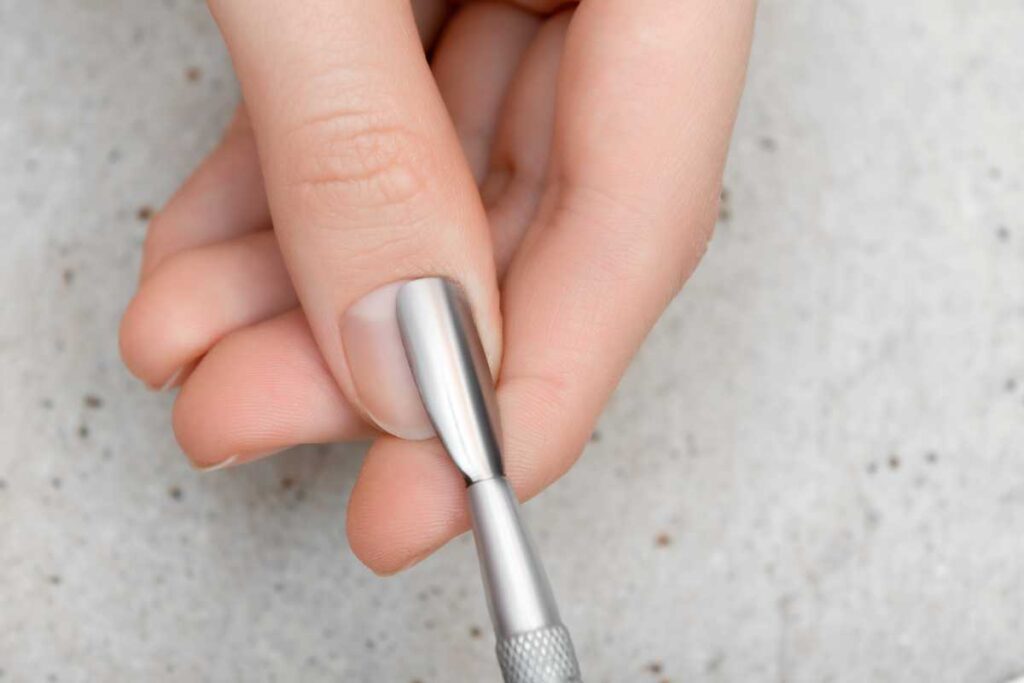
  5. When the skin is still damp, use wooden or steel cuticle pusher to push cuticles. Use round shaped part of the cuticle pusher and gently push the cuticles towards the nail base.
  6. To push the cuticles at the corner of fingernails use sharp end of the cuticle pusher.

 Tips

  • Apply jojoba oil or coconut oil to hydrate dry cuticles.
  • Start the process only when the cuticles are completely moisturized.
  • Place your hand on firm surface while pushing cuticles.
  • Take an expert advice or ask them to help you out for few days.

Would you prefer pricey spas over this home available cuticle pusher? Please share your views in comments.

Image source