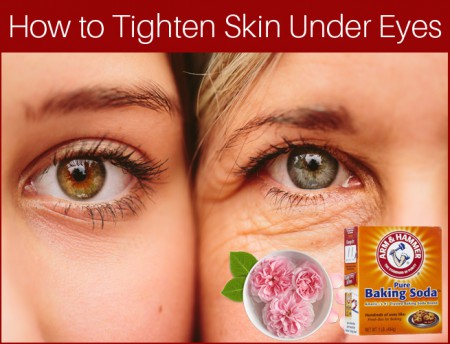
5 Simple Steps to Make Shea Butter Lotion

shea butter lotion recipes

All over the cosmetic world praises for shea butter are sung because of its fascinating moisturizing and healing ability. Moisturizing elements in shea butter which are identical to elements in sebum penetrates into skin and hydrates it from the inside. Along with face shea butter lotion can topically applicable on other parts of the body.

While vitamin A, E enhances fast healing, antioxidant and anti-inflammatory properties in shea butter aids to treat acne, eczema, psoriasis, stretch marks and other skin diseases. It is non-comedogenic; mean it doesn’t block pores, thus making it favorable for oily skin. Beauty experts suggest raw or unrefined shea butter, as refined shea butter has less healing properties.

Also read: Shea butter for Stretch marks

Shea butter is ivory colored fat derived from nuts of karité tree. Unrefined form is a bit strong and may hard to apply it over skin. For easy use, it’s recommended to add essential oil or base oil and whip. There are numerous shea butter lotion recipes available over web and you can make your own recipe by blending your favorite oils.

How to Make Shea Butter Lotion

shea butter body lotionTo make shea butter body lotion at home, you need shea butter, essential oil and an electric whipper. (Here we’re sharing most simple recipe keeping all our users.)

Things you’ll need

  • Raw shea butter – 1 lb or 0.45 kg
  • Essential oil (grape seed oil or virgin coconut oil) – 3 ounce (or 88.7 ml)
  • Vitamin E oil – 1 ounce (or 29.5 ml)
  • Fragrance oil and preservatives (optional)

Procedure to make shea butter lotion at home

  • Put a bowl on heat (microwave) and pour all ingredients, includes essential oil or base oil (vitamin E oil) and shea butter.
  • Don’t make ingredients heat, we just want to melt slightly for easy blending.
  • Remove from heat and whip with electric whipper for about 1 minute.
  • Now add distilled water to it make lotion. Again whip it for 3 minutes. Then let it cool.
  • You’ll get a thick cream, add fragrance or preservatives (not recommended) optionally.
  • Now it’s ready, before applying it over prewashed face or skin, whip it for easy application.

Note: Overheating ingredients makes them lose healing properties

Don’t miss : DIY Guide to make Shea Butter Face Mask

How to Make Shea Butter Soap

shea butter soap making

Because it rejuvenates skin, most people prefer shea butter soap; with this you can make your skin supple and inflammation free. It’s simple to make your own shea butter soap at home.

Things you’ll need

  • Castile soap – 1
  • Raw shea butter – 2 tbsp
  • Almond oil – 1 tbsp
  • Water and double boiler

Procedure

  • Fill half of the double boiler with tap water and grate your castile soap in inner double boiler.
  • Heat to melt the soap completely; now add almond oil and raw shea butter. Stir thoroughly.
  • Now pour the mixture in small plastic box to dry for several hours.
  • Obtained shea butter soap should be placed on dry rack for 3 weeks, turn regularly to avoid warping.
  • Wrap it in a plastic cover to preserve it for future use.

Share your views about this shea butter lotion and soap recipes in comments.

Image source , 2, 3

how to make whipped shea butter

Make Whipped Shea Butter in Less Than 15 Minutes

how to make whipped shea butter

Shea butter is extracted from seeds of shea tree, native to Africa. It has shown significance moisturizing and healing properties when applied topically. Vitamin A and E in shea butter enhances cell growth, while its assorted antioxidant and anti-inflammatory properties soothes skin.

American Shea Butter Institute states that moisturizing elements in shea butter and in sebum are identical. Thus this proves to be an emollient. And it also reveals that shea butter is non-comedogenic, mean it doesn’t clog pores.

So, shea butter cream is favorable to both dry and oily skin. Though you can get shea butter from local store, it’s simple to make whipped shea butter cream at home.

How to Make Whipped Shea Butter

whipped shea butter cream

Do you want to reap nutritional benefits of shea butter for your skin? Then try raw shea butter instead of refined chemical ingredient shea butter. As raw or unrefined shea butter is strong and sometimes hard to topically apply on skin, it’s recommended to whip it, by adding some essential oils. Obtained whipped shea butter will be smooth compared to previous one and yet packed with all nutrients.

Making whipped shea butter is a bit demanding so it takes trial & error methods to obtained well whipped butter, which you can directly apply on skin as a moisturizer. There are many different recipes of making whipped shea butter available online; few suggest melting shea butter and other prefer without melting. Though both recipes works, sometimes melting shea butter creates problems by turning to grainy. So we would like to follow recipes which don’t include melting of shea butter.

Things you’ll need

  • Raw shea butter – 4 ounce
  • Virgin olive oil (or any base oil) – 2 tbsp
  • Lavender oil (or any essential oil) – 10-20 drops
  • 2 Bowls and 1 electric whisker.

Procedure to make whipped shea butter

  • Get raw or unrefined shea butter from local store and keep it in a room temperature. Put it in a bowl and mash using fork or spoon.
  • Add virgin olive oil and mash for few more minutes.
  • Now, using electric whisker whip shea butter mixture at high speed for about 5-8 minutes.
  • Optionally add lavender oil to whipped cream. Transfer the whipped shea butter cream into a jar and place it in dry cool place.

That’s it! You’ve made raw whipped shea butter cream at home. You can topically apply on prewashed face.

Note: If you’ve acne prone skin or acne blemishes Shea butter cream can treat, click here to find out.

How to Make Shea Butter Cream

shea butter creamEven without whipping shea butter you can use it directly. But as mentioned earlier, unrefined shea butter may feel hard to apply over skin and it has strong odor. To easy topical application, beauty experts make shea butter cream. You make think why not bring a new shea butter cream form local store, yes you can but they lack healing properties as most of them are subjected to refining process.

What’s the secret ingredient to reap the benefits of shea butter?

Add few drops of essential oil and base oil to shea butter. Believe us! That’s it.

Remember to prefer only raw ingredients to garner nutritional benefits. As this homemade shea butter cream doesn’t have preservatives they may not last for longer time, so make only in small quantities.

Things you’ll need

  • Raw shea butter – 1 tbsp
  • Jojoba oil – 1 tbsp (or essential oil)
  • Jasmine oil – 1 tbsp (or base oil)

Related post: How to make jojoba oil

Procedure to make shea butter cream at home

  • Initially start with small quantities so that you may not go wrong. Place double boiler on heat. Fill half of bottom layer of boiler with water and place shea butter in top boiler.
  • We’re melting shea butter so that it will be easy for us to blend essential oils. But note, not to heat for longer time as it loses healing properties.
  • After removing boiler from heat, mix jojoba oil and jasmine oil to shea butter solution and using whisk whip the solution.
  • Settle it to cool down and deport the cream into another jar to preserve.

Don’t miss: shea butter face mask recipe

You can apply shea butter whipped cream over prewashed face in circular motion.

Tips on Storing Shea Butter

As we didn’t add preservatives shea butter cream won’t last longer. Anyhow you can add preservatives if needed. Store in cool dry place. No need to refrigerate, room temperature is favorable. Whenever you use shea butter remember to wash your hands.

If you get unpleasant rancid odor then its a sign that your shea butter cream is rotten, throw it away.

Image source, 2

How to Make Jojoba Oil

Jojoba oil is a liquid wax extracted by crushing jojoba plant seeds. It’s native to southern Arizona, California and northwestern Mexico. The innate benefits of jojoba oil for skin made it most renowned natural moisturizer.

Jojoba oil is packed with assorted antioxidant and antimicrobial properties which soothes and thwarts infection causing bacteria. These adverse properties make it difficult for bacteria to spread and it also controls excess sebum production.

Topical application of this oil moisturizes skin, treats oily skin and restrains acne. Though you can get pure jojoba oil for local or online store, you can also make jojoba oil at home.

Yes, it’s quite challenging to make it at home, yet its valuable.

3 Simple Steps to Make Jojoba Oil

how to make jojoba oil

If you don’t locate near to jojoba plant’s native place, try to acquire its seeds from local garden or nursery. Traditionally, they’re harvested in summer.

Step: 1 (Dry Seeds for 2 weeks)

Jojoba seeds contain 54 percent of wax. Before you put these seeds to extraction, moisture level should be approximately 10 percent.

Step: 2 (Extract oil from Jojoba seeds with seed presser)

Spill all jojoba seeds into seed presser or expeller press. Collect oil into jar and discard jojoba meal. According to Pubmed.gov Simmondsin in jojoba meal effects on meal patterns and few other researches claim it to be toxic.

Also remove wax accumulated, which appears to be light oil.

Step: 3 (Store Pure Jojoba oil in dark place)

Disparate property of jojoba oil aids to store it for longer period without turning to rancid. Collect extracted jojoba oil into a glass container and use it topically or mix it in a face mask.                                                         [Related post: How to make jojoba oil face mask]

Here, we’re done with making unrefined jojoba oil at home.

Image source

benefits of argan oil for face

3 DIY Banana Face Mask for Face and Dry Skin

banana face mask

Banana, the curved yellow fruit is a favorite for everyone. Apart from being sweet and creamy, it’s a good source of vitamins, minerals and fiber. Besides dispensing numerous health benefits when consumed, banana face mask can hydrate your skin when applied topically.

Though you’ve been using surfeit chemical creams to keep your skin hydrated, this homemade banana face mask will awake natural beauty in you. Packed with vitamin C, B6, copper, fiber and manganese, this creamy fruit is available throughout the year. These vitamins tighten your skin; moisturize dry skin and fades wrinkles and fine lines when applied topically. Dead skin cells accumulated over skin gets exfoliated with banana face mask. (List of homemade exfoliators.)

Benefits of Banana Face Mask skin: Topical application turns your rough skin to much smoother one. Vitamins in it soothe dry spots, remove blemishes and propel toned skin. Vitamin E helps to remove wrinkles and fine lines. Below listed are few recipes to try.

Also read: Home remedies to treat dry skin

Homemade Banana Face Packs

With banana you can add other essential oils or natural moisturizers to spice it up. Below is few transformation of it.

DIY – 1 Banana Face Mask

Things you’ll need

  • Ripe banana – 1
  • Honey – 1 tbsp
  • Olive oil – 1 tbsp

Procedure

  1. After taking its peel, place ripe banana in a bowl.
  2. Mush it with spoon.
  3. Add 1 tbsp of honey and olive oil.
  4. Mix the solution thoroughly and apply it on prewashed face.
  5. Rinse it off after 20 minutes.

Key to wrinkle free skin with this face pack is diligence and patience.

  • Humectant in honey penetrated into skin and leaves your skin moisturized.
  • Whereas anti-oxidant properties in banana and olive oil helps to restrain bacterial infection.
  • Also olive oil controls sebum production, this can be used to treat acne.

Also read: Honey and cinnamon face mask

banana face mask for acne
Image credit: Skindiseaseremedies.com

DIY – 2 Banana and Butter Face Mask

Things you’ll need

  • Ripe banana – 1
  • White butter – 2 tbsp

Procedure

  1. Mash the peeled banana into a bowl.
  2. Add whipped butter to mashed banana.
  3. Apply this moisturizing cream on your face.

Instead of butter you can use fully fat milk. It soothes dry skin.

Also read: DIY Cucumber Face Mask

DIY – 3 Banana and Oatmeal Face Mask

Things you’ll need

  • Banana – 1
  • Honey – 1tbsp
  • Egg – 1
  • Oatmeal – 1/2 mug

Procedure

  1. Mash half banana into a bowl.
  2. Add all ingredients to mashed banana and mix it thoroughly.
  3. Apply it all over the face and rinse it off after 20 minutes.

Polysaccharide in oats makes it an effective remedy to treat dry skin. With this face mask you can keep itching at bay.

Must read: Benefits of  honey for skin

Other Banana Face Mask Recipes

Just in the same way listed above you can add other home available ingredients like avocado, yogurt, milk and lemon (for dark spots).

You can treat acne with Banana Face Mask for Acne.

Things you’ll need

Procedure

  1. Initially cleanse your face, using natural cleanser.
  2. Pat your skin dry.
  3. Parallely ask your partner to mix above ingredients in a bowl.
  4. Now apply it on prewashed face, leave for about 20 minutes and wash with cold water.

 Wait wait! Even Banana Peel Can Treat Acne!


home remedies for acne scars

Salicylic Acid Peels at Home – A DIY Guide

salicylic acid peel at home

Salicylic acid has been used as an anti inflammatory drug from ancient times. Now, in modern times salicylic acid is used as constituent of some products. It’s a beta hydroxy acid derived from willow bark and it’s a key ingredient in many skin care treatment products including acne, dermatitis, psoriasis and warts.

Salicylic acid bags credit for treating whiteheads, blackheads, pimples, acne and large pores. It comes as a cloth, cream, lotion, gel, ointment, shampoo, pad, patch and peel. Almost all skin care products include this beta hydroxy acid as an ingredient. But you can also make your own salicylic acid peel at home.

Stay away from this chemical peel if you’re allergic to aspirin or if you’re pregnant.

Why Salicylic Acid Peel So Beneficial For Acne and Other Skin Diseases

According to Medline plus, topical application of salicylic acid treats acne by unplugging blocked skin pores to shrink pimples and reduces swelling and redness. Also it treats other chronic skin diseases by softening and loosening dry, scaly skin, whereby it falls.

Salicylic acid is fat soluble, it breaks down sebum and clears pimples. Topical application can help in fading acne scars and exfoliating skin. Anti inflammatory properties help to reduce skin inflammation.

How to Make Salicylic Acid Peel at Home

If you’re a lazy guy and don’t want to try homemade salicylic acid you can get one from local store or online. As aspirin contains salicylic acid and topical application of it produces rejuvenating effect we here consider aspirin for making salicylic acid peel at home.

Things you’ll need

Steps to Make Your Own Salicylic Acid Sitting at Home

  1. Take aspirin tablets into a bowl and squeeze lemon juice into it.
  2. Crush aspirin tablets using the spoon.
  3. Cleanse your face and apply crushed aspirin paste to your face evenly.
  4. Parallelly mix 1tbsp of baking soda with 1 cup of water.
  5. To neutralize acid, use cotton ball and apply baking soda (the one who mixed with water) gently on face to remove aspirin peel.

So simple isn’t it?

Note: To save eyes, mouth and nose from salicylic acid, apply petroleum jelly prior to aspirin application.

For spot acne blemishes treatment use dissolve half aspirin in lemon juice and apply on lesions.

Few Important Tips

  1. Initially start with 15% salicylic acid peel every day.
  2. Depending on your skin type increase time intervals of peel on face.
  3. If you see no results with 15% salicylic acid after weeks of application, try with 20%.
  4. You face will be left with frosting on skin, don’t alarmed by this.
  5. Remember topically application of salicylic acid results in break outs.
  6. First time users, stay in shade, wear sunscreen.
  7. If you see any side effects, stop using this chemical peel and consult your doctor.

Whats your recipe to make salicylic acid peel at home?

Image source

 list of citrus fruits

Top 10 Benefits of Castor Oil for Skin

castor oil for skin

Do you remember your grandmother threatening you to give castor oil if you don’t eat food? Most of us have experienced this thick and odor oil. But unfortunately we limited its use as laxatives.

From centuries castor oil has been used to treat major health issues. But because of its odor (I guess) it didn’t receive much press attention.

Before delving into benefits of castor oil for skin let’s have a brief intro about castor oil.

Castor oil is extracted from seeds of castor oil plant (Ricinus communis). It is colorless to very pale yellow liquid with unpleasant smell. It’s a vegetable oil and native to Africa and India. Cosmetic industries as well as other industries use castor oil as main ingredient.

10 Amazing Benefits of Castor Oil for Skin

Ricinoleic acid is the main protein present in castor oil, which has anti-inflammatory and anti-bacterial properties. To steal the benefits of castor oil opt for organic castor oil.

1. Castor Oil Remedy for Dry Skin

Our largest organ skin has capability to release natural moisture which refrains skin from drying out, but at times skin fails to do so. Applying external moisturizer helps skin a lot.

Mix equal quantities of castor oil and coconut oil in a bowl and apply it on your dry skin. Rinse it off after 30 minutes. Repeat the process.

Face Mask Remedy:

Mix 1tbsp of castor oil with egg yolk thoroughly, and then apply it on your face in circular motion. After leaving it for 20 minutes rinse it off. Apply perfumed moisturizer after this.

2. Castor Oil for Sunburn

This remedy is only for minor burns, major burns need doctor’s attention.

Anti-inflammatory properties present in castor oil helps soothe sunburns. Apply castor oil mixed with coconut oil in equal quantities on affected area and soon it will relieve pain.

3. Itchy Skin Remedy

Skin protects our body and natural moisture present on skin protects it from harmful bacteria. Because of dehydration your skin fails to release natural moisture, this triggers itching and bacteria starts invading resulting in chronic skin diseases.

Apply castor oil on dry itchy skin; soon you’ll see the result. You can also mix coconut oil with castor oil.

4. Castor Oil for Wrinkles and Fine Lines

Main protein which is responsible for skin’s elasticity is collagen. Decrease in collagen leads to wrinkles and frown lines. Castor oil when applied on skin gets absorbed and it stimulates production of collagen. It also hydrates skin from the outside. Thus makes your skin softer and smoother.

You just need to apply castor oil on wrinkles and fine lines for 15-20 minutes and then rinse it off. Repeat the process for best results.

Also read: How to get rid of forehead wrinkles

5. Castor Oil to Prevent Stretch Marks

Castor oil gets absorbed into skin fading stretch marks. For pregnant women castor oil is must recommended oil. Mix castor oil with coconut oil to apply on stretch marks.

6. Castor Oil for Acne

Ricinoleic acid present in castor oil makes it a super remedy for treating acne blemishes. Skin when secrets excess oil gets accumulated over skin pores with dead skin cells forming pimples/blemishes. Anti-inflammatory properties in castor oil soothe these blemishes and controls excess oil production.

Anyway, for severe acne we recommend consulting doctor.

Other treatments for Acne

7. Castor Oil Fades Scars

Acids present in castor oil penetrate into tissues and stimulates its growth. Thus fades scars. Regular application is important.

Related post: 10 Home Remedies for Acne Scars

8. Removes Warts and Skin Tags

Warts are caused due to virus infection on outer layer of the skin. Whereas tags are formed when bunch of collagen and tissues gets trapped inside skin it forms skin tags.

Regular topical application of castor oil can remove warts and tags.

9. Castor Oil Works as a Great Moisturizer

If you’re looking for inexpensive and quick moisturizer then opt for castor oil. Fatty acids present in castor oil gets absorbed by skin easily, hydrating dry and itchy skin patches.

Few drops of castor oil are enough to bring your skin back to life.

10. Antimicrobial Properties

Acids present in castor oil has antimicrobial properties that helps to heal open wounds, ring worms, minor cuts and other fungal infections.

Few drops of topical application can do this work for you.

Did we forget to disclose any top benefits of castor oil for skin? Do share in comments.

Image source (altered)

witch hazel for acne

10 Home Remedies for Acne Scars Removal

home remedies for acne scars

Your body is made to take care of itself; it can manage, healing injuries and fading acne scars. But when you squeeze or touch acne pimples skin loses its elasticity because of loss of collagen, this makes skin to depend on external treatments.

Anyway, before trying home remedies for acne scars prevent pressing or squeezing acne blemishes. Yes, we knew that you can’t stop squeezing or pressing, apply hydrogen peroxide or other creams which keeps itching at bay.

A short intro about Acne

Oil glands present under skin produces excess oil called sebum making to clog skin pores and dead cells present on the skin along with bacteria gets accumulate on skin pores forming pimples or blemishes. Acne is most common skin disease.

10 Effective Remedies for Acne Scars Removal

With steroid creams you may treat acne blemishes but they leave scars on your face and no one in this world would love to have acne scars. With natural remedies you can not only fade acne scars but also make your skin youthful.

Nature is packed with thousands of remedies to treat various skin diseases but here we’re sharing only few home available remedies, so that you can choose one among them.

1. Papaya Remedy for Acne Scars

Two main nutrients present in papaya are vitamin A and papain (an enzyme). Whereas vitamin A acts as antioxidant to restrains acne causing bacteria, papain acts as an exfoliator to clear clogged pores by removing dead cells.

Not just acne, papaya benefits for skin are endless, which includes removing frown lines, hydrates skin, heals injuries, controls premature aging etc…

Remedy

  • Get some fresh papaya and mash it.
  • Mix 2 tbsp of honey to the paste and apply it on your face or affected part.
  • Rinse it off with cool water after 20 minutes.

2. Honey Remedy to Remove Acne Scars

honey for acne scars

Antioxidant and anti-inflammatory properties in honey helps in treating acne and also help to fade acne scars. Not just skin disease, honey can be used to treat other major health problems. You can take it internally or use it topically.

Here is a case study about honey treating acne.

Remedy

  • Add 1 tbsp of honey with 1 tbsp of grape seed oil.
  • Then add 1 tbsp of lemon juice.
  • You can also add 1-2 tbsp of essential oil.
  • Then apply it on acne scars.

Else you can try directly applying on acne scars.

3. Aloe Vera for Acne Scars

Like honey, aloe is another nature’s gift to human kind. Packed with vitamin A, B complex and C, aloe can be used to treat acne, eczema and psoriasis. To treat acne with aloe you just need to apply aloe gel on affected part and rinse it off after few minutes repeat the process and you can see wonders.

Repeating same remedy will help you to fade acne scars.

Also read: Aloe Vera benefits for skin

Remedy

  • Take fresh aloe leaf and peel its skin to see gel like substance.
  • Apply the gel on acne scars.
  • Rinse it off after few minutes.

You can use aloe vera internally. Click here to make aloe juice.

4. Lemon to Fade Acne Scars

lemon jucie for dark spots

Vitamin C present in this citrus fruit helps to rebuild collagen which was damaged because of acne and by squeezing pimples. It also helps to lighten dark spots and scars on skin.

Remedy

  • Directly squeeze lemon juice in a bowl and apply it on acne scars using cotton ball.
  • If you’ve sensitive skin, then dilute lemon juice by adding water to it.
  • For lemon mask, mix lemon juice, tomato juice and sandal wood to make paste. Apply this paste on affected area and rinse it off after 20 minutes.

Lemon makes your skin sensitive, so while going out either wear sunscreen cream or wide spread hat.

5. Olive Oil for Acne Scars Removal

Olive oil is obtained from olive tree berries, packed with antioxidants and vitamins, works great for skin diseases. It can be used both internally and externally.

Remedy

  • Using cotton ball apply olive oil on acne scars.
  • Leave it for few minutes so that your skin absorbs olive oil.
  • You can remove excess oil using a soft cloth.
  • Rinse it off after few minutes.

6. Baking Soda for Acne Scars

Baking soda is best remedy to exfoliate dead cells accumulated on skin. Anyway it may dry your skin so apply moisturizer after using baking soda.

Remedy

  • Mix water with baking soda to make paste.
  • Apply the paste on acne scars and massage for about 2 minutes.
  • Then rinse it off.

For sensitive skin we don’ recommend baking soda, anyway you can consult dermatologist.

Also read: Using baking soda to treat pimples

7. Raw Potatoes for Acne Scars

potatoes for acne scars

This comfort food consists of vitamin B, vitamin C and potassium and magnesium. Place raw sliced potato on acne scars to see what this vegetable can do for your skin.

Remedy

  • Slice fresh potato and rub it on acne scars in circular motion.
  • Repeat the process until you see sliced potato dried.
  • Take another sliced potato and do same.
  • Leave it for few minutes and then rinse it off with water.

8. Raw Tomatoes to Fade Acne Scars

Lycopene present in tomatoes have an antioxidant property which helps to fight bacteria.

Remedy

  • Mash raw tomatoes into a bowl.
  • Now apply tomato pulp on your face.
  • Rinse it off after few minutes.

9. Cucumber for Acne Scars

Though this vegetable didn’t receive much press attention, it’s packed with antioxidant and anti-inflammatory properties. These properties help to heal acne and fade acne scars.

Remedy

  • Soak sliced cucumber in water for few minutes so that all nutrients get transferred to water, then wash acne scars with this water.
  • Else, make cucumber juice and mix yogurt to it. Apply this paste to your acne scars.

10. Apple Cider Vinegar Remedy for Acne Scars Removal

apple cider vinegar for acne scars

ACV is packed with antimicrobial properties which help to kill bacteria. It can be used to treat chronic skin diseases like eczema. Apple cider vinegar can also fade moles.

Read this: Vinegar benefits for skin

Remedy

  • Get raw apple cider vinegar from local store or through Amazon.
  • Apply it on acne scars using cotton ball.

Did we miss any effective and inexpensive home remedy for acne scars here? Please share in comments so that we could include in this post.

easily digested foods

How to Rejuvenate the Skin

rejuvenate the skin

As you age your skin starts losing its elasticity, which develops wrinkles and flaws on the skin. Yes you can’t stop aging, but you can rejuvenate your skin to get back youthful skin.

Because of pollution and other chemical products our skin gets dry and dead cells gets accumulated on skin pores making it difficult for skin to breathe and secrete sebum which helps to fight bacteria. Thus resulting in dry itchy skin and with the absence of moisture (sebum) skin quickly loses its elasticity and wrinkles start appearing.

Below are few natural remedies with which you can bring back your skin to life.

Step – 1 Rejuvenate skin using cleanser

With all the dirt and dead cells accumulated over skin, first step involves clearing them up. This will help skin to secrete natural moisture. You can get cleanser from local store.

Or you can use Aloe Vera gel as cleanser, the most inexpensive yet effective remedy. Other natural cleansers include baking soda, jojoba oil, honey, lemon, Orange and raw milk.

Step – 2 Exfoliate your skin

Dead skin cells present on the body will be washed away by exfoliating and this process helps for good blood circulation. Baking soda, sugar, honey and oatmeal can be used as exfoliator.

Else you can get best exfoliate cream from local store.

Related post: Best natural exfoliants and DIY facial scrub recipes

Step – 3 Apply moisturizer

Main reason for all skin diseases is lack of moisture, skin when looses moisture bacteria acts skin, which triggers itching and frown lines. Though skin has its own natural moisturizer at times it fails to secrete, applying external moisturizer helps skin regain its youthfulness.

Shea butter, honey, aloe Vera gel and essential oils can be used as moisturizer.

Related post: Natural moisturizers for skin

Step – 4 Drink more water

Now it’s time to hydrate your skin form the insider. Drink at least 8 glasses of water. Water plays vital role in maintaining skin’s elasticity and suppleness.

Step – 5 Avoid stress

Not just your work your skin also gets affected by stress. Stress makes your skin dull, dry, prematurely aged skin, wrinkles appear and compromises immune function. Long time effects of stress may lead to chronic skin diseases like hives, psoriasis, eczema or rosacea.

You can meditate, go out for a long walk or try any other way which makes you feel peace.

Few more tips

  • Check what you’re eating; prefer vitamins and proteins contained diet.
  • If needed take vitamin supplements.
  • Regular exercise helps your body and skin to function great.
  • Avoid intoxicants.
  • Avoid products with chemical ingredients.
  • Pamper your skin while going out; take moisturizer in winter and sunscreen cream.