Olive Oil Benefits for the Skin

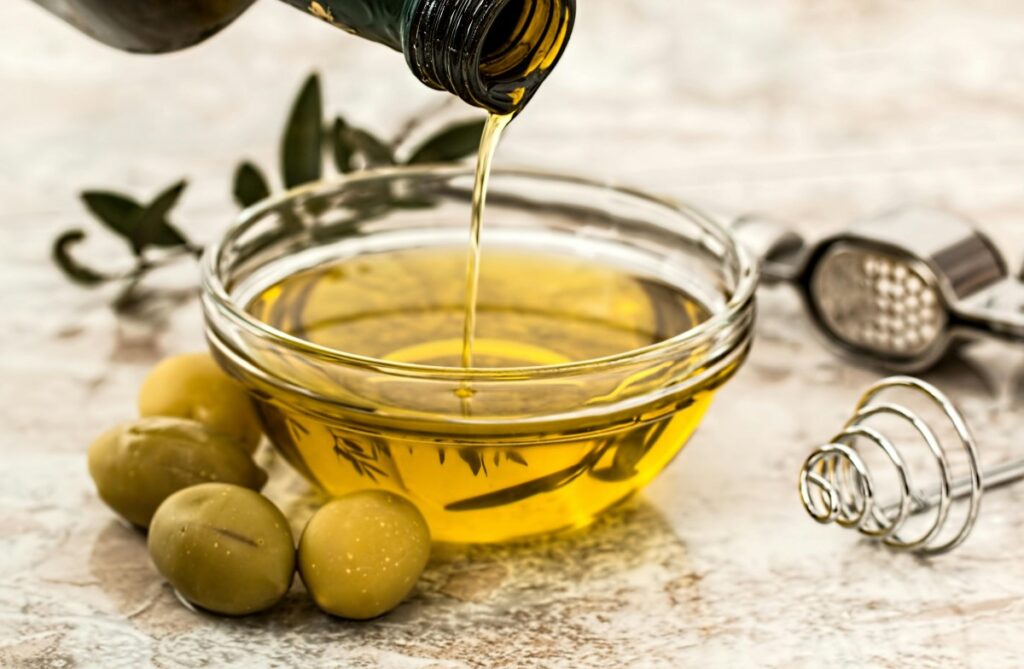
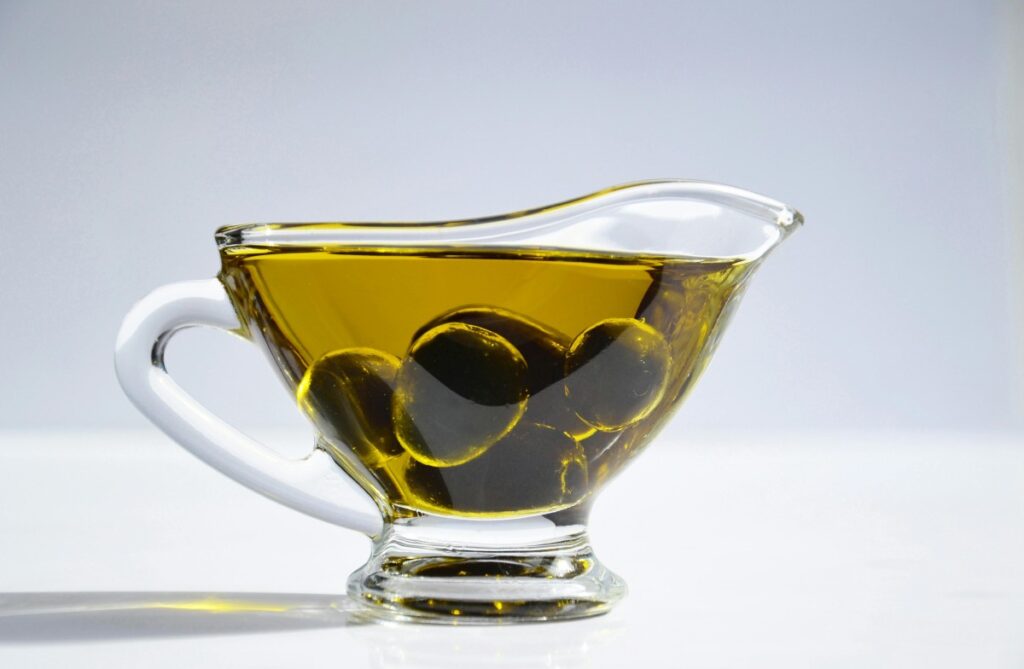
Olive oil has been cherished for centuries as a key ingredient in skincare routines, thanks to its numerous health benefits. Rich in antioxidants, vitamins, and essential fatty acids, olive oil nourishes the skin deeply, providing moisture and protection from environmental stressors. Let’s explore the top benefits of olive oil for the skin and how to incorporate it into your skincare routine.

1. Rich in Antioxidants

Olive oil is packed with antioxidants, particularly vitamin E and polyphenols, which protect the skin from oxidative damage caused by free radicals. Free radicals, which result from environmental pollution, UV rays, and stress, can lead to premature aging, wrinkles, and fine lines. Antioxidants in olive oil neutralize these free radicals, helping the skin maintain its youthful appearance.

How to Use:

  • Apply a few drops of extra virgin olive oil to your face as a serum before bed.
  • Mix olive oil with a carrier oil like jojoba for an antioxidant-rich face oil.

2. Intensely Hydrating

One of the standout qualities of olive oil is its ability to deeply hydrate and nourish the skin. It acts as an occlusive, meaning it locks moisture into the skin by creating a protective barrier. This makes olive oil ideal for dry, flaky skin and areas prone to roughness, such as elbows and knees.

How to Use:

  • Use olive oil as a moisturizer by massaging a small amount into damp skin after bathing.
  • Add a few drops of olive oil to your body lotion to boost its hydrating effects.

3. Anti-Inflammatory Properties

Olive oil contains compounds like oleocanthal, which have anti-inflammatory properties. These compounds can help soothe irritated, red, or inflamed skin. It’s particularly useful for people with sensitive skin conditions such as eczema, psoriasis, or rosacea.

How to Use:

  • Gently apply olive oil to affected areas to reduce irritation and inflammation.
  • Mix olive oil with aloe vera gel for an even more soothing treatment.

4. Supports Skin Barrier Repair

The skin’s barrier is essential for protecting against environmental irritants and preventing water loss. Olive oil is rich in essential fatty acids, particularly oleic acid, which helps strengthen the skin’s natural lipid barrier. This promotes better moisture retention and supports the healing of damaged skin.

How to Use:

  • Use olive oil as a night-time skin treatment by applying it to your face and leaving it overnight for intensive barrier repair.
  • Combine olive oil with shea butter to create a nourishing balm for dry or damaged areas.

5. Promotes Skin Regeneration

The vitamins and antioxidants in olive oil not only protect the skin but also encourage skin cell turnover. Regular use of olive oil can help in the regeneration of skin cells, improving skin texture and promoting healing from minor scars or blemishes.

How to Use:

  • Massage olive oil onto your face in circular motions to stimulate circulation and support regeneration.
  • Use it on stretch marks or small scars to improve their appearance over time.

6. Natural Makeup Remover

Olive oil is an excellent, gentle makeup remover. It effectively breaks down makeup, including waterproof mascara and eyeliner, without stripping the skin of its natural oils. Its moisturizing properties also ensure that your skin remains soft and supple after cleansing.

How to Use:

  • Apply a small amount of olive oil to a cotton pad and gently wipe away makeup.
  • Rinse with lukewarm water or use a mild cleanser for a clean finish.

7. Fights Signs of Aging

Olive oil’s rich content of vitamins A, D, E, and K can help reduce visible signs of aging. These nutrients nourish the skin, improve elasticity, and help reduce the appearance of fine lines and wrinkles. The combination of hydration, antioxidants, and nourishment makes olive oil a powerful anti-aging treatment.

How to Use:

  • Apply olive oil around the eyes and mouth, where fine lines and wrinkles tend to form.
  • Create a natural anti-aging mask by mixing olive oil with honey and applying it to your face for 15 minutes before rinsing off.

8. Protects Against UV Damage

While olive oil is not a substitute for sunscreen, it can help repair skin after sun exposure. The antioxidants and vitamin E in olive oil help to reduce the damage caused by UV rays, such as sunburn or pigmentation.

How to Use:

  • Apply olive oil to sun-exposed areas to soothe and moisturize the skin after being in the sun.
  • Use it as a base for homemade after-sun lotions or creams.

Conclusion

Olive oil is a versatile and natural ingredient that offers immense benefits for the skin. Whether you’re looking to hydrate, protect, or rejuvenate your skin, olive oil can be an excellent addition to your skincare routine. By incorporating it into your daily regimen, you can enjoy softer, more radiant, and healthier skin. Always opt for extra virgin olive oil to get the most out of its natural properties, and patch test before applying it to sensitive areas of the skin.

White Spots on Teeth: 3 Effective Ways to Get Rid of Them

White spots on your teeth can be frustrating and may make you feel self-conscious about your smile. These spots are often a sign of enamel demineralization, where minerals are lost from the surface of your teeth, leading to a noticeable discoloration. While they are generally harmless, they can be a sign of early tooth decay or other dental issues. Fortunately, there are several effective ways to treat and reduce the appearance of white spots on teeth. In this article, we’ll explore three key methods for getting rid of white spots and improving the overall health of your smile.

1. Remineralization with Fluoride

Why it works: Fluoride is a powerful mineral that helps restore lost minerals in your tooth enamel, essentially “remineralizing” it. This process can reduce the appearance of white spots, strengthen the enamel, and help prevent further damage or decay.

How to use it:

  • Fluoride toothpaste: Switch to a fluoride-rich toothpaste. Brush your teeth twice daily using a fluoride toothpaste, which will help remineralize the enamel over time and diminish the appearance of white spots.
  • Fluoride mouth rinse: You can use a fluoride mouth rinse in addition to toothpaste to help further strengthen your enamel. Look for a mouthwash that contains sodium fluoride or stannous fluoride.
  • Professional fluoride treatments: If white spots are persistent or severe, your dentist may apply a concentrated fluoride gel or varnish directly to your teeth. This treatment helps accelerate remineralization and can make a significant difference in reducing white spots.

Bonus tip: Avoid rinsing your mouth immediately after using fluoride toothpaste to allow the fluoride to stay on your teeth longer for maximum benefit.

2. Microabrasion Treatment

Why it works: Microabrasion is a cosmetic dental procedure that involves gently removing a thin layer of the outer enamel to smooth out the surface and diminish the appearance of white spots. It’s a non-invasive treatment that helps to blend the white spots with the surrounding enamel.

How to use it:

  • Consult a dentist: Microabrasion is performed by a dentist or dental hygienist. They apply a mild abrasive compound (usually a mixture of hydrochloric acid and pumice) to the affected areas of your teeth, gently polishing away the surface layer of enamel.
  • Results: This treatment can significantly improve the appearance of white spots, especially if they are caused by superficial demineralization. After the procedure, your teeth will look smoother and more uniform in color.

Bonus tip: Microabrasion can be used in combination with fluoride treatment to help restore enamel strength and improve the overall health of your teeth.

3. Veneers or Tooth Bonding

Why it works: For more severe cases of white spots or when other treatments haven’t worked, dental veneers or bonding can be used to cover the affected areas and give your teeth a uniform, natural look. This method is more of a cosmetic solution, providing immediate and long-lasting results.

How to use it:

  • Veneers: Dental veneers are thin, custom-made shells that cover the front surface of your teeth. They are a popular solution for improving the appearance of teeth with white spots, as they effectively conceal discoloration and create a smooth, bright smile. Veneers are durable and stain-resistant.
  • Bonding: Dental bonding involves applying a tooth-colored resin to the affected area of the tooth. This resin is shaped to match the natural contours of your teeth and then hardened with a special light. Bonding is generally quicker and more affordable than veneers, although it may not last as long.

Bonus tip: Both veneers and bonding require a consultation with a dentist to determine if you are a good candidate. If you have extensive tooth damage or decay, these treatments might not be suitable without addressing those issues first.


Other Helpful Tips for Preventing White Spots on Teeth

While treatments can help get rid of white spots, prevention is key to maintaining the health of your teeth and avoiding future spots. Here are a few tips to help you keep your teeth looking their best:

  1. Brush and floss regularly: Brushing with fluoride toothpaste twice a day and flossing daily helps remove plaque and prevent the buildup of acids that can demineralize your teeth.
  2. Avoid acidic foods and drinks: Citrus fruits, soda, wine, and other acidic foods can erode your enamel and exacerbate the appearance of white spots. If you consume these, rinse your mouth with water afterward.
  3. Drink plenty of water: Drinking water throughout the day helps rinse away food particles and acids that could damage your enamel.
  4. Limit sugary snacks and drinks: Sugar feeds harmful bacteria in the mouth, which produce acids that can erode your enamel and cause white spots.
  5. Visit your dentist regularly: Routine dental checkups allow your dentist to detect issues like white spots early and offer guidance on treatment options before the condition worsens.

Conclusion

White spots on your teeth can be a sign of early enamel damage, but with the right treatment, you can reduce their appearance and prevent further dental problems. Whether you use fluoride to remineralize your teeth, undergo microabrasion, or opt for cosmetic treatments like veneers or bonding, there are several ways to address white spots and regain a confident smile. Additionally, maintaining good oral hygiene and avoiding foods that erode enamel can help prevent white spots from returning.

If you’re concerned about white spots or other dental issues, it’s always a good idea to consult your dentist for personalized advice and treatment options.

8 Home Remedies for Bronchitis: How to Prevent & When to Worry

Bronchitis is an inflammation of the bronchial tubes, which carry air to and from your lungs. It can cause coughing, mucus production, shortness of breath, and wheezing. Acute bronchitis, usually caused by viruses like the flu or common cold, can be treated at home with self-care measures. However, chronic bronchitis, which is often linked to smoking or long-term exposure to irritants, requires medical attention.

If you’re dealing with acute bronchitis or looking for ways to alleviate symptoms of chronic bronchitis, several home remedies can help manage the condition. Alongside these remedies, it’s important to know when to seek medical help.

1. Stay Hydrated

Why it works: Drinking plenty of fluids helps thin out the mucus in your airways, making it easier to cough up and expel. Staying hydrated also helps keep your throat moist, reducing irritation and easing coughing.

How to use it:

  • Drink water, herbal teas, or broths regularly throughout the day.
  • Avoid caffeinated or alcoholic drinks as they can lead to dehydration.

Bonus tip: Warm water with honey and lemon can soothe the throat and reduce irritation.

2. Steam Inhalation

Why it works: Inhaling steam helps loosen up the mucus in your airways, easing the coughing and promoting better air flow. Steam also helps hydrate your respiratory system, reducing inflammation and congestion.

How to use it:

  • Boil water and carefully inhale the steam. You can do this by leaning over a bowl with a towel over your head to trap the steam.
  • Alternatively, take a hot shower and inhale the steam while in the bathroom.

Bonus tip: Add a few drops of eucalyptus oil to the steam to open up the airways and enhance relief.

3. Honey and Ginger

Why it works: Honey has natural antibacterial and anti-inflammatory properties, while ginger helps clear mucus from the respiratory system and soothes the throat. Both can help reduce coughing and irritation caused by bronchitis.

How to use it:

  • Mix 1 tablespoon of honey with 1/2 teaspoon of grated ginger. Drink this mixture 1–2 times a day.
  • You can also add ginger slices to hot water to make a soothing ginger tea.

Bonus tip: Honey can also be used on its own as a cough suppressant.

4. Turmeric and Milk

Why it works: Turmeric contains curcumin, which has powerful anti-inflammatory properties that help reduce inflammation in the bronchial tubes and ease the symptoms of bronchitis. Drinking turmeric milk can soothe the throat and reduce coughing.

How to use it:

  • Mix 1/2 teaspoon of turmeric powder into a glass of warm milk and drink it before bed.
  • You can also use turmeric in soups and stews to incorporate it into your diet.

Bonus tip: Turmeric can also be combined with honey and warm water for added relief.

5. Use a Humidifier

Why it works: Humidified air helps keep your throat and nasal passages moist, which can reduce irritation and help clear mucus. Dry air can exacerbate bronchitis symptoms, leading to more coughing and discomfort.

How to use it:

  • Place a humidifier in your bedroom or living room to maintain a comfortable level of moisture in the air.
  • Make sure to clean the humidifier regularly to prevent mold or bacteria buildup.

Bonus tip: Adding a few drops of essential oils like eucalyptus or lavender can further help open up the airways and promote relaxation.

6. Salt Water Gargle

Why it works: Gargling with warm salt water helps reduce throat inflammation and can soothe a scratchy or sore throat caused by coughing. Salt water also has mild antiseptic properties that can help reduce infection and clear mucus.

How to use it:

  • Mix 1/2 teaspoon of salt in a glass of warm water and gargle for 30 seconds.
  • Repeat this process 2-3 times per day to help alleviate throat discomfort.

Bonus tip: Add a pinch of baking soda to the mixture for extra soothing power.

7. Peppermint Tea

Why it works: Peppermint contains menthol, which acts as a natural decongestant. It can help open the airways, making it easier to breathe and reduce the cough reflex. Peppermint also has antibacterial properties that can help fight off infection.

How to use it:

  • Brew fresh peppermint leaves or use peppermint tea bags. Drink 2-3 cups a day.
  • You can also inhale peppermint steam by adding a few drops of peppermint oil to hot water.

Bonus tip: You can add honey or lemon to the tea for added benefits.

8. Rest and Elevate Your Head While Sleeping

Why it works: Rest is vital for recovery when dealing with bronchitis. Sleep helps your body fight off the infection or inflammation. Elevating your head while sleeping reduces mucus buildup and makes breathing easier.

How to use it:

  • Ensure you get enough rest each night, ideally 7-8 hours of uninterrupted sleep.
  • Sleep with your head elevated by using extra pillows or an adjustable bed to keep your airways open.

Bonus tip: Sleeping in a slightly elevated position can also reduce coughing at night, allowing for more restful sleep.


How to Prevent Bronchitis

While home remedies can provide relief, preventing bronchitis is the best way to manage and avoid recurrent episodes. Here are some preventive measures:

  1. Quit Smoking: Smoking is a leading cause of chronic bronchitis. Quitting smoking improves lung health and reduces the risk of developing bronchitis.
  2. Avoid Irritants: Try to avoid exposure to pollutants, chemicals, and secondhand smoke, which can irritate your lungs and increase your chances of developing bronchitis.
  3. Practice Good Hygiene: Wash your hands regularly, especially during flu season, to reduce the risk of catching viral infections that can lead to acute bronchitis.
  4. Get Vaccinated: The flu and pneumonia vaccines can help protect you from respiratory illnesses that may cause bronchitis.
  5. Stay Hydrated: Drinking plenty of fluids helps keep your respiratory system healthy and reduces mucus buildup.

When to Worry: Signs You Need Medical Help

While many cases of bronchitis can be treated at home, there are times when you should seek medical attention:

  • Persistent Cough: If your cough lasts longer than three weeks, it may be chronic bronchitis or another underlying condition.
  • High Fever: A fever above 100.4°F (38°C) that doesn’t improve with home treatment could indicate a bacterial infection requiring antibiotics.
  • Shortness of Breath: Difficulty breathing or a feeling of tightness in the chest is a serious symptom that requires immediate medical attention.
  • Blood in Mucus: If you notice blood in your mucus, seek medical advice right away.
  • Chest Pain: Severe chest pain or discomfort could indicate a more serious problem, such as pneumonia or even a heart condition.

Conclusion

Bronchitis can be uncomfortable, but with these natural remedies and preventive measures, you can alleviate your symptoms and manage the condition more effectively. If your symptoms persist or worsen, don’t hesitate to consult with a healthcare professional for further evaluation. Proper self-care, hydration, and rest, along with these remedies, can help you recover faster and reduce the risk of future episodes.

Headache: Causes, Symptoms, Remedies, and Prevention

Headaches are one of the most common health complaints worldwide. Almost everyone has experienced a headache at some point in their lives, whether it’s a mild inconvenience or a debilitating condition. Understanding the causes, recognizing the symptoms, and knowing how to treat and prevent headaches can help you manage this common issue effectively.

What is a Headache?

A headache is pain or discomfort in the head or neck area. It can range from mild to severe and can affect one or both sides of the head. While many headaches are not serious and can be treated at home, some can be a symptom of a more serious medical condition.

Types of Headaches

There are several types of headaches, each with its own causes and symptoms. The most common types include:

  1. Tension Headaches:
    • Cause: Often triggered by stress, poor posture, or muscle strain.
    • Symptoms: Dull, constant pain, often described as a band of pressure around the head.
    • Duration: Can last from 30 minutes to several hours.
  2. Migraine:
    • Cause: Often linked to genetic and environmental factors. Triggers can include stress, hormonal changes, certain foods, lack of sleep, or bright lights.
    • Symptoms: Severe, throbbing pain usually on one side of the head. Can be accompanied by nausea, vomiting, and sensitivity to light and sound.
    • Duration: Can last anywhere from a few hours to several days.
  3. Cluster Headaches:
    • Cause: These headaches are rare but extremely painful. They are believed to be related to abnormalities in the hypothalamus (part of the brain responsible for regulating sleep and circadian rhythms).
    • Symptoms: Intense, burning or piercing pain usually behind one eye. May be accompanied by red, watery eyes, and nasal congestion.
    • Duration: Occurs in “clusters,” meaning they happen several times a day over a period of weeks or months.
  4. Sinus Headaches:
    • Cause: Often caused by inflammation of the sinus cavities due to a cold, allergies, or infection.
    • Symptoms: Pressure or pain around the eyes, forehead, or cheeks. It may be accompanied by a runny nose, fever, and nasal congestion.
    • Duration: Varies depending on the underlying cause, but typically occurs as long as the sinus issue persists.
  5. Rebound Headaches:
    • Cause: Often caused by overuse of headache medication. These headaches occur when the body becomes dependent on the drug, and stopping it causes withdrawal symptoms.
    • Symptoms: Frequent headaches that worsen over time, often occurring in the morning.
    • Duration: Can last as long as medication is being overused.

Symptoms of Headaches

The symptoms of a headache vary depending on the type and severity of the headache, but common signs include:

  • Pain: Can be mild, moderate, or severe.
  • Nausea and Vomiting: Especially common in migraines.
  • Sensitivity to Light and Sound: A hallmark of migraines and cluster headaches.
  • Dizziness or Lightheadedness: May occur with tension or sinus headaches.
  • Visual Disturbances: Such as seeing flashing lights or blind spots, particularly in migraines.
  • Fatigue: Headaches often lead to a sense of tiredness or inability to concentrate.

Causes of Headaches

There are many potential causes of headaches, some of which are preventable and some of which are not. The most common causes include:

  1. Stress: Emotional or physical stress can lead to tension headaches.
  2. Dehydration: Lack of water can cause headaches, as the brain temporarily shrinks from fluid loss, triggering pain.
  3. Sleep Issues: Both lack of sleep and poor-quality sleep can contribute to headaches.
  4. Dietary Triggers: Certain foods and beverages like alcohol, caffeine, chocolate, and processed meats can trigger headaches.
  5. Hormonal Changes: Women are more likely to suffer from migraines due to hormonal fluctuations during their menstrual cycle, pregnancy, or menopause.
  6. Poor Posture: Slouching or sitting in awkward positions can strain muscles in the neck and shoulders, leading to tension headaches.
  7. Medical Conditions: Sinus infections, high blood pressure, and other health issues can lead to headache symptoms.
  8. Medication Overuse: Overuse of pain relief medications, such as aspirin or ibuprofen, can cause rebound headaches.

Remedies for Headaches

While the treatment for headaches varies depending on the type and cause, several remedies can help alleviate the pain and discomfort:

1. Over-the-Counter (OTC) Pain Relief

  • Medication: Non-prescription medications like ibuprofen, aspirin, or acetaminophen can effectively relieve mild to moderate headaches.
  • Combination Medications: Some medications combine pain relievers with caffeine, which can help boost the effectiveness of the treatment.

2. Hydration

  • Drink Water: Dehydration is a common headache trigger, so drinking plenty of water throughout the day can help prevent or relieve headaches.

3. Rest and Sleep

  • Get Quality Sleep: Ensuring you get enough restful sleep (7-9 hours for most adults) can prevent headaches caused by fatigue or stress.
  • Nap: A short nap can sometimes alleviate the pain of a headache, particularly if it is stress or sleep-related.

4. Cold or Warm Compress

  • Cold Compress: Applying a cold pack or ice wrapped in a towel to the forehead can numb the area and reduce inflammation, especially for migraines.
  • Warm Compress: A warm towel or heating pad can relieve tension headaches, particularly those caused by muscle strain in the neck or shoulders.

5. Caffeine

  • Caffeine in Moderation: A small amount of caffeine can help constrict blood vessels, which may reduce headache pain. However, avoid excessive consumption, as it can lead to dehydration or rebound headaches.

6. Herbal Remedies

  • Peppermint or Lavender Oil: Applying diluted essential oils such as peppermint or lavender to the temples and forehead may provide relief from tension headaches.
  • Ginger Tea: Ginger has anti-inflammatory properties and may help reduce nausea and discomfort associated with headaches.

7. Acupressure or Massage

  • Massage: Gentle neck, shoulder, and head massages can alleviate tension and improve circulation, reducing headache pain.
  • Acupressure: This technique involves applying pressure to specific points on the body to relieve pain and tension.

Prevention of Headaches

Prevention is key to minimizing the frequency and severity of headaches. Here are some strategies to help you avoid headaches:

  1. Maintain Regular Sleep Patterns: Go to bed and wake up at the same time every day to ensure restful sleep and reduce headaches related to fatigue.
  2. Stay Hydrated: Drink plenty of water throughout the day to prevent dehydration, a common trigger for headaches.
  3. Reduce Stress: Practice relaxation techniques like meditation, yoga, or deep breathing to reduce stress, which can lead to tension headaches.
  4. Limit Caffeine and Alcohol: Both caffeine and alcohol can trigger headaches, especially when consumed in excess. Try to limit your intake.
  5. Eat a Balanced Diet: Avoid skipping meals, and eat regular, well-balanced meals. Foods rich in magnesium, such as leafy greens, nuts, and seeds, may help reduce migraine frequency.
  6. Exercise Regularly: Regular physical activity can reduce the frequency and intensity of tension headaches by promoting better circulation and reducing stress.
  7. Take Breaks from Screens: If you work at a computer, take regular breaks to reduce eye strain, which can contribute to headaches.
  8. Use Good Posture: Maintaining good posture while sitting or standing can prevent tension headaches caused by muscle strain in the neck and shoulders.

When to Seek Medical Help

While most headaches are not serious, there are times when you should seek medical attention. Contact a healthcare professional if:

  • The headache is severe or the worst you’ve ever experienced.
  • You experience vision changes, confusion, or difficulty speaking.
  • You have headaches after a head injury.
  • The headache is persistent and doesn’t respond to usual treatments.

Conclusion

Headaches, while common, can vary in intensity and cause. Whether triggered by stress, dehydration, poor posture, or an underlying health condition, headaches can often be managed with simple lifestyle changes, home remedies, and over-the-counter treatments. Understanding the different types, causes, and remedies for headaches can help you take proactive steps to reduce their impact on your daily life. If your headaches are frequent, severe, or difficult to manage, it’s essential to consult with a healthcare professional for further evaluation and treatment.

DIY Aloe Vera Soap: A Step-by-Step Guide to Make Soap at Home

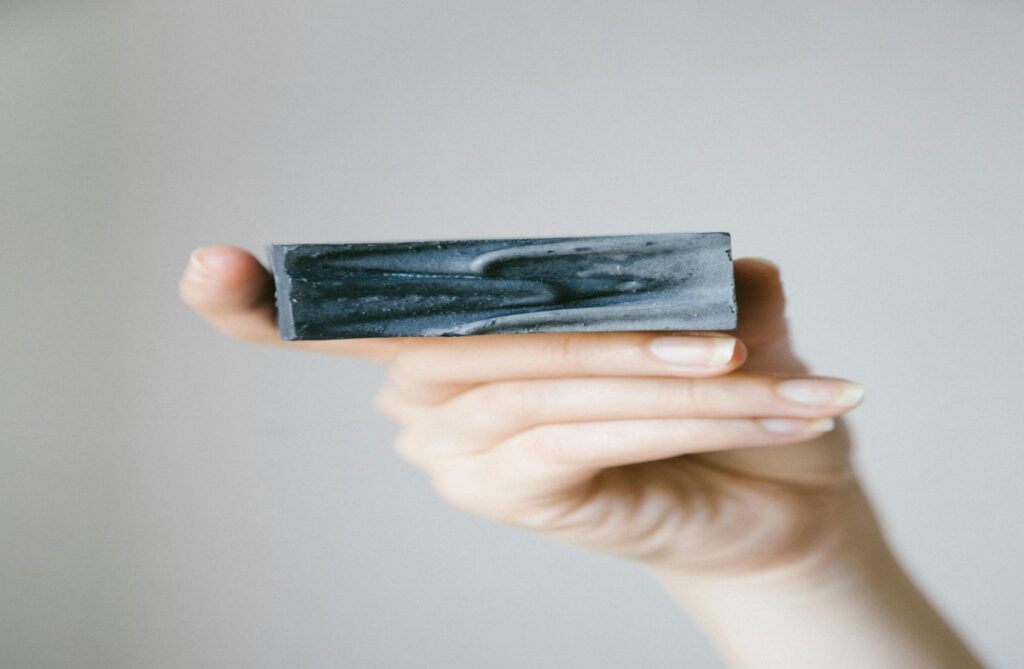
Making your own aloe vera soap at home is a rewarding and enjoyable process. Aloe vera is well-known for its soothing and moisturizing properties, making it an excellent addition to homemade soap. This guide will walk you through everything you need to know to create your own nourishing aloe vera soap.

Benefits of Aloe Vera in Soap

  1. Moisturizing: Aloe vera is rich in water content, making it an excellent natural moisturizer for your skin.
  2. Soothing Properties: It helps calm irritated skin and can be beneficial for conditions like sunburn and eczema.
  3. Rich in Nutrients: Aloe vera contains vitamins A, C, and E, which are essential for healthy skin.
  4. Antioxidant: It has antioxidant properties that help protect the skin from damage caused by free radicals.
  5. Gentle Cleansing: Aloe vera soap can cleanse the skin without stripping away natural oils.

Ingredients Needed

Basic Ingredients:

  • Aloe Vera Gel: Freshly extracted from the aloe vera leaf or store-bought.
  • Soap Base: You can use a melt-and-pour soap base (glycerin, shea butter, or goat milk).
  • Essential Oils: For fragrance (optional) – consider lavender, tea tree, or peppermint.
  • Colorants: Natural colorants like turmeric or spirulina (optional).

Equipment Needed:

  • Soap molds (silicone molds work well)
  • Mixing bowl
  • Microwave-safe container or double boiler
  • Stirring spoon or stick blender
  • Knife (for cutting the soap base)
  • Measuring spoons
  • Safety goggles and gloves (if using lye)

Step-by-Step Instructions

Step 1: Prepare the Aloe Vera Gel

  1. Extracting Gel:
    • Cut an aloe vera leaf from the plant.
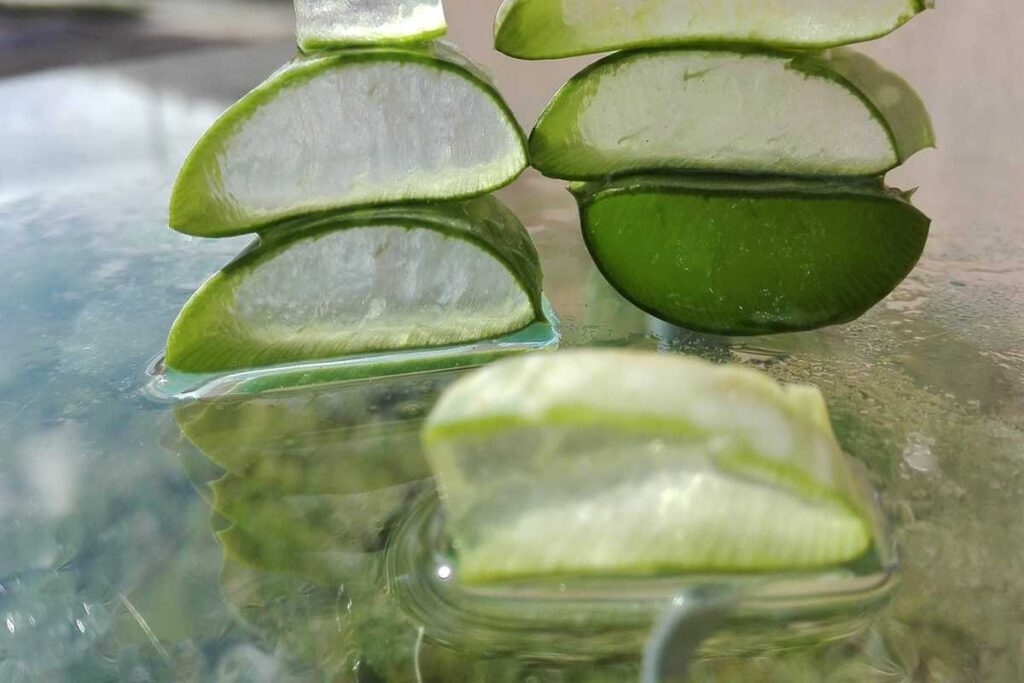
    • Slice it lengthwise and scoop out the clear gel using a spoon.
    • Measure approximately 1/2 cup of fresh aloe vera gel for your soap.

Step 2: Melt the Soap Base

  1. Cut the Soap Base:
    • Cut the melt-and-pour soap base into small cubes (about 1-inch).
  2. Melting:
    • Place the soap base cubes into a microwave-safe container or double boiler.
    • If using a microwave, heat in 30-second intervals, stirring in between, until fully melted. If using a double boiler, heat gently over low heat until melted.

Step 3: Mix in Aloe Vera Gel

  1. Combine:
    • Once the soap base is melted, remove it from the heat and let it cool slightly (about 5 minutes).
    • Add the prepared aloe vera gel into the melted soap base and stir well to combine.
  2. Essential Oils and Colorants:
    • If desired, add essential oils and natural colorants at this stage. A few drops of essential oil should suffice, and you can adjust according to your preference.

Step 4: Pour into Molds

  1. Molding:
    • Pour the mixture into soap molds. Fill them to the desired level, tapping the mold gently to remove any air bubbles.
  2. Cooling:
    • Allow the soap to cool and harden completely at room temperature. This usually takes about 1-2 hours.

Step 5: Unmold and Store

  1. Unmolding:
    • Once the soap is solid, gently pop it out of the molds. If you’re having difficulty, you can place the molds in the freezer for a few minutes to make the soap easier to remove.
  2. Storage:
    • Store the finished aloe vera soap in an airtight container in a cool, dry place until you are ready to use it.

Tips for Customization

  • Additives: Consider adding natural exfoliants like oatmeal or ground coffee for texture.
  • Herbs and Flowers: Dried herbs (like lavender or chamomile) or flower petals can be added to enhance the visual appeal and therapeutic benefits.
  • Packaging: If you plan to gift your soap, consider wrapping it in natural materials or placing it in a decorative box.

Conclusion

Making your own DIY aloe vera soap is a simple yet rewarding process. Not only does it allow you to create a product that’s free from harsh chemicals, but it also lets you enjoy the myriad benefits of aloe vera. This personalized soap can be a delightful addition to your skincare routine or a thoughtful gift for friends and family.

Feel free to experiment with different scents, colors, and ingredients to make your aloe vera soap unique! Enjoy the process and the benefits of your homemade creation!

Are Apples Beneficial for Weight Loss? Discover Their Surprising Health Benefits

Apples are among the most popular fruits worldwide, renowned for their delicious taste, convenience, and numerous health benefits. As more people seek effective ways to lose weight and improve their health, the question arises: Are apples beneficial for weight loss? In this blog, we will explore the nutritional profile of apples, their potential impact on weight loss, and the myriad health benefits they offer.

The journey toward effective weight loss often involves dietary changes, increased physical activity, and the incorporation of nutritious foods. Apples, with their crisp texture and sweet-tart flavor, are not only a delightful snack but also a versatile ingredient in many dishes. This blog delves into the science behind apples, examining their role in weight management and overall health improvement.

Why Focus on Weight Loss?

Weight loss is a common goal for many people, driven by various factors including health concerns, aesthetic preferences, and lifestyle choices. Achieving a healthy weight can lower the risk of chronic diseases, improve mental health, and enhance overall quality of life. Understanding the foods that support weight loss can empower individuals to make better dietary choices.

1. Nutritional Profile of Apples

A. Caloric Content

One of the most compelling reasons apples are often associated with weight loss is their low caloric content. A medium-sized apple (approximately 182 grams) contains about 95 calories. This makes apples an excellent choice for a satisfying snack without significantly contributing to daily caloric intake.

B. Fiber Content

Apples are rich in dietary fiber, particularly soluble fiber called pectin. A medium apple contains about 4 grams of fiber, which contributes to feelings of fullness and aids in digestion. Fiber slows down the digestion and absorption of nutrients, which can help regulate blood sugar levels and curb appetite.

C. Vitamins and Minerals

Apples are packed with essential vitamins and minerals that contribute to overall health. Some key nutrients found in apples include:

  • Vitamin C: An antioxidant that supports the immune system and promotes skin health.
  • Potassium: An essential mineral that helps regulate blood pressure and fluid balance.
  • Vitamin K: Important for blood clotting and bone health.

D. Antioxidants

In addition to vitamins and minerals, apples are rich in antioxidants, particularly quercetin, catechin, and chlorogenic acid. These compounds have been linked to various health benefits, including reduced inflammation and improved heart health.

2. How Apples Support Weight Loss

A. Low Energy Density

Energy density refers to the number of calories in a given volume of food. Foods with low energy density, like apples, provide fewer calories per gram, allowing you to consume larger portions without overeating. This can lead to reduced overall caloric intake, making weight loss more manageable.

B. Increased Satiety

The high fiber content in apples promotes satiety by slowing digestion and enhancing feelings of fullness. Eating an apple before a meal can reduce overall calorie consumption, making it easier to stick to a weight loss plan. Studies have shown that incorporating fruits high in fiber can help people feel fuller for longer periods.

C. Natural Sugar

While apples contain natural sugars, their fiber content helps moderate the release of glucose into the bloodstream. This prevents rapid spikes and crashes in blood sugar levels, reducing cravings for sugary snacks and promoting stable energy levels throughout the day.

D. Versatile and Convenient

Apples are incredibly versatile and can be enjoyed in various ways—raw, cooked, in salads, or as part of a smoothie. This makes them an easy addition to meals and snacks, helping individuals maintain a healthy diet without feeling deprived.

3. Health Benefits of Apples

A. Heart Health

Numerous studies suggest that regular apple consumption is associated with improved heart health. The soluble fiber in apples helps lower cholesterol levels, while the antioxidants reduce inflammation and prevent the oxidation of LDL cholesterol, both of which contribute to cardiovascular disease.

B. Blood Sugar Regulation

Apples may help regulate blood sugar levels, making them an excellent choice for individuals with diabetes or those at risk. The fiber content slows the absorption of sugar into the bloodstream, preventing spikes in blood sugar. Some studies have also shown that consuming apples is linked to a lower risk of type 2 diabetes.

C. Gut Health

The fiber in apples acts as a prebiotic, promoting the growth of beneficial gut bacteria. A healthy gut microbiome is crucial for overall health, influencing digestion, metabolism, and even mental well-being. Regularly consuming fiber-rich foods like apples can support gut health and improve digestive function.

D. Weight Management

Incorporating apples into a balanced diet can aid in weight management. Their low-calorie content, high fiber levels, and natural sweetness make them an ideal snack for those looking to lose or maintain weight.

E. Cancer Prevention

Some studies suggest that the antioxidants found in apples may play a role in reducing the risk of certain cancers. Research indicates that apple consumption may be linked to a lower risk of colorectal, breast, and lung cancers, though more studies are needed to establish definitive conclusions.

F. Enhanced Immune Function

The vitamin C content in apples supports the immune system, helping the body fend off infections and illnesses. A strong immune system is essential for maintaining overall health, especially during cold and flu season.

G. Skin Health

Antioxidants in apples can contribute to healthier skin by fighting free radicals that cause skin aging and damage. Consuming apples regularly can support skin health and promote a youthful appearance.

4. How to Incorporate Apples into Your Diet

A. Snack Ideas

  • Sliced Apples with Nut Butter: Pair apple slices with almond or peanut butter for a nutritious snack that combines healthy fats, protein, and fiber.
  • Apple Chips: Bake thin apple slices for a crunchy, low-calorie alternative to traditional chips.
  • Cinnamon Apples: Sprinkle sliced apples with cinnamon for a delicious and healthy treat.

B. Meal Additions

  • Salads: Add diced apples to salads for a refreshing crunch and natural sweetness.
  • Oatmeal: Mix chopped apples into your morning oatmeal for added fiber and flavor.
  • Smoothies: Blend apples with spinach, yogurt, and your favorite fruits for a nutritious smoothie.

C. Cooking and Baking

  • Apple Sauce: Make homemade applesauce without added sugar for a healthy dessert or topping.
  • Baked Apples: Core apples and fill them with oats, nuts, and spices, then bake for a warm and satisfying dessert.
  • Soups and Stews: Add chopped apples to savory dishes for a touch of sweetness and depth of flavor.

5. Addressing Common Concerns

A. Are All Apples Created Equal?

While all apples share similar health benefits, some varieties may have slightly different nutrient profiles. Generally, all apples provide fiber and antioxidants, but varieties like Granny Smith may contain higher levels of certain antioxidants. It’s beneficial to consume a variety of apple types to maximize health benefits.

B. Organic vs. Conventional Apples

Choosing organic apples may reduce exposure to pesticide residues. However, washing apples thoroughly can help remove surface residues. Both organic and conventional apples can contribute to a healthy diet, so the choice may depend on personal preferences and budget.

C. Allergies and Sensitivities

Some individuals may have allergies or sensitivities to apples. Common symptoms include itching, swelling, or digestive discomfort. If you suspect an allergy, consult a healthcare professional for guidance.

6. Practical Tips for Buying and Storing Apples

A. Selecting Fresh Apples

When purchasing apples, look for firm, unblemished fruits with vibrant color. Avoid apples with soft spots, bruises, or wrinkles, as these may indicate spoilage.

B. Storing Apples

Store apples in the refrigerator to prolong their freshness. Apples can be kept in a crisper drawer or in a plastic bag with ventilation holes. For optimal flavor, allow apples to come to room temperature before eating.

C. Preparing Apples

Wash apples thoroughly under running water to remove any pesticides or wax. For recipes, peel apples if desired, but keep in mind that many nutrients are found in the skin.

7. Conclusion

Apples are a delicious and nutritious fruit that can play a significant role in weight loss and overall health. Their low caloric content, high fiber levels, and wealth of vitamins and antioxidants make them an ideal choice for anyone looking to improve their diet and support their weight management goals.

By incorporating apples into your meals and snacks, you can enjoy their health benefits while satisfying your taste buds. Remember, achieving weight loss and health goals requires a balanced approach that includes a variety of nutrient-rich foods, regular physical activity, and lifestyle adjustments.

So, the next time you’re searching for a healthy snack or a flavorful ingredient, reach for an apple—your body will thank you!

How to Get Rid of Pimples and Acne Overnight Using These 25 Quick Remedies

Pimples or acne are more than frustrating things tohandle in our lives. As you get older, they become more difficult to treatbecause many acne fighting products can be overly drying and irritating on ourskin.

Don’t worry and don’t go down blaming your skin for your acne problems. As it is not the problem of your skin and using harsh chemicals and skin products will result in making the problem worse.

So, have a little patience to deal with acne and pimples. This article will help you with 25 best remedies that work as a magic on your skin and has a huge affect on regular basis.

Use all the below remedies on regular basis to get smooth, clear and glowing skin as a result. 

25Home Remedies For Acne And Pimples:

1. Don’t Forget To Wash Your Pillowcase Regularly:

This is the most effective remedy that works perfect to reduce acne and pimples on your skin.

Washing your pillow case prevents the excess oil and other bacteria that sit on your face throughout the night by worsening your acne. So, don’t forget to wash your pillowcase at least twice in a week to see huge difference on your skin.

2. Use Lemon Juice For Treating Pimples And Acne:

Lemon juice is another effective remedy to treat pimples and acne. The citric acid present in lemon juice exfoliates the skin and removes all dead skin cells and vitamin C helps in toning your skin.

It astringent properties also help you to reduce the redness caused by acne and prevents them completely.

What You Need To Do:

  • All you need to do is wash your face with cool water and apply little amount of lemon juice directly on the pimple before stepping out in the sun every time.

3. Use Echinacea To Treat Acne:

This is an amazing remedy that works absolutely perfect in preventing acne and also helps to fight against the infections that causes flu and cold.

The anti inflammatory and anti bacterial properties in Echinacea helps fight against acne and give you smooth and soft skin.

What You Need To Do:

  • Use Echinacea tea as your regular face wash for at least twice in a day instead of those expensive chemical filled face washes.

4. Try An Oatmeal Mask:

Oatmeal is loaded with anti inflammatory and anti bacterial properties that helps to prevent acne and reduces redness that come along with acne.

What You Need To Do:

  • Take little amount of cooked oatmeal and apply it as a mask on your face and wash it off with water after few minutes.
  • It might not completely prevent acne, but it will help to reduce the pain and irritation with acne.

5. Try Aspirin For Your Acne:

We all thought that aspirin will only help to reduce headache and other inflammation on our skin. But the fact is, it is also effective in reducing acne and pimples due to the presence of salicylic acid.

What You Need To Do:

  • Take a pill of aspirin and dissolve it in a glass of water. Don’t drink this water, dab the mixture directly on your pimples and blemishes.

6. Aloe Vera To Cure Acne And Swelling:

The anti inflammatory and anti bacterial properties in aloe vera make it effective in treating acne, redness and swelling caused by pimples.

What You Need To Do:

  • Wash your face with cool water follow with pat dry.
  • Now apply little amount of aloe vera gel directly on the pimple and leave it for about 5-10 minutes and then wash it off.

7. Baking Soda To Control Acne:

Baking soda is one of the best ingredients to soften your skin and help to look great while fighting against acne.

What You Need To Do:

  • Mix one table spoon of baking soda with little amount of water to make a paste. Apply this paste on your face and wash it off after 25 minutes with warm water.

8. Mixture Of Avocado And Honey For Acne:

Due to its high content of good fat and healthy nutrients aloe vera works perfect on sensitive skin. Especially, when it is mixed with little amount of honey.

What You Need To Do:

  • Mix one table spoon of honey with one table spoon of avocado paste and apply it on your face.
  • Leave it on for 15 minutes and then wash it off with warm water and pat dry.

9. Use Orange To Get Rid Of Acne:

Oranges are rich in vitamins C that help to nourish and regrow your skin and the citric acid acts as an exfoliant and works as an powerful astringent.

What You Need To Do:

  • Take two oranges peel and blend them to make a fine paste by adding little amount of water.
  • Apply this paste on your acne and allow it to sit around 25 minutes. Then rinse it off with water and pat dry.

10. Try Yogurt And Honey For Sensitive Skin:

Yogurt will help to reduce inflammation and get rid of redness caused by acne due to its anti inflammatory properties.

What You Need To Do:

  • Mix one table spoon of yogurt and honey and apply this mixture as a layer on your skin.
  • Leave the mask for 15 minutes and wash it off with cool water and pat dry.

11. Apple Cider Vinegar:

Due to its astringent properties apple cider vinegar get rid of oil that nourishes bacteria on your skin and makes your acne worse.

What You Need To Do:

  • Mix one table spoon of apple cider vinegar in a glass of water and apply this mixture on your acne using a cotton ball.
  • You can do this 3-4 times in a day to reduce or prevent acne completely.

12. Use Papaya For Pimples:

Papaya is not only a tasty fruit it also helps us in maintaining healthy and glowing skin due to its powerful component called papain.

What You Need To Do:

  • Take table spoon of papaya paste and apply it on the affected area and allow it to sit for 20 minutes and then wash it off with cool water.

13. Banana Peel To Get Rid Of Pimples:

Not only banana, even banana peel is loaded with many nutrients that protect your skin. It also contains anti inflammatory properties that helps to reduce inflammation and swelling caused by pimples and acne.

What You Need To Do:

  • Take banana peel and rub it in circular motions around the affected area for few minutes.

14. Use Strawberries And Honey:

Strawberries also contain salicylic acid which is an excellent exfoliant and astringent to fight against bacteria that cause acne and help your skin grow and look healthier.

What You Need To Do:

  • Mix one table spoon of mashed strawberry paste with one table spoon of honey and apply it on pimples.
  • Leave this paste for at least 25 minutes and then use warm water to rinse your face and pat dry.

15. Potatoes To Punish Pimples:

Potatoes are rich in minerals like phosphorous, sulphur, chloride, potassium that helps to get rid of blemishes and redness caused by pimples and acne.

What You Need To Do:

  • Wash your face with cool water and pat dry, now apply potato juice using a cotton ball on your skin and leave it for 15-20 minutes.
  • Use warm water to rinse your face and pat dry follow by applying moisturizer.

16. Try Sugar Scrub To Get Rid Of Pimples:

Sugar scrubs are excellent exfoliators which are also help to remove dead skin cells and clear up your skin.

What You Need To Do:

  • Mix one table spoon of sugar with little amount of coconut oil and store it in air tighten jar.
  • Use this scrub before taking shower on the affected area and wash it off completely using cool water after few minutes.

17. Garlic To Defeat Your Acne:

Garlic is anti bacterial and effective in reducing acne and pimples in an ease way.

What You Need To Do:

  • Mash 3 cloves of garlic and mix them in glass of water and leave it for 5 minutes. Now, take a cotton swab and apply the mixture on the affected areas.

18. Steam Away Your Acne:

Steam is the best way to clear up all the pimples and  to push out excess oil and dirt out from the skin.

What You Need To Do:

  • Take one bowl of hot water and cover your head using a towel, so that it forms a tent that keeps the steam inside.
  • Inhale and exhale for few minutes and continue it for other 15 minutes.

19. Green Tea For Acne And Pimples:

Green tea not only beneficial for those who want to maintain healthy weight, it is also for the people experiencing pimples and acne.

The anti oxidant properties reduces acne and fights against bacteria when applied directly on your skin.

20. Fight Acne With Egg White:

Egg whites are great in fighting against acne and prevent the scars caused by them. And the proteins, vitamins and nutrients present in egg white add glow to your skin by reducing the excess oil that worsens the acne.

What You Need To Do:

  • Whisk one egg white and apply it on your face as a mask and leave it until it is dried completely.
  • Rinse your face with warm water and pat dry.

21. Chamomile Tea For Acne:

Chamomile contains excellent anti inflammatory properties which are effective in reducing acne and pimple in an effective way.

What You Need To Do:

  • You can use chamomile tea bags to reduce acne by placing it on the affected area or else apply chamomile tea using cotton swab on the affected area and leave it for few minutes.

22. Use Mint To Clear Up Your Skin:

Mint contains anti inflammatory agent called menthol which is effective in reducing acne and swelling caused by it.

What You Need To Do:

  • Apply mint juice on the affected area and leave it for about 10 minutes.

23. Cinnamon:

Cinnamon is not only a powerful spice that adds flavor to your dishes, it is also powerful in treating skin issues like acne and pimples due to its anti inflammatory and anti bacterial properties.

What You Need To Do:

  • Mix one table spoon of honey with one teaspoon of honey and apply it on the affected area.
  • Let it remain for 15 minutes and wash it off with warm water and pat dry.

24. Use Treat Tree Oil To Treat Acne:

Tea tree essential oil is one of the effective ingredients to treat acne. It unblocks the pores of your skin and reduces bacterial that worsens acne.

What You Need To Do:

  • Mix one part of tea tree oil with 9 parts of water and use this mixture to apply on your acne.

25. Leave It Alone:

Don’t touch your acne or pimples again and again that worsens the condition within short time.

Try to avoid messing with your pimples, even it irritates you. Give some time to heal your skin and be patient until you get results.

How to Use Fenugreek for Face, Acne & Skin Whitening – Face Mask Recipes

fenugreek-for-skin whitening

Fenugreek (methi) seeds are extensively used in treating health ailments and to fix hair fall. Recent researchers state exceptional benefits of fenugreek for skin whitening, acne and to tighten skin.

Apart from reducing cholesterol, preventing diabetes and increasing breast milk, fenugreek seeds and leaves are extensively used in Indian households. Especially North Indians use methi in making of dals, parathas, curries and other dishes.

Exceptional medical properties packed in fenugreek makes it an effective remedy for all skin disorders. High amounts of proteins and vitamins in this herb fights infection causing bacteria and rebuild your dry skin. Below listed are uses of methi for skin.

Stay with me to know uses of methi seeds, before jumping to fenugreek (methi) face mask recipe list.

Is Fenugreek Good for Skin?

Fenugreek seeds are packed with exceptional nutrients that are essential for your sensitive skin.

  • Cleansing ability of fenugreek seeds can remove dead cells, pollutants and lighten your skin.
  • Moisturizing and healing properties of fenugreek seeds can tone your skin and make it supple.
  • Skin whitening abilities exhibited by vitamin C residing in methi seeds can make your skin bright.
  • Strengthen Your Skin& Hair: Thiamine, also known as vitamin B1 is responsible for generating energy from food. With this vitamin you can maintain healthy skin, hair and nails.
  • Treats Chronic Skin Ailments: Vitamin A housed in fenugreek and incorporated in cosmetic products can treat major skin disorders like acne, eczema, psoriasis and blackheads.
  • Exfoliates your skin: Apart from using chemical peels you can use fenugreek seeds to exfoliate your skin.
  • Fasten the Healing Process: Its healing agents treat wounds, sun burns and other minor injuries.
  • Reduce Wrinkles: Antioxidant properties of vitamin C in methi can help you from UV rays and prevent aging wrinkles.
  • Reduce Stretch Marks and Acne Scars: Fenugreek is rich source of vitamin K, various skin care creams and doctors use vitamin K as it helps in blood clotting. Assorted properties in vitamin K helps to treat stretch marks, spider veins, fade scars and reduce dark circles.
  • Other minerals like calcium, magnesium, zinc, selenium and iron residing in fenugreek seeds and leaves helps to treat minor to moderate skin problems.

The brief nutritional benefits of fenugreek conclude that it can topically and internally make the skin free from bacteria and harmful virus.

8 Benefits of Fenugreek Seeds for Face, Acne and Skin Tightening

Benefits that natural ingredients bring to you can’t be listed in numbers, as they’re numerous. Here are notable uses of methi for skin. (I placed number just to attract your eye balls ;))

Below listed are fenugreek (methi) face mask recipes.

#1. Fenugreek for Skin Whitening

Let me clear you that using these home remedies you can improve skin complexion to some extent. Like if your skin is piled with dead cells, dark spots, impurities and scars.

It can’t magically turn a brown or black skin to fair, like they show in cosmetic ads.

However, don’t be upset. Exfoliating, hydrating and healing properties exhibited by this home available ingredient may bring a natural glow on your face.

How to Use:

  • Prepare fenugreek seed powder by grind it.
  • You can store the powder in air tight container for future use.
  • Mix milk with this powder in required quantity and apply it over the face evenly.
  • Allow it to dry naturally and then rinse it off with water.

#2. Fenugreek for Skin Tightening

Accumulated impurities give your skin hard time to breathe and function. Exfoliating makes it easy for your skin to breathe and thwarts infection causing bacteria.

Probiotics, anti-inflammatory and lactic acid ability housed in yogurt help to reduce ailments and make your skin supple.

How to Use:

  • Mix powdered fenugreek seeds with yogurt in equal ratio.
  • Wash your face and massage fenugreek face mask on your skin.
  • Leave it for 15-20 minutes then rinse it off.

This face mask will exfoliate and wipe dead cell from your skin.

#3. Reduce Inflammation

Minor burns, eczema, pimples and other skin disorders are associated with inflammation. Apply fenugreek face mask topically will get rid of inflammation.

How to Use:

  • Grind methi seeds into powder and pour warm water to it.
  • Now apply the mixture over affected part like poultice. You can use clean cloth.
  • In other words, you just need to wrap mixed past in a cloth and apply it over affected part for few minutes.

Related post: Bentonite clay face mask

#4. Fenugreek for Acne

Properties in this herb draw toxins from the skin, so it can easily treat blackheads and enhance elasticity of the skin. Acne is mainly cause due to inflammation, which can be reduced using above mentioned face mask.

Also, fenugreek seeds are packed with anti-inflammatory and antibacterial abilities that can help you to fight acne.

Honey is packed with anti-inflammatory, antimicrobial and healing abilities. Humectant property residing in honey helps to get rid of dry skin.

  • Soak fenugreek seeds overnight.
  • Grind methi seeds with 1 tablespoon of manuka honey till you obtain smooth paste.
  • Wash your face with lukewarm water and apply this paste evenly in circular motion.
  • Rinse it off after 15-20 minutes.

#5. Prevent Dark Spots and Lightens the Skin

Dirt and dead cells along with bacteria accumulate over the skin to form dark spots. Fenugreek face mask wipes out all impurities and tones your skin making it glow naturally.

How to Use:

  • Soak fenugreek seeds as mentioned above and grind it with plain milk.
  • Apply the obtained paste over prewashed face and under eyes.
  • Let it dry naturally and rinse it off after 15 minutes.

Also read: Green tea for blackheads

#6. Protects your Skin from Sun

Prolonged exposure to sun rays makes your skin dark and results in peeling. Vitamin C housed in fenugreek seeds protects your skin from harmful UV rays.

Consuming it shows excellent results in protecting skin from sun rays. Else you can also use the above mentioned fenugreek and honey face mask.

  • Boil ½ cup of fenugreek seeds in 2 cups of water.
  • When the water turns yellowish, stop heating and allow it cool.
  • Refrigerate it and apply it on the face using a cotton ball.

#7. Fenugreek for Wrinkles

As you age, your skin loses its natural elasticity. Apart from aging other external factors results in premature aging wrinkles.

Topical application of such vitamin rich ingredients will enhance collagen production and improve elasticity of your skin.

As it combats with free radicals, fenugreek stands as an excellent innate remedy for aging signs.

  • Mix boiled milk to fenugreek paste, optionally add raw honey and mix thoroughly.
  • Topically apply this face mask over the face and then rinse it off.

Method- 2 (Anti-aging)

  • Take 1 tablespoon of methi seeds and soak it overnight.
  • In the morning, grind these seeds with 1 tbsp of plain yogurt.
  • Add little water if needed.
  • Blend till you obtain smooth paste.
  • Use this paste as a face mask to reduce wrinkles or fine lines.

#8 Methi Face Pack for Oily Skin

  • Take 2 tablespoons of methi seeds and soak it in a cup of water overnight.
  • Drain the water and mash the seeds to obtain smooth paste like consistency.
  • Add aloe gel or vitamin E oil to the methi paste and apply it on prewashed face.
  • Allow it to dry naturally for 15-20 minutes and then rinse it off with normal water.

You can use this simple face mask to brighten your skin.

How to Use Fenugreek Seeds to Nourish the Skin

As you can see fenugreek is naturally stuffed with exceptional nutrients that can nourish the skin and improve your skin tone.

  • Take fenugreek seeds and water in equal quantities.
  • Keep it over stove on simmer.
  • After 10 minutes, collect the strained water in a bowl and let it cool.
  • Now, daily wash your face using this water.

Nutrients in fenugreek transferred to water, which will cleanse and tones your skin.

Fenugreek Face Mask

Renowned properties housed in methi helps to reduce scars and treat acne lesions. Boil washed methi seeds in water for few minutes. Let it cool down and strain the seeds to apply the water over your face using cotton ball.

Alternatively, you can grind methi seeds with little water to form a thick paste like consistency and apply it over prewashed face.

Consumption of Fenugreek Seeds

Ingesting limited amount of methi seeds can treat various health related issues like cancer, reduce joint pains, lower cholesterol, maintain blood sugar level, promote proper digestion and helps to lose weight.

However, excess consumption may trigger inflammation and irritation. Pregnant women must consult their physician before ingesting these seeds.

Tips on Using Fenugreek Seeds for Face

  • To reap its nutrients for beautiful skin, experts recommend topical application.
  • To make it more effective you can blend other natural ingredients with methi seeds powder.
  • Ingredients that irritate your skin must be avoided.
  • Drink enough water and include vitamin rich diet for best results.
  • Chemical incorporated creams are harmful for your sensitive skin, so stop using them.
  • Choose any of the above mentioned recipes and start with small quantity to make sure your skin isn’t allergic to its ingredients.

Skin Whitening Tips With Fenugreek Seeds

  • Choose any one of the face mask recipes listed above.
  • Avoid chemical incorporated creams as they may irritate your sensitive skin.
  • Best time to apply this ingredient is before going to bed.
  • Apart from this, ingest skin lightening and collagen foods.

Image source