How to Get Eyelash Glue Off Without Any Damage

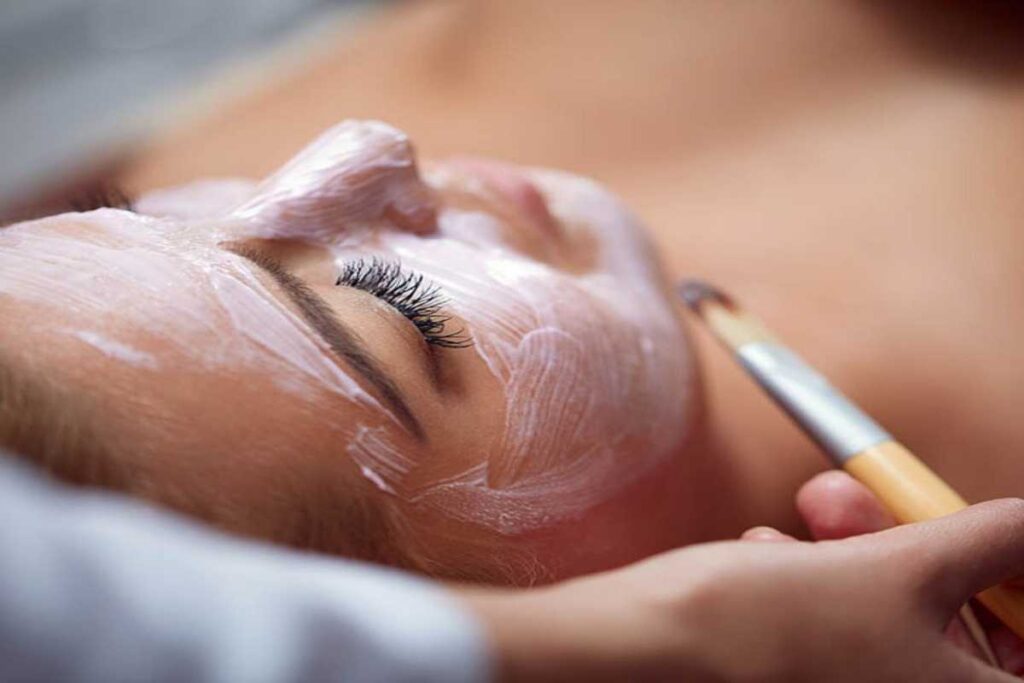
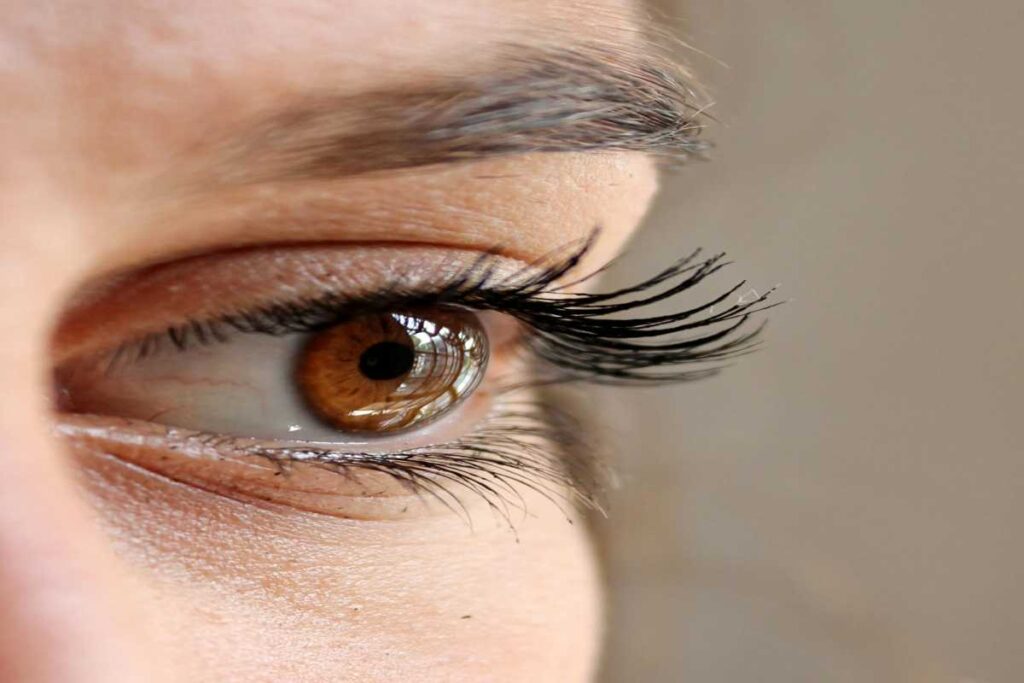
Eyelash extensions or false eyelashes are a fantastic way to enhance the beauty of your eyes, but removing the eyelash glue without causing damage can be tricky. If not done properly, it can lead to irritation, breakage, or damage to your natural lashes and delicate skin around the eyes. Fortunately, there are safe and effective methods to remove eyelash glue without causing harm.

In this blog, we’ll guide you through the best techniques to get eyelash glue off with minimal damage, as well as some essential tips to help protect your natural lashes and skin.


Why Eyelash Glue Removal Needs Caution

Before diving into how to remove eyelash glue, it’s essential to understand why this task requires special attention.

  1. Delicate Skin Around the Eyes: The skin around your eyes is sensitive and thin, making it prone to irritation if exposed to harsh chemicals or excessive rubbing.
  2. Fragile Natural Lashes: Your natural lashes are delicate, and pulling on them aggressively can cause them to break or fall out.
  3. Possible Glue Residue: Even after removing the false lashes, there may still be stubborn glue left on your natural lashes or the eyelid that needs gentle removal.

By using the right techniques and products, you can ensure that your lashes remain intact and your skin stays safe.


Best Ways to Get Eyelash Glue Off Without Damage

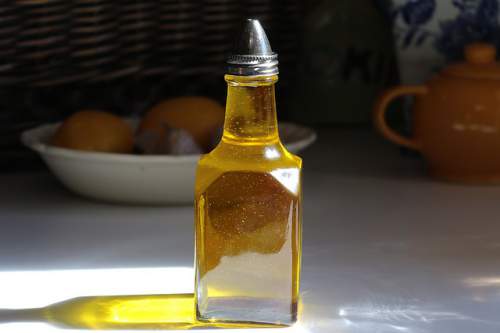
1. Use an Oil-Based Makeup Remover

One of the most effective ways to remove eyelash glue is by using an oil-based makeup remover. Oils are great for dissolving the strong adhesive in eyelash glue while being gentle on both your lashes and skin.

  • How to Use: Pour a small amount of oil-based makeup remover onto a cotton pad or cotton ball. Gently press it onto your closed eyelids, where the glue is, for a few seconds to allow the oil to break down the adhesive. Then, wipe gently in a downward motion to remove the glue. Repeat if necessary.
  • Why It Works: Oil-based removers work by breaking down the bonds of the eyelash glue without irritating the skin. Oils like coconut oil, olive oil, or even baby oil are great options.

2. Coconut Oil

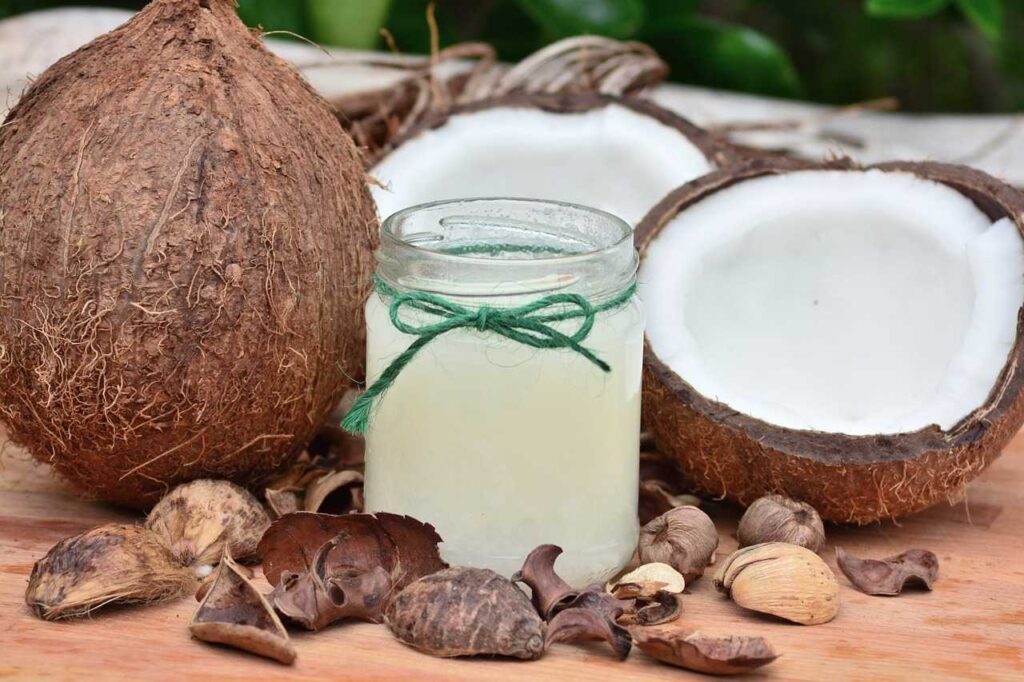
Coconut oil is a popular natural remedy for removing eyelash glue. Not only does it help dissolve the adhesive, but it also nourishes your lashes and the skin around your eyes with its moisturizing properties.

  • How to Use: Warm a small amount of coconut oil in your fingers and gently massage it onto the lash line, focusing on areas where the glue is stuck. Leave it on for 5-10 minutes, then wipe away the oil with a cotton pad or soft cloth. Repeat if needed.
  • Why It Works: Coconut oil contains fatty acids that help break down the adhesive while providing moisturizing benefits to prevent dryness and irritation.

3. Micellar Water

Micellar water is a gentle, water-based solution containing small oil molecules that trap dirt, oil, and makeup, including eyelash glue. It’s ideal for those with sensitive skin around the eyes.

  • How to Use: Soak a cotton pad with micellar water and hold it over your eyelids for about 10 seconds. Then, gently wipe the cotton pad along your lashes to remove the glue. You can repeat this process until the glue is gone.
  • Why It Works: Micellar water is gentle, non-irritating, and perfect for removing stubborn makeup and adhesive without harsh rubbing or chemicals.

4. Baby Oil

Baby oil is another great option for removing eyelash glue without causing irritation. It’s gentle, effective, and ideal for sensitive areas like the eyes.

  • How to Use: Apply a few drops of baby oil to a cotton pad and hold it over your eyelids for a few minutes. Gently rub the cotton pad along your lash line in a downward motion to break down the glue. Wipe away any excess oil with a clean cotton pad.
  • Why It Works: Baby oil is mild and helps to break down the glue without damaging your natural lashes or skin, leaving the area soft and hydrated.

5. A Makeup Remover Gel or Liquid

Specialized eyelash glue removers are available in the form of makeup remover gels or liquids. These products are designed to break down adhesives without causing harm to the skin or lashes.

  • How to Use: Apply a small amount of remover gel or liquid to a cotton swab or cotton pad. Gently apply it to the area with glue and wait for a few seconds for it to dissolve the adhesive. Wipe away the glue gently without rubbing.
  • Why It Works: These products are formulated specifically to dissolve eyelash glue and adhesive without causing irritation or damaging your natural lashes.

6. Steam to Loosen the Glue

Using steam is an effective way to soften the adhesive, making it easier to remove the glue. The warm steam helps break down the bonds of the glue, making it less sticky and easier to remove.

  • How to Use: Boil water and let it cool slightly. Hold your face over a bowl of hot water with a towel over your head to trap the steam. Stay in the steam for a few minutes to help loosen the glue. Then, gently remove the glue using a cotton pad with a makeup remover or oil.
  • Why It Works: Steam opens up your pores and softens the glue, allowing you to remove it without pulling or causing damage to your lashes.

7. Avoid Rubbing or Pulling on Your Lashes

Regardless of the method you choose, it’s important to avoid aggressively rubbing or pulling on your lashes. This can cause your natural lashes to fall out or break. Always be gentle when handling your eyelids and lashes, especially when removing glue.

  • Why It Works: Your lashes are delicate, and applying too much pressure can weaken them. Gentle, slow movements will help preserve the integrity of your natural lashes and skin.

Tips for Preventing Eyelash Glue Build-Up

While removing eyelash glue can be easy with the right products, preventing glue buildup is just as important. Here are a few tips to help minimize the amount of glue residue left on your lashes:

  1. Cleanse Regularly: Make sure to cleanse your eyes thoroughly after wearing false lashes. Use a gentle, non-oily cleanser to remove any excess glue and makeup.
  2. Use Lash Extensions Carefully: If you’re using eyelash extensions, have them professionally applied and removed to prevent damage to your natural lashes.
  3. Avoid Excessive Glue: Use only the amount of glue needed for applying false lashes. Excessive glue can create residue and make removal more difficult.
  4. Keep Lashes in Good Condition: Take care of your false lashes by cleaning them regularly. This will prevent glue buildup on the lashes themselves, making removal easier the next time.

Conclusion: Removing Eyelash Glue Safely

Getting eyelash glue off without causing damage is a simple process when you use the right products and techniques. Whether you prefer natural remedies like coconut oil or micellar water or opt for a specialized eyelash glue remover, the key is to be gentle with your delicate skin and natural lashes. By following these methods, you can ensure your lashes stay healthy, your skin remains irritation-free, and your beauty routine stays hassle-free.

Remember, always remove glue with care and take preventative measures to avoid buildup, keeping your eyes and lashes looking beautiful and intact.

Type 1B Hair: Pros, Cons, Care Tips, and Best Hairstyles

Type 1B hair is characterized by its straight yet slightly bouncy texture. It’s not as fine as 1A hair but lacks the full wave or curl seen in other hair types. This versatile hair type is often easy to manage and style, but like all hair types, it comes with its unique set of challenges. Here’s everything you need to know about type 1B hair, including its pros and cons, care tips, and ideal hairstyles.


What is Type 1B Hair?

Type 1B hair is straight with a bit of volume and body, making it less flat than type 1A.

  • Texture: Medium thickness with a smooth finish.
  • Appearance: Straight with minimal bends, often shiny and easy to brush through.

Pros and Cons of Type 1B Hair

Pros:

  1. Low Maintenance: Requires less effort to detangle and style compared to curly or wavy hair types.
  2. Versatile: Works well with a wide range of hairstyles, from sleek ponytails to voluminous waves.
  3. Naturally Shiny: The straight texture reflects light, giving it a naturally glossy appearance.
  4. Resilient: Less prone to frizz compared to wavy or curly hair.

Cons:

  1. Flat Roots: Can sometimes lack volume at the crown, leading to a “flat” appearance.
  2. Oiliness: The straight texture allows natural oils to travel down the shaft quickly, making it prone to greasiness.
  3. Heat Damage Risk: Being naturally straight, it’s often subjected to styling tools that can lead to damage over time.
  4. Limited Texture: Without styling, the hair may appear too straight for those seeking variety.

How to Take Care of Type 1B Hair

1. Wash Regularly but Mindfully

  • Why? Type 1B hair can become oily quickly, so washing every 2–3 days is recommended.
  • Use a mild, sulfate-free shampoo to cleanse without stripping natural oils.

2. Condition Strategically

  • Focus conditioner on the mid-lengths and ends to avoid weighing down the roots.
  • Opt for lightweight, volumizing conditioners to maintain body.

3. Avoid Overloading Products

  • Heavy products can make 1B hair look greasy and limp. Stick to lightweight serums or sprays.
  • Dry shampoo is your best friend to extend time between washes and add volume.

4. Protect Against Heat Damage

  • Apply a heat protectant before using flat irons, curling wands, or blow dryers.
  • Use heat styling tools sparingly to preserve the natural health of your hair.

5. Incorporate Scalp Care

  • Regularly cleanse your scalp to prevent oil buildup, which can weigh down the hair.
  • Use a clarifying shampoo once a month to remove product buildup.

6. Add Volume

  • Use volumizing mousse or sprays at the roots before blow-drying.
  • Blow-dry upside down to naturally lift the roots and add body.

Hairstyles for Type 1B Hair

1. Sleek and Straight

  • Showcase the natural shine and smoothness of your hair with a classic straight look.
  • Use a flat iron for a polished finish, but don’t overdo it to avoid damage.

2. Messy Waves

  • Add soft waves with a curling wand for a textured, beachy vibe.
  • Use a texturizing spray to enhance the look without weighing the hair down.

3. Voluminous Ponytail

  • Create a high ponytail and tease the roots for added volume.
  • Secure with a silk scrunchie to avoid breakage.

4. Half-Up Half-Down

  • Perfect for showcasing your hair’s length while keeping it out of your face.
  • Add a small braid or twist for an elegant touch.

5. Layered Cuts

  • Layers add movement and texture to type 1B hair, preventing it from looking flat.
  • Pair with face-framing layers for a soft, flattering look.

6. Braided Styles

  • Simple braids like fishtails or French braids can enhance the natural beauty of type 1B hair while being practical.

Conclusion

Type 1B hair is a beautiful balance between straight and slightly textured. While it’s easy to manage, understanding its unique needs can help you keep it looking its best. From regular washing routines to adding volume-enhancing products, small changes can make a big difference. With the right care, type 1B hair can easily transform into any style you desire, making it a versatile and low-maintenance choice for many.

12 Tips for Maintaining Long Hair – A Definitive Guide

Long, luscious locks are often associated with beauty, elegance, and health. However, maintaining long hair requires more than just letting it grow—it involves consistent care and attention to ensure it remains strong, healthy, and free from damage. Whether you’re growing your hair out or already flaunting long tresses, here’s a comprehensive guide with 12 essential tips to help you keep your hair in its best condition.

1. Trim Regularly to Avoid Split Ends

Split ends are one of the most common challenges for long hair. Regular trims help keep your hair looking fresh and prevent the damage from traveling up the hair shaft.

  • How often? Every 6–8 weeks is ideal, but if you notice more split ends, consider trimming sooner.
  • Trimming doesn’t hinder growth—it promotes healthier hair by removing damaged ends.

2. Use a Mild Shampoo

Shampoos with harsh chemicals can strip your hair of its natural oils, leaving it dry and prone to breakage. Opt for a sulfate-free shampoo that cleanses gently while maintaining your hair’s moisture balance.

  • Washing frequency: 2–3 times a week is enough for most hair types.
  • Overwashing can dry out your scalp, leading to brittle strands. For oily scalps, use a lightweight shampoo that doesn’t weigh your hair down.

3. Condition Deeply and Consistently

Conditioner is essential for long hair as it hydrates, smooths, and detangles. Pay extra attention to the ends, as they are older and more prone to dryness.

  • Use a deep-conditioning treatment or hair mask once a week for added moisture and repair.
  • Look for products with natural oils, keratin, or proteins to strengthen your hair.

4. Detangle with Care

Long hair is prone to tangling, and improper detangling can lead to breakage.

  • Use a wide-toothed comb or a detangling brush, starting at the tips and working your way up to the roots.
  • Avoid brushing wet hair, as it is more fragile. If necessary, use a comb with conditioner applied for extra slip.

5. Limit Heat Styling

Excessive use of heat tools like straighteners, curling irons, and blow dryers can cause long-term damage to your hair.

  • If you must use heat, always apply a heat protectant spray to minimize damage.
  • Let your hair air-dry whenever possible, or use the cool setting on your dryer.

6. Choose Protective Hairstyles

Wearing your hair down all the time can lead to tangles and friction damage. Protective hairstyles help prevent breakage and keep your hair safe from daily wear and tear.

  • Loose braids, buns, or ponytails are great options.
  • Avoid overly tight hairstyles that can pull on your scalp and cause tension or hair loss over time.

7. Sleep Smartly

Friction while you sleep can lead to tangles and breakage. Switching to hair-friendly materials can make a big difference.

  • Use a silk or satin pillowcase to reduce friction and keep your hair smooth.
  • Protect your hair by braiding it loosely or wrapping it in a silk scarf before bed.

8. Hydrate from Within

Healthy hair starts from the inside, and hydration plays a crucial role.

  • Drink at least 8 glasses of water daily to keep your scalp and hair hydrated.
  • Incorporate water-rich foods like cucumbers, oranges, and melons into your diet for added benefits.

9. Eat a Balanced Diet

Your hair reflects what you eat. A diet rich in nutrients is essential for maintaining long, healthy hair.

  • Protein: Hair is primarily made of keratin, a protein, so ensure your diet includes eggs, fish, chicken, and legumes.
  • Vitamins and Minerals: Biotin, zinc, iron, and omega-3 fatty acids promote hair growth and prevent thinning.

10. Avoid Overwashing Your Hair

Washing your hair too frequently can strip it of its natural oils, leading to dryness and damage.

  • For those with oily scalps, use dry shampoo between washes to refresh your hair.
  • If your scalp tends to be dry, stretch your wash days and focus on conditioning instead.

11. Protect Against Environmental Damage

Environmental factors like sun exposure, pollution, and chlorine from swimming pools can weaken your hair.

  • Wear hats or scarves when outdoors to shield your hair from UV rays.
  • Rinse your hair with clean water before swimming to reduce the absorption of chlorinated water. After swimming, wash and condition your hair immediately.

12. Massage Your Scalp Regularly

Scalp massages are not just relaxing—they stimulate blood circulation, which can promote healthy hair growth.

  • Use natural oils like coconut, argan, or castor oil for added nourishment.
  • Massage your scalp in circular motions for 5–10 minutes, 2–3 times a week.

Bonus Tips for Ultimate Hair Care

  • Switch to gentle hair ties: Avoid elastic bands that can snag or break your hair.
  • Use lukewarm water: Hot water can strip oils from your scalp; opt for lukewarm or cool water instead.
  • Avoid chemical treatments: Minimize exposure to harsh chemicals like bleach or relaxers that weaken the hair.

Conclusion

Caring for long hair is a commitment, but the results are worth the effort. By following these 12 tips, you can maintain your hair’s health, shine, and length for years to come. Whether it’s through proper hydration, mindful detangling, or a nourishing diet, your long locks will thank you for the extra care. Remember, healthy hair grows from healthy habits!

11 Must-Try Easy Homemade Pomegranate Face Packs

Pomegranates are not just delicious and nutritious; they also offer a wealth of benefits for the skin. Rich in antioxidants, vitamins, and minerals, pomegranates can help improve skin texture, promote a healthy glow, and combat signs of aging. Creating homemade face packs using pomegranate is an excellent way to harness its natural properties for skincare. In this blog, we’ll explore 11 must-try easy homemade pomegranate face packs that can rejuvenate your skin and enhance your beauty routine.


1. Pomegranate and Honey Face Pack

Benefits: Honey is known for its moisturizing properties and ability to soothe the skin, while pomegranate provides antioxidants that help protect and nourish.

Ingredients:

  • 1 tablespoon of pomegranate juice
  • 1 tablespoon of honey

Instructions:

  1. Mix the pomegranate juice and honey in a bowl.
  2. Apply the mixture to your face and neck, avoiding the eye area.
  3. Leave it on for 15-20 minutes and rinse with warm water.

2. Pomegranate and Yogurt Face Pack

Benefits: Yogurt contains lactic acid, which gently exfoliates the skin and helps to brighten the complexion. Together with pomegranate, this pack revitalizes dull skin.

Ingredients:

  • 2 tablespoons of pomegranate juice
  • 2 tablespoons of plain yogurt

Instructions:

  1. Combine the pomegranate juice and yogurt in a bowl.
  2. Apply to clean skin and let it sit for 20 minutes.
  3. Rinse off with lukewarm water for a fresh glow.

3. Pomegranate and Oatmeal Face Pack

Benefits: Oatmeal acts as a gentle exfoliant and helps absorb excess oil, making this pack suitable for oily and combination skin.

Ingredients:

  • 1 tablespoon of pomegranate juice
  • 2 tablespoons of ground oatmeal

Instructions:

  1. Mix the pomegranate juice with ground oatmeal to form a paste.
  2. Apply it evenly on your face and massage gently for a few minutes.
  3. Leave it on for 10-15 minutes and rinse with warm water.

4. Pomegranate and Aloe Vera Face Pack

Benefits: Aloe vera is renowned for its soothing and hydrating properties, making this combination perfect for calming irritated skin.

Ingredients:

  • 2 tablespoons of pomegranate juice
  • 2 tablespoons of fresh aloe vera gel

Instructions:

  1. Blend the pomegranate juice with aloe vera gel.
  2. Apply the mixture to your face and leave it on for 20-30 minutes.
  3. Rinse with cool water to refresh your skin.

5. Pomegranate and Turmeric Face Pack

Benefits: Turmeric has anti-inflammatory and antibacterial properties, making this face pack great for reducing acne and blemishes.

Ingredients:

  • 1 tablespoon of pomegranate juice
  • ½ teaspoon of turmeric powder

Instructions:

  1. Mix the pomegranate juice and turmeric powder until well combined.
  2. Apply to affected areas or the entire face, avoiding sensitive areas.
  3. Leave it on for 15 minutes and wash off with lukewarm water.

6. Pomegranate and Banana Face Pack

Benefits: Banana is rich in vitamins and minerals that hydrate and nourish the skin, while pomegranate enhances its antioxidant properties.

Ingredients:

  • 1 ripe banana
  • 1 tablespoon of pomegranate juice

Instructions:

  1. Mash the banana in a bowl and mix in the pomegranate juice.
  2. Apply the paste to your face and neck.
  3. Leave it on for 20 minutes, then rinse with warm water.

7. Pomegranate and Coconut Oil Face Pack

Benefits: Coconut oil is deeply moisturizing and can help improve skin texture. This pack is excellent for dry or mature skin.

Ingredients:

  • 1 tablespoon of pomegranate juice
  • 1 tablespoon of coconut oil

Instructions:

  1. Combine the pomegranate juice and melted coconut oil.
  2. Massage the mixture onto your face and neck.
  3. Allow it to sit for 15-20 minutes, then wash off with a mild cleanser.

8. Pomegranate and Green Tea Face Pack

Benefits: Green tea is loaded with antioxidants that protect the skin from damage. This pack can help reduce puffiness and improve skin tone.

Ingredients:

  • 1 tablespoon of pomegranate juice
  • 1 tablespoon of brewed green tea (cooled)

Instructions:

  1. Mix the pomegranate juice with cooled green tea.
  2. Apply to your face using a cotton pad or your fingers.
  3. Leave it on for 20 minutes before rinsing with cool water.

9. Pomegranate and Sandalwood Face Pack

Benefits: Sandalwood has calming properties and helps brighten the skin. This pack is ideal for treating blemishes and uneven skin tone.

Ingredients:

  • 1 tablespoon of pomegranate juice
  • 1 tablespoon of sandalwood powder
  • Water (as needed)

Instructions:

  1. Combine the pomegranate juice and sandalwood powder, adding water to achieve a paste consistency.
  2. Apply the mixture to your face and neck.
  3. Leave it on for 20-30 minutes, then wash off with lukewarm water.

10. Pomegranate and Milk Face Pack

Benefits: Milk contains lactic acid, which helps to exfoliate and brighten the skin, making it softer and smoother.

Ingredients:

  • 2 tablespoons of pomegranate juice
  • 2 tablespoons of milk

Instructions:

  1. Mix the pomegranate juice and milk in a bowl.
  2. Apply to your face and let it sit for 20 minutes.
  3. Rinse with warm water for a refreshed appearance.

11. Pomegranate and Essential Oils Face Pack

Benefits: Essential oils, such as lavender or tea tree, can enhance the benefits of pomegranate by providing additional hydration and antibacterial properties.

Ingredients:

  • 1 tablespoon of pomegranate juice
  • 1 drop of essential oil (lavender or tea tree)

Instructions:

  1. Combine the pomegranate juice with your chosen essential oil.
  2. Apply to your face, avoiding the eye area.
  3. Leave it on for 15 minutes and rinse thoroughly.

Conclusion

Incorporating these 11 easy homemade pomegranate face packs into your skincare routine can provide your skin with the nourishment and hydration it craves. The natural properties of pomegranate, combined with other beneficial ingredients, can help you achieve a healthier, glowing complexion.

Always perform a patch test before trying new face packs, especially if you have sensitive skin. With consistency and the right ingredients, you can enjoy the numerous benefits of pomegranate and enhance your beauty regimen naturally. Start experimenting with these face packs today and embrace the power of nature for beautiful skin!

How to Make Pore Strips at Home

1. Why Choose Homemade Pore Strips?

Benefits of Homemade Pore Strips

  • Natural Ingredients: Avoid harsh chemicals found in many commercial products.
  • Cost-Effective: Save money by using items you likely already have at home.
  • Customizable: Tailor the recipe to your skin type, whether oily, dry, or sensitive.

2. What You’ll Need

Ingredients

  • Unflavored Gelatin: Acts as the main ingredient to help the strips adhere to your skin.
  • Milk: Helps to nourish the skin and improve the adhesion of the gelatin.
  • Optional: Honey for its antibacterial properties or tea tree oil for acne-fighting benefits.

Tools

  • A small bowl
  • A spoon for mixing
  • A microwave-safe container
  • A brush or spatula for application

3. Step-by-Step Instructions

Creating Your Pore Strip Mixture

  1. Combine Ingredients: In a small bowl, mix 1 tablespoon of unflavored gelatin with 2 tablespoons of milk. If using, add 1 teaspoon of honey or a few drops of tea tree oil.
  2. Mix Well: Stir the mixture until the gelatin is fully dissolved and the ingredients are well combined.
  3. Heat the Mixture: Microwave the bowl for about 10-15 seconds. The mixture should be warm but not boiling. Stir again to ensure everything is well blended.

4. How to Apply the Pore Strips

Preparing Your Skin

  • Cleanse Your Face: Start with a clean face by washing with a gentle cleanser to remove dirt, makeup, and oils.
  • Open Your Pores: For best results, you can steam your face for a few minutes or apply a warm, damp towel to open your pores.

Applying the Mixture

  1. Apply Evenly: Using a brush or spatula, apply a thin layer of the gelatin mixture to the areas you want to treat, typically the nose, forehead, or chin.
  2. Let It Dry: Allow the mixture to dry completely, which usually takes about 15-20 minutes. You’ll know it’s ready when it feels firm and no longer sticky.

5. Removing the Pore Strips

How to Take Off the Strips

  1. Peel Gently: Start at one edge and slowly peel the strip away from your skin. Pull gently to minimize discomfort.
  2. Rinse: After removal, rinse your face with cool water to remove any leftover residue and soothe your skin.

6. Post-Application Care

Moisturize

  • After using pore strips, it’s essential to apply a moisturizer to keep your skin hydrated and balanced.

7. Frequency of Use

How Often to Use

  • Limit the use of homemade pore strips to once a week to avoid irritating your skin. Overuse can lead to dryness or redness.

8. Store Leftover Mixture

How to Store

  • If you have leftover mixture, you can store it in an airtight container in the refrigerator for up to a week. Reheat in the microwave before use.

Conclusion

Creating your own pore strips at home is a simple, fun, and effective way to tackle blackheads and maintain clear skin. By using natural ingredients, you can avoid the harsh chemicals found in many store-bought options. With just a few ingredients and some easy steps, you’ll have your very own DIY pore strips ready to use. Enjoy your clearer, healthier skin!

8 Effective Thai Beauty Secrets Revealed

Thai beauty secrets are steeped in centuries of tradition and holistic practices that promote natural beauty and well-being. With a rich cultural heritage that emphasizes harmony with nature, Thai women have developed effective beauty rituals that harness the power of natural ingredients. Here are eight effective Thai beauty secrets that can help you enhance your beauty regimen.

1. Herbal Face Masks

Benefits: Herbal face masks are a staple in Thai beauty routines, known for their ability to nourish and rejuvenate the skin.

How to Use: Common ingredients include turmeric, tamarind, and rice flour.

  • Turmeric Mask: Mix turmeric powder with yogurt or honey to create a paste. Apply to your face for 15-20 minutes before rinsing with warm water. This mask helps brighten the skin and reduce inflammation.
  • Tamarind Mask: Soak tamarind in warm water, mash it, and apply it to your face. This helps exfoliate dead skin cells and improve skin texture.

2. Coconut Oil

Benefits: Coconut oil is revered for its moisturizing properties and is used in many Thai beauty treatments.

How to Use:

  • Moisturizer: Apply a small amount of virgin coconut oil to your skin after bathing to lock in moisture.
  • Hair Treatment: For dry hair, massage warm coconut oil into your scalp and hair, leave it on for an hour, and then wash it out with shampoo for deep conditioning.

3. Rice Water Rinse

Benefits: Rice water is rich in vitamins and minerals that nourish the skin and hair, making it a popular beauty treatment in Thailand.

How to Use:

  • Facial Toner: After rinsing rice for cooking, save the water. Allow it to ferment overnight and then use it as a facial toner to tighten pores and brighten the complexion.
  • Hair Rinse: Use rice water as a final rinse after shampooing to strengthen hair, improve shine, and promote hair growth.

4. Lemongrass for Skin Refreshing

Benefits: Lemongrass is not only a flavorful herb in Thai cuisine but also an effective skin refresher.

How to Use:

  • Lemongrass Mist: Boil lemongrass in water and let it cool. Pour the infused water into a spray bottle and use it as a facial mist to hydrate and refresh your skin throughout the day.
  • Soothe Skin: The anti-inflammatory properties of lemongrass can also help soothe irritated skin and reduce redness.

5. Aloe Vera Gel

Benefits: Aloe vera is well-known for its soothing and healing properties, making it a common ingredient in Thai beauty rituals.

How to Use:

  • Sunburn Relief: Apply fresh aloe vera gel directly to sunburned skin for immediate relief and hydration.
  • Moisturizing Face Mask: Blend aloe vera gel with honey and apply it as a mask to hydrate and nourish the skin.

6. Jasmine Rice Scrub

Benefits: Jasmine rice is a staple in Thai cuisine and also offers exfoliating benefits for the skin.

How to Use:

  • Exfoliating Scrub: Grind jasmine rice into a fine powder, mix it with honey or yogurt to form a paste, and gently scrub your face in circular motions. This helps remove dead skin cells, leaving your skin soft and smooth.

7. Papaya for Brightening

Benefits: Papaya contains enzymes that exfoliate and brighten the skin.

How to Use:

  • Papaya Face Mask: Mash ripe papaya and mix it with honey. Apply to your face for 15-20 minutes before rinsing off. This mask helps to even skin tone and improve radiance.

8. Regular Massage

Benefits: Traditional Thai massage promotes relaxation, improves circulation, and enhances skin elasticity.

How to Use:

  • Facial Massage: Incorporate a gentle facial massage using your favorite oil or moisturizer. Focus on areas that tend to hold tension, such as the jawline and forehead. Regular massage can improve blood flow and promote a healthy glow.

Conclusion

These eight Thai beauty secrets emphasize the importance of natural ingredients and holistic practices in enhancing beauty. By incorporating these time-tested rituals into your beauty routine, you can achieve healthier skin and hair while also embracing the rich cultural heritage of Thailand. Remember that consistency is key, and it’s essential to choose ingredients that suit your skin type for the best results.

Feel free to share your experiences or any other beauty secrets you’ve discovered along the way!

How to Do a Fruit Facial at Home – A Complete Guide

Fruit facials are a delightful way to rejuvenate your skin using natural ingredients packed with vitamins, minerals, and antioxidants. They are gentle, effective, and suitable for all skin types. This complete guide will walk you through the benefits of fruit facials, how to prepare for one, and detailed steps to do a fruit facial at home.

Benefits of Fruit Facials

  1. Natural Ingredients: Fruit facials use fresh fruits that are rich in vitamins and minerals, providing your skin with essential nutrients.
  2. Hydration: Many fruits have high water content, which helps to hydrate the skin and improve its elasticity.
  3. Exfoliation: Fruits like papaya and pineapple contain natural enzymes that gently exfoliate dead skin cells, revealing a brighter complexion.
  4. Brightening: Regular fruit facials can help even out skin tone and reduce pigmentation, leading to a radiant appearance.
  5. Anti-Aging Properties: Antioxidants present in fruits combat free radicals, reducing signs of aging such as wrinkles and fine lines.

What You’ll Need

Ingredients:

  • Choose your fruits based on your skin type:
    • For Oily Skin: Papaya, lemon, watermelon
    • For Dry Skin: Banana, avocado, cucumber
    • For Normal Skin: Strawberry, apple, peach
    • For Combination Skin: A mix of the above fruits

Additional Ingredients (optional):

  • Honey: For added moisture and antibacterial properties
  • Yogurt: For a soothing effect and additional hydration
  • Oats: As a gentle exfoliant

Tools:

  • A mixing bowl
  • A blender (if needed)
  • A clean towel
  • A facial brush or clean fingers for application
  • A headband to keep hair away from your face

Preparation Steps

  1. Cleanse Your Face: Begin by thoroughly cleansing your face to remove makeup, dirt, and excess oil. Use a gentle cleanser suitable for your skin type.
  2. Steam Your Face: Optionally, steaming your face for 5-10 minutes helps open up the pores, making it easier for the nutrients from the fruits to penetrate your skin.
  3. Gather Your Ingredients: Select the fruits you want to use based on your skin type and cut them into small pieces.
  4. Prepare Your Fruit Mixture: Depending on the fruit you choose, you may want to mash, blend, or puree the fruits to create a smooth paste.

Step-by-Step Fruit Facial Process

Step 1: Exfoliation

  • Ingredients: Oats (optional) + Fruit pulp
  • Procedure: If using oats, mix a tablespoon of finely ground oats with your fruit pulp. Apply this mixture gently to your face in circular motions for 2-3 minutes. This step helps to remove dead skin cells and prepares your skin for the next steps.

Step 2: Facial Mask

  • Ingredients: Fruit pulp (and optional honey or yogurt)
  • Procedure:
    1. Apply the fruit mixture evenly over your face, avoiding the eye area.
    2. If desired, mix in a teaspoon of honey for extra hydration or yogurt for a soothing effect.
    3. Leave the mask on for 15-20 minutes. Use this time to relax.

Step 3: Rinse Off

  • Procedure: After the time is up, rinse your face with lukewarm water to remove the mask. Make sure to thoroughly wash off all residues. Follow with a splash of cold water to close your pores.

Step 4: Moisturize

  • Procedure: Pat your face dry with a clean towel and apply your favorite moisturizer. This will lock in hydration and keep your skin feeling soft and supple.

Step 5: Aftercare

  • Routine: Avoid direct sunlight for a few hours after the facial, as your skin may be more sensitive. Apply sunscreen if you plan to go outside.

Tips for the Best Results

  1. Use Fresh Fruits: Always opt for fresh, ripe fruits for the best nutrients and results.
  2. Patch Test: Before applying any fruit mixture, do a patch test on a small area of your skin to check for any allergic reactions.
  3. Stay Consistent: For optimal results, incorporate fruit facials into your skincare routine 1-2 times a week.
  4. Hydrate: Drink plenty of water before and after the facial to keep your skin hydrated from the inside out.

Conclusion

A fruit facial at home is an enjoyable and effective way to pamper your skin using natural ingredients. With just a few simple steps and easily available fruits, you can achieve a healthy, glowing complexion. Remember to tailor your fruit choices and techniques to suit your skin type for the best results. Treat yourself to this refreshing experience, and embrace the beauty of nature!

How to Use Olive Oil to Remove Makeup?

Removing off the makeup might still be one of the most challenging tasks you face every day, especially if you’ve already nodded off and can hardly hold your eyes open.

Picking the right makeup cleanser is even more difficult, particularly if you have delicate skin. And, if you run out of makeup cleanser, don’t panic because we’re about to teach you a home item that can easily replace regular makeup remover.

You can use olive oil to remove makeup. It also offers a variety of advantages for your eyes and skin. It may appear strange to wash your skin with oil, given that oil is usually the thing you are working to remove off your face.

But olive oil can be helpful in this process. Because of its greasy qualities, this natural oil has an immediate impact when used for a makeup remover, allowing you to eliminate the most resistant makeup, such as mascara and eyeliner.

But what makes olive oil unique is that it is not just an excellent makeup cleanser, but it is a fantastic moisturizer for the skin around the eyes. Yes, and this can make your entire skin glow.

Is olive oil beneficial to the skin?

Despite its alarming pore-clogging tendency, olive oil has several advantages:

It’s typically abundant with squalene, an oil that resembles your skin’s normal sebum, this it’ll make your skin exceptionally smooth and silky, and it’s additionally high in antioxidants, which function intensely to protect your skin from environmental harm.

Below are the different advantages of using olive oil. Read this post to find out incredible facts about the use of olive oil and methods to remove your makeup successfully.

What is the process of oil cleansing?

“Like dissolves like,” as we all know from chemistry class. As a result, substances will absorb other elements with identical chemical structures.

Given that oils and heavy lubricants are frequently used in cosmetics, it stands to reason why olive oil can remove greasy makeup.

Beauty chemists who manufacture oil-based makeup cleansers and wipes employ the principle of identical components dissolving in one another.

Many liquid cosmetic removers contain pure oil, while lotions blend with liquid, thickening agents, and emulsifiers.

Nevertheless, specific cosmetic cleansers aren’t particularly good at removing makeup due to the water-based elements.

They are therefore designed to eliminate exterior dirt and grease. As a result, the gentler a cleaner is, the less capable it is of removing heavy oils and grease.

Olive Oil’s Skin Advantages

Olive oil has many skin advantages, from hydrating dry spots to dissolving stubborn foundations. Below are a few advantages of olive oil –

  • Keeps moisture from drying up:

The significant advantage of olive oil is that it moisturizes the skin by decreasing moisture loss. This moisturization boosts the skin’s moisture contents, which improves its health and beauty.

  • Defends against pollution problems:

The antioxidant qualities of olive oil preserve skin cells from environmental stress and inflammation.

This implies that you’ll be protected against fine lines and wrinkles as well as discomfort or redness.

  • Defends against premature aging:

Olive oil has a high concentration of vitamins A, D, K, & E and squalene. These can help reduce oxidative strain on the skin (which can result in premature skin aging).

  • Makeup lifter:

Olive oil is excellent for dissolving waxy things such as water-resistant eyeliner and mascara. It hydrates the sensitive skin around the eyes and strengthens eyelashes in the same manner as conditioners do for hair. It also contains antioxidants and moisturizing squalene.

How do you clean makeup with olive oil?

You’ll require olive oil, absorbent tissues, and cotton wipes to eliminate makeup utilizing olive oil. There are two ways to dissolve makeup with olive oil.

You may apply the oil to a cotton ball and wipe the makeup with it, or you could take olive oil in your hand and work it into your skin to dissolve the makeup.

After using either procedure, you must use an absorbent tissue to remove the remaining oil from your face and afterward wash it.

Remember: Before using olive oil on your skin, perform a patch test.

Is olive oil eye makeup remover?

Olive oil is an excellent product for removing resistant makeup, like mascara or sparkly eyeshadow. Apply a few droplets of olive oil into a cotton ball and apply the dab on the eye to wipe makeup.

Lightly massage it on the eyes to dissolve thick makeup. When you sense your makeup has fully dissolved, rub the cotton pad in circular movements over the eye.

The mascara from the eyes would be transferred to the cotton pad using circular movements. Do this process for both the eyes.

If there are any mascara leftovers on the eyelashes, take a clean cotton ball, dab a little oil on it, and lightly massage it until these chunks of mascara dissolve and fall off the eyelids.

Should you use Extra virgin olive oil makeup remover?

Most cosmetics, including moisturizers, concealer, eyeliner, eyeshadow, and mascara, are composed of thick waxes and oils.

Extra virgin olive oil will quickly remove the base, eye shadow, eyeliner, lipstick, and other cosmetics since it has an identical chemical composition to the lubricants and oils used in cosmetics. In reality, the majority of commercial makeup cleaners are oil-based.

Because extra virgin olive oil is an organic item, it is free of the colors, aromas, emulsifying agents, thickening agents, and other ingredients found in industrial makeup removers.

It is also non-comedogenic, which ensures it will not clog skin pores. Olive oil is very affordable; odds are you probably have it in your home, but if not, you could buy up a massive quantity at the supermarket that would last a long time.

Just dab a tiny quantity of extra virgin oil with your fingers and lightly massage this over your face and eyes to eliminate makeup.

After removing your makeup, your face may retain a tiny greasy behind. To remove it, wash it using lukewarm water, then dry it with a light, clean cloth.

Here are various applications for olive oil on the skin.

Other than removing makeup, olive oil has different advantages as well. We have come up with the most accessible and most valuable benefits of extra virgin olive oil –

  • Hand lotion

When you are cooking, put a few oil droplets in your palms. You will not have to stress about putting bad-tasting moisturizer in your meals, and you shouldn’t have to keep a container of moisturizer in your kitchen.

  • Babies’ moisturizer

You may apply olive oil to the baby’s skin. Olive oil is sometimes used as baby oil and can assist with dryness, eczema, or cradle cap.

You don’t have to fear your kid consuming olive oil as they continually put their fingers into their mouths. It’s beneficial to them!

Olive oil has also been used to clean the bottoms of newborns. If your infant is sensitive to diaper rashes, consider using a towel and a combination containing olive oil & water rather than diaper wipes.

  • Remedy for hair

Nourish your scalp with olive oil to prevent breakage and frizz. Fill a glass bottle halfway with ½ cup olive oil. Pour a bowl halfway with boiling water and submerge the container in it for 5 minutes. Check the oil’s heat.

It ought to be warm but not heated. Secure your hair with plastic paper or a plastic bath cover after applying the oil. Then drape a cloth or a hair wrap over yourself. Set aside for 20-45 minutes. Rinse and dry your hair to uncover shiny locks!

Warnings and Recommendations

The elements recommended above are not meant for every skin type. These components are suitable for people with normal skin.

When dry patches, wipe your makeup using a 1:3 proportion of castor oil with extra virgin olive oil.

On the face, olive oil can create a greasy layer. If you have oily skin and lids, you might notice that the use of olive oil daily can make your skin sticky and might result in additional breakouts.

Olive oil cosmetic remover isn’t suitable for all types of makeup. Applying olive oil to eliminate waterproof face makeup might be more difficult. In that instance, excessive straining might cause fine lines and wrinkles, particularly around the eyes.

Conclusion

Finally, we recommend a patch test on your skin before applying it to your skin. If you face any issues or skin irritation, kindly do not continue using olive oil to remove makeup. Otherwise, if you have normal skin and benefit from olive oil, use them.

Instead of using expensive makeup remover from the market, reap the benefits of olive oil to remove mascara, eye makeup, foundation, and everything else.

This will benefit your skin in the long term. As mentioned above, the use of olive oil will keep the glow on your face. As you can use olive oil eye makeup remover, it can help you with the skin around the eyes too. Overall the benefits are enormous.