4 Steps to Curl Fine Hair at Home Like a Pro + Safety Tips

Curling fine hair can be tricky since it’s more prone to damage and doesn’t always hold curls as well as thicker hair types. However, with the right techniques and tools, you can achieve bouncy, long-lasting curls without compromising the health of your hair. In this guide, we’ll take you through four simple steps to curl fine hair at home, along with essential safety tips to ensure your curls look perfect and your hair stays healthy.


Step 1: Start with Clean, Dry Hair

Before you curl your hair, it’s essential to start with clean and dry hair. This ensures that your curls hold longer and don’t get weighed down by oil or styling products.

How to Prepare Your Hair:

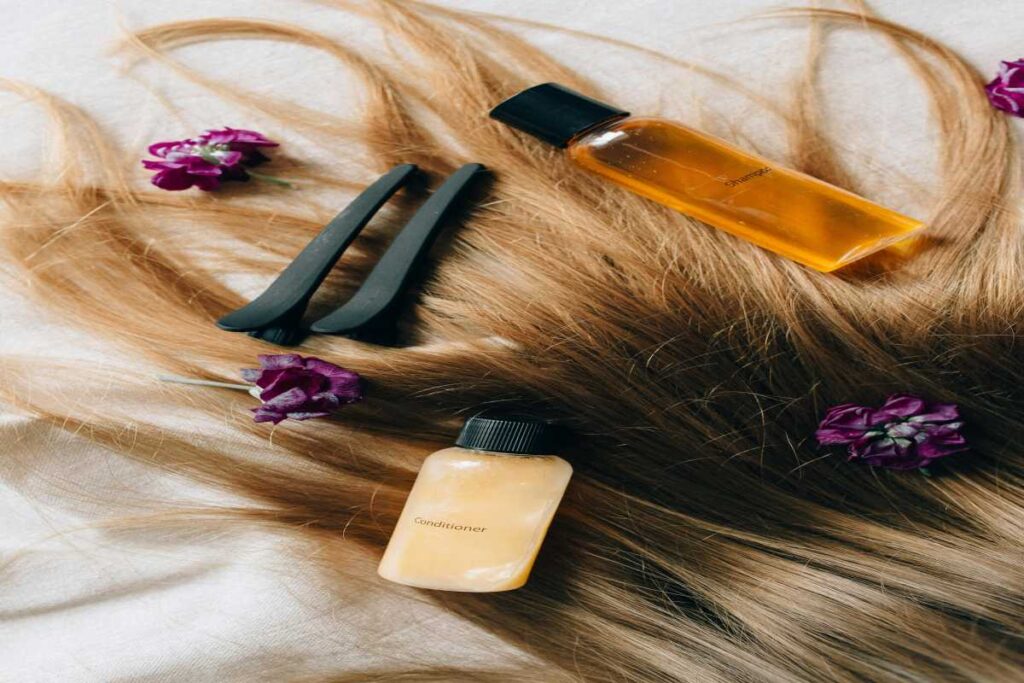
  • Shampoo and Condition: Use a gentle, volumizing shampoo to give your hair a little lift and a lightweight conditioner to avoid weighing it down.
  • Heat Protectant: Apply a heat protectant spray or serum to protect your fine hair from the damaging effects of heat styling tools. This is especially important for fine hair, which can be more vulnerable to damage.
  • Dry Thoroughly: Ensure your hair is completely dry before curling. Fine hair tends to hold styles better when it’s not damp. You can air dry, but using a blow dryer with a nozzle attachment helps speed up the process without adding too much volume.
  • Tip: For added volume, try flipping your head upside down while blow-drying for more body at the roots.

Step 2: Choose the Right Curling Tool

The right curling tool is crucial for creating curls that will last and look natural. For fine hair, you’ll want to opt for a curling iron with adjustable heat settings and a barrel that suits your desired curl size.

How to Choose Your Curling Tool:

  • Curling Iron with a Clamp: This is a classic option and can give you defined curls. Choose a 1-inch barrel for medium curls or a ¾-inch barrel for tighter, bouncy curls.
  • Curling Wand: A wand without a clamp can create more natural, beachy waves. Fine hair responds well to this type of tool because it allows for more freedom in creating looser curls.
  • Ceramic or Tourmaline: Choose a ceramic or tourmaline curling iron or wand, as these materials distribute heat evenly and reduce the risk of heat damage.
  • Adjustable Heat Settings: Fine hair is more susceptible to heat damage, so ensure your curling tool has adjustable heat settings. Set it to a lower heat setting (around 300–350°F) for fine hair to prevent overheating.

Step 3: Curl in Small Sections

To achieve long-lasting curls, it’s essential to work in small sections. Curling your hair in small pieces ensures the heat is evenly distributed, and the curls will hold longer.

How to Curl:

  1. Divide Hair into Sections: Use clips or hair ties to divide your hair into smaller sections. Start with the bottom layers and work your way up.
  2. Curl One Section at a Time: Take a small section of hair (about 1 inch wide) and wrap it around the curling iron or wand. Hold the hair for 5–10 seconds (depending on the tool and heat setting) and release the curl. Be sure not to hold the hair too long, as fine hair is more prone to damage.
  3. Curl in Different Directions: For a more natural look, alternate curling your hair in different directions—some curls away from your face, others towards your face. This adds volume and texture to the curls.
  4. Repeat the Process: Continue curling each section of hair until all the sections are done. Don’t worry if the curls look tight at first—they will loosen up as you run your fingers through them later.
Step 4: Finish with a Lightweight Hold

Once you’ve curled all your hair, it’s important to set the curls with a light finishing product to ensure they last throughout the day.

How to Finish Your Curls:

  • Cool Down Your Curls: Allow your curls to cool down for a few minutes before touching them. This helps them set and hold their shape.
  • Finger Comb or Brush Through: To make the curls more natural and less tight, gently run your fingers through the curls. Alternatively, use a wide-tooth comb for more relaxed waves.
  • Light Hairspray: Set the curls with a lightweight hairspray that provides hold without weighing your hair down. Avoid heavy, sticky formulas that can cause fine hair to fall flat.
  • Texturizing Spray (Optional): If you want more volume and texture, use a texturizing spray after the curls have cooled down. This adds dimension without making the hair too stiff.

Safety Tips for Curling Fine Hair

  1. Protect Your Hair from Heat Damage: Always apply a heat protectant before using any hot styling tools. Fine hair is more delicate and can be damaged by high heat if unprotected.
  2. Avoid Over-Curling: Fine hair doesn’t require long exposure to heat. Curl each section for only 5–10 seconds and never leave the curling iron on too long to prevent damage.
  3. Don’t Overload with Product: Fine hair can get weighed down easily, so be mindful of the amount of product you use. Stick to light, volumizing products and avoid heavy creams or gels.
  4. Give Your Hair Breaks: Heat styling tools should be used sparingly. Try to limit the use of curling irons or wands to 1-2 times a week and give your hair breaks in between.
  5. Use the Right Heat Settings: Use a lower heat setting for fine hair, typically around 300°F to 350°F. Higher heat settings can cause fine hair to become brittle and break.

Conclusion

Curling fine hair at home can be easy and effective with the right tools and techniques. By using a gentle heat setting, curling in small sections, and finishing with the right products, you can achieve beautiful, bouncy curls that last without damaging your fine hair. Remember to protect your hair from heat, avoid over-curling, and give it a break from heat styling to maintain its health and prevent breakage.

How to Wash Your Natural Hair to Prevent Breakage: A Step-by-Step Guide

Washing your natural hair properly is crucial for maintaining its health and preventing breakage. Natural hair, especially curly or textured hair, can be more prone to dryness and breakage if not handled with care. In this guide, we’ll walk you through the best practices for washing your natural hair to minimize breakage, maintain moisture, and keep your curls healthy.


1. Detangle Your Hair Before Washing

Detangling your hair before washing is essential to prevent unnecessary breakage and reduce stress on the strands when wet.

  • Tip: Use a wide-tooth comb or your fingers to gently detangle your hair. Start from the ends and work your way up to the roots to prevent breakage.
  • Product: Apply a leave-in conditioner, detangler spray, or a lightweight oil to your hair before detangling to make the process smoother and less damaging.

2. Use the Right Shampoo

Choose a shampoo that is sulfate-free and designed for natural hair. Sulfates are harsh detergents that can strip the hair of its natural oils, leaving it dry and prone to breakage.

  • Tip: Look for shampoos that are moisturizing and contain nourishing ingredients like shea butter, coconut oil, or aloe vera. These will help hydrate and protect your hair during the wash.
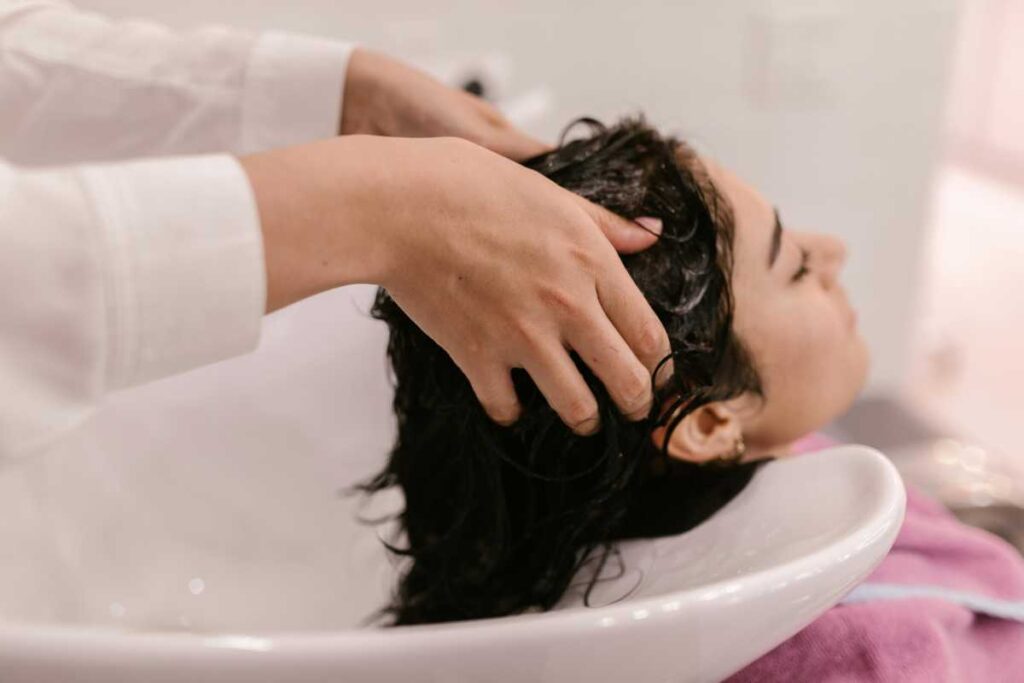
  • How to use: Apply shampoo to your scalp, gently massaging it with your fingertips to cleanse without causing friction or tangling.

3. Wash Your Hair in Sections

Washing your hair in sections is especially helpful for those with thick or curly hair. It allows you to focus on specific areas of your scalp and ensures that every part of your hair gets thoroughly cleaned.

  • How to do it: Divide your hair into 4–6 sections using hair ties or clips. Apply shampoo to each section and massage the scalp gently.
  • Tip: This method helps you avoid excessive manipulation of your hair, reducing tangling and breakage.

4. Rinse With Lukewarm Water

Hot water can strip your hair of essential moisture, making it more susceptible to breakage. Lukewarm water is gentler and helps retain the natural oils in your hair.

  • How to rinse: After shampooing, rinse your hair with lukewarm water to remove all product buildup. For the final rinse, you can use cool water to close the hair cuticles and lock in moisture.

5. Apply Conditioner

Conditioning is vital for replenishing moisture and preventing breakage. Choose a moisturizing conditioner that is rich in hydrating ingredients like shea butter, jojoba oil, or argan oil.

  • How to apply: Apply the conditioner generously to your hair, focusing on the mid-lengths and ends where dryness and breakage are most common.
  • Tip: If you have thicker or curlier hair, you may want to leave the conditioner on for 5-10 minutes or use a deep conditioner once a week for added moisture.

6. Use the “Squish to Condish” Method (Optional)

The “squish to condish” method is a great technique for curly or coily hair types to ensure the conditioner is absorbed and locks in moisture.

  • How to do it: After applying the conditioner, bend your head forward and “squish” the product into your curls by pressing your palms against your hair. This helps encourage curl formation while sealing in moisture.

7. Avoid Excessive Rubbing and Towel Drying

After washing, avoid using a regular towel to rub your hair dry. Rubbing your hair with a towel can create friction, leading to breakage, frizz, and split ends.

  • Tip: Use a microfiber towel or a cotton T-shirt to gently blot excess water from your hair. Alternatively, you can let your hair air dry in sections or use a blow dryer with a diffuser on a low heat setting.

8. Deep Condition Regularly

Deep conditioning helps maintain the strength and elasticity of your natural hair, preventing dryness and breakage. Use a deep conditioner once a week or bi-weekly, depending on how often you wash your hair.

  • How to deep condition: Apply a generous amount of deep conditioner to damp hair, cover with a plastic cap, and leave it on for 15-30 minutes. You can also use a heat cap to enhance absorption. Follow up with a rinse.

9. Protect Your Hair After Washing

Once your hair is washed and conditioned, it’s important to protect it from friction and dryness, especially while sleeping or during the day.

  • Protective styles: Consider styling your hair in protective styles like braids, twists, or buns to prevent breakage and reduce tangling.
  • Satin or Silk: Use a satin or silk scarf or bonnet at night to protect your hair from friction with cotton pillowcases, which can cause breakage. Alternatively, a satin pillowcase can also help protect your hair.

10. Moisturize and Seal

After washing and conditioning, don’t forget to moisturize your hair. Natural hair tends to lose moisture quickly, which can lead to breakage.

  • How to moisturize: Apply a leave-in conditioner or lightweight moisturizer to damp hair to lock in moisture. Follow up with an oil or butter (like jojoba oil or shea butter) to seal in hydration and prevent dryness.
  • Tip: Avoid applying too much product, as excess product buildup can weigh down your hair and cause breakage.

Conclusion

Washing your natural hair properly is an important step in maintaining its health and preventing breakage. By following these simple steps—detangling before washing, using the right shampoo and conditioner, avoiding harsh towel drying, and regularly moisturizing and sealing your hair—you can keep your curls healthy, strong, and free from unnecessary breakage. With the right care and products, you can maintain your natural hair’s texture, shine, and growth.

Irish Sea Moss for Hair Growth: Does It Work?

Irish Sea Moss, a type of red algae, has gained significant popularity in recent years due to its impressive health benefits. Packed with essential vitamins, minerals, and antioxidants, this superfood has been hailed as a powerful addition to skincare, gut health, and even hair care routines. But does Irish Sea Moss really work for hair growth? In this article, we’ll dive deep into how Irish Sea Moss can support healthy hair, the science behind its effectiveness, and how to incorporate it into your hair care routine.


What Is Irish Sea Moss?

Irish Sea Moss, also known as Chondrus crispus, is a type of seaweed found along the coasts of the Atlantic Ocean, primarily in Ireland and parts of the Caribbean. It is rich in over 90 essential minerals and vitamins, including calcium, potassium, zinc, iodine, magnesium, and vitamins A, C, E, and K. These nutrients are known to nourish the body in various ways, and when applied to the hair and scalp, they can provide numerous benefits for healthy hair growth and maintenance.


How Irish Sea Moss Can Help with Hair Growth

  1. Rich in Nutrients for Hair Health
    Irish Sea Moss is packed with minerals and vitamins that are essential for overall hair health. The high levels of calcium, magnesium, and zinc help strengthen hair follicles and improve hair texture. These nutrients nourish the scalp, promote healthy hair growth, and improve the health of existing strands. Magnesium, in particular, is known to improve blood circulation to the scalp, which is vital for hair growth.
  2. Hydrates and Moisturizes the Scalp
    A hydrated scalp is essential for healthy hair growth. Irish Sea Moss has natural hydrating properties that help maintain moisture balance in the scalp. It can prevent dry, flaky scalp conditions like dandruff, while also promoting the proper oil production necessary for nourishing the hair follicles. By keeping the scalp moisturized, Irish Sea Moss creates an optimal environment for healthy hair growth.
  3. Strengthens Hair Follicles
    The sulfur content in Irish Sea Moss contributes to the strengthening of hair follicles and prevents breakage. Sulfur is a key component in the formation of keratin, the protein that makes up your hair, skin, and nails. With stronger hair follicles, hair is less likely to fall out, and you may notice thicker, more resilient strands over time.
  4. Improves Blood Circulation
    For healthy hair growth, it’s essential to ensure that the hair follicles receive an adequate supply of nutrients and oxygen. The potassium and iodine in Irish Sea Moss support improved blood circulation to the scalp. This can stimulate dormant hair follicles and encourage them to produce new hair.
  5. Fights Scalp Inflammation and Infection
    The anti-inflammatory and antimicrobial properties of Irish Sea Moss make it an effective treatment for scalp conditions that may inhibit hair growth, such as dandruff or fungal infections. The sea moss helps calm irritation, reduce scalp redness, and combat any microbial imbalance, providing a healthy environment for hair to grow.
  6. Boosts Collagen Production
    Irish Sea Moss is rich in collagen-boosting vitamin C, which plays a vital role in maintaining the elasticity and strength of your hair. Collagen supports hair structure, promoting thicker and more durable strands. Additionally, the vitamin C in Irish Sea Moss helps protect hair from environmental damage, such as UV rays and pollutants.

How to Use Irish Sea Moss for Hair Growth

Irish Sea Moss can be used in various forms to enhance your hair care routine, including gels, powders, or even as a supplement. Here are a few ways to incorporate it into your hair care regimen:

1. Irish Sea Moss Hair Gel

Irish Sea Moss gel is one of the most popular ways to use this superfood for hair growth. It can be applied directly to the scalp or mixed with other nourishing ingredients like aloe vera or essential oils. Here’s how to make your own Sea Moss gel at home:

Ingredients:

  • 1/2 cup dried Irish Sea Moss
  • 2 cups water

Instructions:

  1. Rinse the dried Irish Sea Moss thoroughly to remove any debris.
  2. Soak it in water for 12-24 hours to rehydrate.
  3. Blend the soaked Sea Moss with fresh water until it forms a gel-like consistency.
  4. Store the gel in the refrigerator for up to three weeks.

Apply the gel directly to your scalp, leave it on for 30 minutes, then wash it out with a mild shampoo. You can do this once or twice a week.

2. Irish Sea Moss Hair Mask

You can mix Irish Sea Moss gel with other moisturizing ingredients to create a potent hair mask. For example, mix it with honey, coconut oil, or avocado to make a nourishing treatment for dry or damaged hair. Leave the mask on for 20-30 minutes before rinsing out to hydrate and repair hair strands.

3. Irish Sea Moss Supplements

If you prefer to take Irish Sea Moss internally, consider adding it to your diet as a supplement. Irish Sea Moss is available in capsules, powders, or even as a liquid. By consuming it regularly, you can support overall health, which in turn benefits your hair growth. Aim for the recommended daily dosage according to the product instructions.

4. DIY Sea Moss Scalp Massage

Combine Irish Sea Moss gel with your favorite essential oils, like rosemary or lavender, and massage it directly onto your scalp. This not only nourishes the scalp but also improves blood circulation, further stimulating hair growth.


Is Irish Sea Moss Effective for Hair Growth?

While there is no scientific study specifically focused on Irish Sea Moss and hair growth, the nutritional profile of this natural superfood suggests it can have a positive impact on hair health. Many users report noticeable improvements in hair texture, thickness, and overall health after incorporating Irish Sea Moss into their hair care routine. The minerals, vitamins, and anti-inflammatory properties of Irish Sea Moss are all factors that support a healthy scalp, which is crucial for promoting hair growth.

That being said, individual results may vary, and using Irish Sea Moss as part of a comprehensive hair care routine, which includes a balanced diet, hydration, and proper scalp care, is essential to achieving the best results.


Conclusion

Irish Sea Moss is a nutrient-packed superfood that can support healthy hair growth in various ways. From hydrating the scalp to strengthening hair follicles and promoting circulation, its benefits make it an excellent addition to your hair care routine. Whether applied topically as a gel or taken as a supplement, Irish Sea Moss can help improve the overall health and appearance of your hair. If you’re struggling with hair growth or scalp issues, consider adding this natural remedy to your regimen and enjoy the benefits of healthier, more vibrant hair.

5 Benefits of Beeswax for Hair, How to Use It, and Side Effects

Beeswax, a natural substance produced by honeybees, has been used for centuries in skincare and hair care products due to its many beneficial properties. It is packed with nutrients and provides a protective layer that helps maintain hair health. In this article, we’ll explore the top 5 benefits of beeswax for hair, how to use it effectively, and potential side effects.


What is Beeswax?

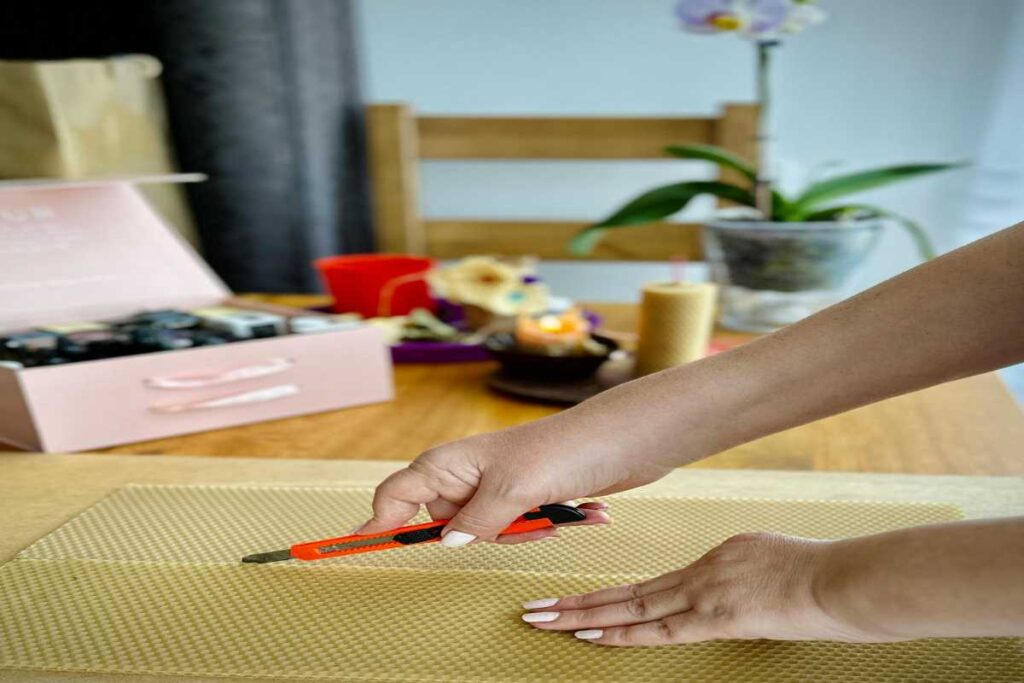
Beeswax is a natural wax produced by honeybees that is used to build their honeycombs. It is composed of fatty acids, alcohols, and esters, making it rich in nutrients that benefit hair and skin. When used in hair care products, beeswax can provide texture, moisture, and protection, helping to address several hair-related concerns.


5 Benefits of Beeswax for Hair

1. Natural Hair Conditioner

Beeswax is an excellent natural conditioner. It helps to lock in moisture, making hair soft and shiny without weighing it down.

  • How it helps: Beeswax forms a thin layer on the hair shaft, sealing moisture inside, which prevents dryness and frizz. It’s particularly beneficial for dry or coarse hair.

2. Promotes Hair Growth

Beeswax can stimulate hair growth by improving circulation to the scalp. Its emollient properties help to nourish the scalp and reduce inflammation.

  • How it helps: By providing a healthy, moisturized scalp environment, beeswax can promote the growth of healthy hair. It also helps in strengthening hair follicles, preventing hair loss.

3. Reduces Hair Breakage

Due to its moisturizing and protective properties, beeswax can prevent hair from becoming brittle and breaking. It adds structure and flexibility, making hair less prone to damage.

  • How it helps: Beeswax coats the hair, providing a barrier against environmental stressors and reducing the risk of split ends and hair breakage.

4. Adds Shine and Luster

Beeswax can give your hair a healthy, glossy finish without the use of synthetic chemicals. It enhances your natural shine and helps smooth down the hair cuticle.

  • How it helps: It provides a non-greasy shine that makes hair look healthy and vibrant, perfect for dull or lackluster hair.

5. Acts as a Natural Styling Agent

Beeswax is used in many hair styling products because of its ability to add texture and hold to hairstyles. It can be especially useful for taming flyaways and adding definition to curls.

  • How it helps: It provides a light hold for styles like pompadours, twists, or textured curls, making it a great natural alternative to hair gels and sprays.

How to Use Beeswax for Hair

1. Beeswax Hair Mask

To deeply condition your hair and promote moisture retention, create a beeswax hair mask.

  • Instructions: Mix a small amount of beeswax with coconut oil or olive oil. Warm it up to melt the beeswax and mix well. Apply to your hair from roots to ends, leave it on for 20-30 minutes, then rinse thoroughly.

2. Beeswax for Styling

For a natural styling agent, you can use beeswax directly on your hair.

  • Instructions: Rub a small amount of beeswax between your palms to soften it. Apply it to your hair for texture, hold, or to smooth frizz. A little goes a long way, so use sparingly.

3. Scalp Treatment

If you have a dry scalp, beeswax can help moisturize and protect it.

  • Instructions: Combine beeswax with aloe vera gel or tea tree oil. Apply it directly to the scalp and massage gently. Let it sit for 10-15 minutes before washing.

Side Effects of Beeswax for Hair

While beeswax is natural and generally safe for most people, it can cause side effects in some cases. It’s important to be aware of potential reactions, especially if you have sensitive skin or allergies.

1. Allergic Reactions

Some individuals may be allergic to beeswax, especially if they are allergic to bee products (like honey or pollen).

  • Symptoms: Skin irritation, itching, or swelling when beeswax is applied. Always do a patch test on a small area of your skin before using it extensively.

2. Clogging Pores

Beeswax is a heavy substance, and if not used sparingly, it may clog the pores on the scalp, leading to scalp acne or folliculitis (inflammation of hair follicles).

  • How to avoid it: Use beeswax products in moderation and make sure to thoroughly cleanse your scalp after using beeswax treatments.

3. Build-Up

Overuse of beeswax in hair care products can result in product buildup, making your hair feel greasy or heavy.

  • How to avoid it: Make sure to wash your hair thoroughly and regularly, using a clarifying shampoo to remove any buildup.

4. Hard to Remove

Since beeswax is a thick, waxy substance, it can be challenging to fully remove from the hair without proper cleansing.

  • How to avoid it: Use a deep cleansing shampoo or oil (like coconut oil) to break down the beeswax before washing with your regular shampoo.

Conclusion

Beeswax is a fantastic natural ingredient for nourishing, conditioning, and styling your hair. It offers a range of benefits from adding shine and moisture to preventing hair breakage and promoting growth. However, like any ingredient, it’s important to use it correctly and be mindful of potential side effects such as allergies or product buildup. By incorporating beeswax into your hair care routine in moderation, you can enjoy its many benefits for healthy, shiny, and well-styled hair.


Clove Water for Hair: 8 Benefits and Ways to Use It

Clove water is a powerful natural remedy that has gained attention in the world of hair care. Derived from cloves, a spice known for its antioxidant and anti-inflammatory properties, clove water offers a multitude of benefits for your hair and scalp. Whether you’re looking to boost hair growth, reduce dandruff, or enhance shine, clove water can be a versatile and affordable addition to your routine. In this article, we’ll explore the 8 key benefits of clove water for hair and how to incorporate it into your hair care regimen.


What Is Clove Water?

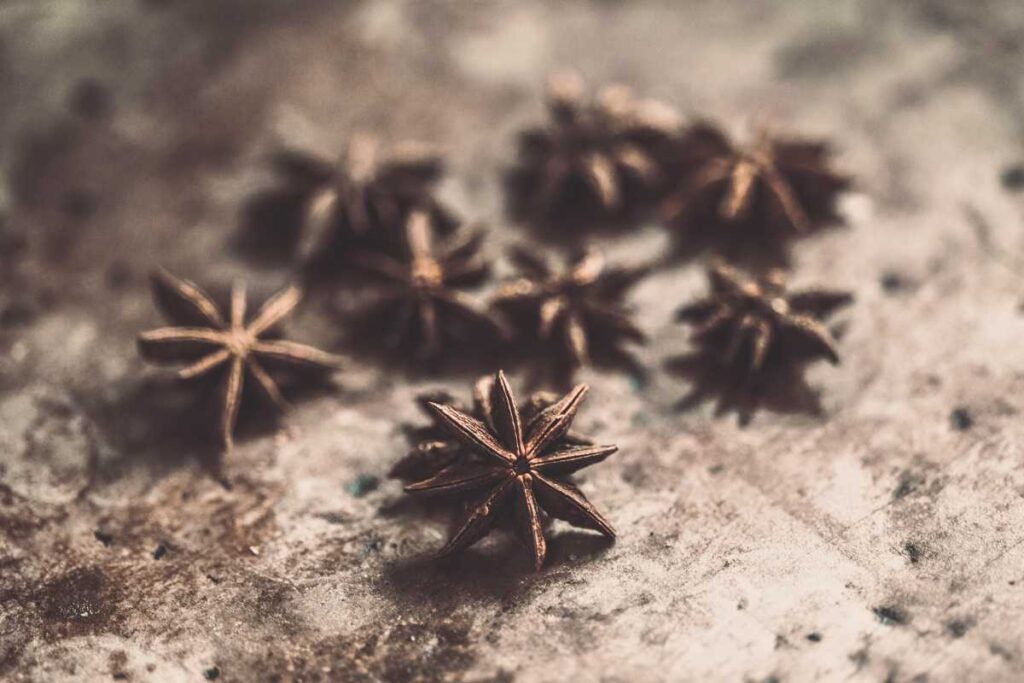
Clove water is made by infusing cloves in water, allowing their active compounds—such as eugenol, antioxidants, and essential oils—to blend with the liquid. When applied to the scalp and hair, clove water works as a natural remedy to improve overall hair health. It is often used in DIY hair treatments to address common hair concerns like hair loss, dandruff, and lackluster strands.


8 Benefits of Clove Water for Hair

  1. Promotes Hair Growth
    One of the most notable benefits of clove water is its ability to stimulate hair growth. Cloves are rich in antioxidants and essential oils, which help to improve circulation to the scalp, nourishing hair follicles and promoting healthy hair growth. Regular use of clove water can help revitalize dormant hair follicles and encourage thicker, longer hair.
  2. Improves Scalp Health
    Clove water has antiseptic and anti-inflammatory properties that help to soothe the scalp and prevent dandruff, flakiness, and irritation. It helps balance the pH of the scalp, keeping it healthy and free from excess oil or dryness.
  3. Strengthens Hair Follicles
    The essential oils in cloves have strengthening properties that work to fortify the hair shaft and follicles, preventing breakage and reducing split ends. This makes clove water an excellent option for individuals with weak or damaged hair.
  4. Adds Shine and Luster
    If your hair looks dull and lifeless, clove water can give it a healthy shine. The antioxidants in cloves help restore the natural luster of your hair, leaving it looking glossy and vibrant after each use.
  5. Reduces Dandruff
    Dandruff is a common scalp condition caused by fungal infections or dry skin. The antimicrobial properties of cloves help fight the yeast-like fungus that contributes to dandruff. Regular use of clove water can reduce flakes, itching, and dryness, giving you a cleaner, healthier scalp.
  6. Prevents Premature Graying
    Clove water has been used for centuries as a natural remedy to delay premature graying. The antioxidants in cloves help preserve melanin, the pigment responsible for hair color, slowing down the graying process.
  7. Improves Hair Texture
    Clove water can improve the overall texture of your hair, making it smoother and more manageable. The hydrating properties help to soften the hair, reducing frizz and making it easier to style.
  8. Reduces Scalp Itchiness
    If you suffer from a dry, itchy scalp, clove water can provide relief. Its anti-inflammatory properties calm the scalp, reducing irritation and discomfort caused by dryness or buildup.

How to Make Clove Water for Hair

Making clove water is simple and requires just a few ingredients. Here’s how to prepare it:

Ingredients:

  • 2-3 tablespoons of whole cloves
  • 1 cup of water

Instructions:

  1. Boil the water in a small saucepan.
  2. Once the water reaches a rolling boil, add the cloves.
  3. Let the cloves steep in the boiling water for 10-15 minutes.
  4. Remove the water from heat and let it cool.
  5. Strain the cloves from the water, and your clove-infused water is ready for use.

You can store the clove water in an airtight container for up to a week in the refrigerator.


How to Use Clove Water for Hair

Now that you have your clove water ready, here are a few ways to incorporate it into your hair care routine:

  1. Scalp Rinse
    After shampooing, use clove water as a final rinse to promote hair growth, reduce dandruff, and improve scalp health. Simply pour the clove water over your scalp and massage it in for a few minutes before rinsing it out with cool water.
  2. Leave-In Treatment
    Apply clove water directly to your scalp and hair and leave it in for a few hours or overnight. This will allow the nutrients to penetrate deeply and provide maximum benefits. Be sure to rinse it out thoroughly in the morning.
  3. DIY Hair Mask
    Mix clove water with natural oils, such as coconut or olive oil, and apply the mixture to your hair for an intensive deep-conditioning treatment. Leave it on for 30 minutes to an hour before washing it out. This will hydrate and strengthen your hair.
  4. Hair Growth Spray
    Transfer your clove water into a spray bottle and spritz it directly onto your scalp. Massage it in and leave it on to encourage hair growth and improve scalp health. You can use this spray once a day for the best results.

Additional Tips for Using Clove Water

  • Patch Test First: Always do a patch test before applying clove water to your scalp to ensure you don’t have an allergic reaction. Apply a small amount to your wrist and wait for 24 hours to check for any irritation.
  • Consistency Is Key: For the best results, use clove water consistently. While you may see some immediate benefits, continued use over time is necessary to see long-term improvements in hair growth and scalp health.
  • Combine with Other Hair Care Products: You can combine clove water with other nourishing ingredients like aloe vera, honey, or essential oils to enhance its effects.

Conclusion

Clove water is a powerful and natural remedy that can help address various hair concerns, from boosting hair growth to reducing dandruff and enhancing shine. By incorporating clove water into your hair care routine, you can enjoy healthier, more manageable hair. With its antiseptic properties and rich antioxidants, clove water provides a simple yet effective solution for maintaining a clean, nourished, and vibrant scalp.

Give it a try, and watch your hair flourish with the help of this amazing herbal remedy!

Beard Balm and Beard Oil: Benefits and How to Use Them

Growing and maintaining a beard requires more than just letting your facial hair grow. For a healthy, soft, and manageable beard, proper grooming products are essential, and two of the most popular options are beard balm and beard oil. While both products play a significant role in beard care, they serve different purposes and work best in specific scenarios. In this guide, we’ll break down the benefits of beard balm and beard oil, explain how to use them, and help you decide which one is right for your beard care routine.


What Is Beard Balm?

Beard balm is a conditioning product with a thicker, waxy consistency designed to moisturize, style, and tame facial hair. It typically contains ingredients like shea butter, beeswax, and essential oils.

Key Benefits of Beard Balm:

  1. Moisturizes Beard and Skin
    Beard balm helps to keep both your beard and the skin beneath it hydrated, reducing itchiness and flakiness.
  2. Tames and Styles
    The wax content in beard balm makes it an excellent tool for shaping and taming unruly hairs, giving your beard a polished look.
  3. Adds Volume
    Its thicker texture provides fullness, making it ideal for men with thinner or patchy beards.
  4. Provides Long-Lasting Moisture
    Beard balm forms a protective layer around your hair, locking in moisture and shielding it from environmental stressors.

What Is Beard Oil?

Beard oil is a lightweight, liquid grooming product formulated to hydrate and nourish both facial hair and the underlying skin. It often contains carrier oils like jojoba, argan, and coconut oil, along with essential oils for fragrance.

Key Benefits of Beard Oil:

  1. Hydrates and Softens
    Beard oil penetrates deep into the hair and skin, providing immediate hydration and leaving your beard softer to the touch.
  2. Eliminates Beard Itch
    By moisturizing the skin, beard oil reduces dryness and irritation, preventing beard dandruff.
  3. Promotes Healthy Growth
    The nourishing oils in beard oil strengthen hair follicles, encouraging healthier and thicker growth over time.
  4. Adds Shine
    Beard oil enhances your beard’s natural shine, giving it a healthy, well-groomed appearance.

How to Use Beard Balm

Step 1: Cleanse Your Beard
Start with a clean, dry beard by washing it with a gentle beard shampoo and patting it dry.

Step 2: Scoop a Small Amount
Use your fingertip to scoop out a pea-sized amount of balm. Adjust the amount based on your beard’s length and thickness.

Step 3: Warm it Up
Rub the balm between your palms until it melts into a smooth consistency.

Step 4: Apply to Your Beard
Massage the balm into your beard, starting at the roots and working your way to the tips. Make sure to coat the entire beard evenly.

Step 5: Style as Desired
Use a beard comb or brush to shape and style your beard while distributing the balm.


How to Use Beard Oil

Step 1: Start with a Clean Beard
Wash your beard and dry it thoroughly to remove any dirt or oil buildup.

Step 2: Dispense a Few Drops
Place 3-6 drops of beard oil in your palm. Adjust the amount based on the length and thickness of your beard.

Step 3: Spread the Oil
Rub your hands together to evenly distribute the oil across your palms and fingers.

Step 4: Massage into Your Beard
Gently massage the oil into your beard, focusing on the roots and the skin beneath to ensure proper hydration.

Step 5: Comb for Even Distribution
Use a beard comb to evenly spread the oil and detangle any knots.


Beard Balm vs. Beard Oil: Which One Should You Use?

FeatureBeard BalmBeard Oil
Best forStyling and taming unruly beardsHydrating and softening facial hair
TextureThick and waxyLightweight and liquid
Main BenefitLong-lasting moisture and holdDeep hydration and shine
Ideal forMedium to long beardsShort to medium-length beards
Skin BenefitsProtects skin from drying outReduces itch and flakiness

If you’re looking for a well-groomed and styled appearance, beard balm is the way to go. For deep hydration and a soft, shiny finish, beard oil is your best bet.


Can You Use Beard Balm and Beard Oil Together?

Yes! Using both products can provide the best of both worlds: hydration from the beard oil and hold from the beard balm. For optimal results:

  1. Apply beard oil first to hydrate your beard and skin.
  2. Follow up with beard balm to lock in moisture and style your beard.

Conclusion

Beard balm and beard oil are essential grooming products that cater to different needs. Whether you’re focusing on hydration, style, or overall beard health, incorporating these products into your routine can elevate your beard game. By understanding the benefits and proper use of beard balm and beard oil, you’ll be well on your way to a healthier, more manageable, and stylish beard.

Choose the product (or combination) that best suits your beard type and grooming goals, and enjoy the journey to a better-looking beard!

Hairline Microblading: Benefits, Downsides, and How It Works

Hairline microblading is a semi-permanent cosmetic procedure that involves the application of tiny pigment strokes to the scalp, mimicking the appearance of natural hair follicles. Originally used for eyebrows, microblading has gained popularity for enhancing the hairline, especially for individuals experiencing thinning or receding hair. Here’s everything you need to know about hairline microblading, including its benefits, downsides, and how it works.


How Hairline Microblading Works

Hairline microblading is a technique where a trained specialist uses a fine blade or needle to implant pigment into the skin along the hairline. The goal is to create the illusion of a fuller, thicker hairline by simulating natural hair growth.

  • The Process:
    1. Consultation: You’ll discuss your desired results and have a patch test to ensure the pigment doesn’t cause an allergic reaction.
    2. Mapping the Hairline: The technician will draw your new hairline, which is customized to suit your face shape and natural hair growth.
    3. Microblading: Using a specialized tool, the technician makes small incisions in the scalp and deposits pigment to mimic hair follicles.
    4. Healing: After the procedure, your scalp may be red, and the pigment will initially appear darker, but it will fade slightly as it heals.

Benefits of Hairline Microblading

1. Natural-Looking Results

  • Hairline microblading creates the illusion of thicker, denser hair, and is virtually undetectable to the naked eye.
  • The tiny strokes mimic natural hair, making the procedure ideal for those with thinning or receding hairlines.

2. Low Maintenance

  • Unlike other hair restoration methods, such as wigs or extensions, microblading requires minimal maintenance once the initial healing period is over.
  • It’s a quick procedure, typically taking 2–3 hours, and results can last anywhere from 12 to 18 months before a touch-up is needed.

3. Non-Invasive and No Downtime

  • Unlike hair transplants, hairline microblading is non-invasive, so there are no stitches, scars, or lengthy recovery times.
  • Most clients can resume normal activities immediately after the procedure, with minimal redness or swelling.

4. Affordable Alternative to Hair Transplants

  • For individuals who don’t want to invest in a more expensive hair transplant, microblading provides a more affordable solution for enhancing their hairline.

5. Confidence Boost

  • A fuller hairline can help individuals feel more confident, especially those with hair thinning or receding, by providing a natural-looking solution that enhances their appearance.

Downsides of Hairline Microblading

1. Temporary Results

  • Hairline microblading is not permanent; the results typically last between 12 to 18 months.
  • After the pigment fades, you will need to schedule touch-up appointments to maintain the results.

2. Potential for Allergic Reactions

  • As with any cosmetic procedure, there is a risk of allergic reactions to the pigment or numbing agents used during the treatment.
  • Always have a consultation beforehand and perform a patch test to avoid complications.

3. Not Suitable for Everyone

  • Hairline microblading may not be suitable for those with certain scalp conditions (like psoriasis or eczema) or individuals who are prone to keloids.
  • It may also be less effective for people with very oily skin, as the pigment can fade more quickly.

4. Requires a Skilled Technician

  • The success of hairline microblading heavily depends on the skill of the technician. An inexperienced artist may create an unnatural look or make mistakes in the placement of the strokes.
  • It’s essential to find a licensed, experienced professional to ensure high-quality results.

5. Risk of Infection

  • Although the procedure is generally safe, there is always a small risk of infection if proper aftercare is not followed, particularly in the first few days after the procedure.
  • Keeping the treated area clean and avoiding scratching or picking at it is crucial to prevent complications.

Aftercare for Hairline Microblading

Proper aftercare is vital to ensure that the healing process goes smoothly and the results last longer. Here’s what to keep in mind:

  1. Avoid Moisture: Keep your hairline dry for at least 7 days post-procedure to avoid infection or smudging of the pigment.
  2. No Touching: Refrain from touching, scratching, or picking at the treated area.
  3. Sun Protection: Protect your scalp from the sun during the healing process, as UV exposure can fade the pigment.
  4. Follow Up Appointments: Return to your technician for a touch-up if necessary, usually 6–8 weeks after the initial procedure, to perfect the results.

Conclusion

Hairline microblading is an effective and minimally invasive solution for individuals looking to enhance their hairline and combat hair thinning. It offers a natural-looking result, minimal maintenance, and a confidence boost for many people. However, it’s important to weigh the benefits and drawbacks, including the need for touch-ups and potential allergic reactions. By working with an experienced technician and following proper aftercare, you can enjoy a fuller, more youthful-looking hairline without the invasiveness of surgical options.

Type 1C Hair: Pros And Cons, Tips To Take Care, And Hairstyles

Type 1C hair is often described as the bridge between straight and wavy hair. With a combination of straight locks and subtle waves, this hair type is known for its coarse texture and natural volume. If you have Type 1C hair, you’re in good company—it’s a versatile hair type that can adapt to many styles and looks. However, like any hair type, it comes with unique challenges and requires specific care to look its best. In this guide, we’ll cover the pros and cons of Type 1C hair, share tips for maintaining its health, and suggest hairstyles to showcase its natural beauty.


What Is Type 1C Hair?

Type 1C hair falls under the Type 1 category, which includes all straight hair types. However, what sets 1C apart is its natural texture—it’s mostly straight but with gentle, loose waves that add volume and dimension. It’s also thicker and coarser compared to Types 1A and 1B.

  • Texture: Straight with subtle waves, often near the ends or mid-length.
  • Thickness: Coarse and dense, which gives it natural volume.
  • Shine: Generally shiny but can sometimes appear frizzy or dry due to its coarser nature.

Pros of Type 1C Hair

  1. Natural Volume
    Type 1C hair has a natural body and fullness that many people try to achieve with styling products.
  2. Versatility
    Its slight wave allows for a variety of styles—whether you want sleek, straight hair or textured beach waves.
  3. Durable Texture
    Coarser hair types like 1C tend to be stronger, making it less prone to breakage compared to finer textures.
  4. Low Maintenance
    It doesn’t require daily heat styling and can look great with minimal effort.

Cons of Type 1C Hair

  1. Frizz Issues
    The coarse texture of 1C hair can make it prone to frizz, especially in humid climates.
  2. Tangles Easily
    Its density can lead to knots and tangles, requiring extra care during brushing.
  3. Lack of Defined Waves
    While 1C hair has a slight wave, it doesn’t have the consistent curl pattern of wavy or curly hair, which can make styling tricky.
  4. Prone to Dryness
    Coarse hair often struggles to retain moisture, leading to dryness and dullness if not properly cared for.

Tips to Take Care of Type 1C Hair

  1. Hydrate with Moisturizing Products
    Use a hydrating shampoo and conditioner to combat dryness and keep your hair soft and manageable.
  2. Embrace Leave-In Conditioners
    Apply a leave-in conditioner or hair serum to tame frizz and add shine. Look for products with ingredients like argan oil, shea butter, or glycerin.
  3. Avoid Overwashing
    Washing your hair too frequently can strip away its natural oils, making it drier. Stick to 2-3 washes per week.
  4. Detangle with Care
    Use a wide-tooth comb or a detangling brush to gently remove knots, especially when your hair is damp.
  5. Use Heat Protection
    When styling with heat tools, always apply a heat protectant to prevent damage.
  6. Air Dry Whenever Possible
    Air-drying minimizes heat damage and enhances the natural wave of Type 1C hair.
  7. Regular Trims
    Trim your hair every 6-8 weeks to prevent split ends and maintain its health.

Hairstyles for Type 1C Hair

  1. Loose Beach Waves
    Enhance your natural wave with a curling wand. Apply a texturizing spray to create soft, beachy waves.
  2. Straight and Sleek
    Straighten your hair with a flat iron for a polished, elegant look. Pair it with a shine spray for added gloss.
  3. Half-Up Bun
    Create a half-up bun to highlight your hair’s natural volume while keeping it out of your face.
  4. Messy Ponytail
    Pull your hair into a high or low ponytail, leaving a few loose strands around your face for a casual, chic vibe.
  5. Braided Crown
    Style your hair into a braided crown for a boho-inspired look that works well with 1C’s thick texture.
  6. Textured Bob
    If you have shorter hair, a textured bob emphasizes your natural wave and adds movement.
  7. Layered Cut
    Add layers to your hair to reduce bulk and bring out the subtle waves.

Conclusion

Type 1C hair is a unique blend of straight and wavy textures, offering natural volume and versatility. While it has its challenges, with the right care and styling, you can enhance its beauty and make the most of its potential. From hydrating products to thoughtful hairstyles, embracing your Type 1C hair means celebrating its natural charm and adapting to its needs.

Whether you prefer sleek styles or playful waves, Type 1C hair offers endless possibilities. With these tips and hairstyle ideas, you can confidently showcase your hair’s best features while keeping it healthy and vibrant.