Castor Oil for Eyes: Types, Benefits, & Tips to Apply

Castor oil, derived from the seeds of the Ricinus communis plant, has been used for centuries in traditional medicine and cosmetics. It is rich in ricinoleic acid, a fatty acid known for its anti-inflammatory and moisturizing properties. When it comes to eye care, castor oil offers numerous benefits, making it a popular choice for those seeking natural remedies for various eye-related issues. In this article, we will explore the types of castor oil, its benefits for eye health, and tips on how to apply it safely and effectively.

1. Types of Castor Oil

Before using castor oil for your eyes, it’s essential to understand the different types available. The primary types include:

a. Cold-Pressed Castor Oil

  • Description: This oil is extracted using a cold-pressing method that retains most of the nutrients and properties of the seeds. It is unrefined and free from additives, making it the purest form of castor oil.
  • Uses: Cold-pressed castor oil is suitable for both cosmetic and therapeutic uses. Its high nutrient content makes it ideal for skin and eye care.

b. Refined Castor Oil

  • Description: Refined castor oil undergoes processing to remove impurities and odors. Although it is safer for consumption, it may lose some of the beneficial properties found in the cold-pressed version.
  • Uses: This type is commonly used in cooking and industrial applications. It is less favored for topical applications due to its processing.

c. Castor Oil Packs

  • Description: These packs consist of a cloth soaked in castor oil and applied to the skin. While not directly used for eyes, they can benefit surrounding areas and relieve tension.
  • Uses: Castor oil packs are often used for muscle pain, inflammation, and general detoxification.

d. Eyedrops with Castor Oil

  • Description: Some over-the-counter eyedrops contain castor oil as an active ingredient. These are specifically formulated for eye health and comfort.
  • Uses: Ideal for dry eyes and to lubricate and soothe irritation.

2. Benefits of Castor Oil for Eyes

Castor oil offers several advantages when used for eye health. Here are some key benefits:

a. Moisturizes Dry Eyes

  • Description: Castor oil is an excellent natural moisturizer that helps alleviate dryness and irritation in the eyes.
  • How It Works: The fatty acids in castor oil create a barrier on the surface of the eye, locking in moisture and preventing dryness. This can be especially beneficial for individuals who spend long hours in front of screens or live in dry environments.

b. Reduces Inflammation

  • Description: The anti-inflammatory properties of ricinoleic acid help reduce swelling and redness in the eyes.
  • How It Works: Applying castor oil can soothe irritated tissues and promote healing in cases of mild eye inflammation, such as allergies or environmental irritants.

c. Improves Eye Lashes and Brows

  • Description: Regular application of castor oil can strengthen and promote the growth of eyelashes and eyebrows.
  • How It Works: The nourishing properties of castor oil help improve hair thickness and reduce breakage, resulting in fuller lashes and brows over time.

d. Promotes Eye Health

  • Description: Castor oil’s antioxidant properties can help protect the eyes from oxidative stress and reduce the risk of age-related eye issues.
  • How It Works: Antioxidants neutralize free radicals that can damage eye tissues, potentially lowering the risk of cataracts and macular degeneration.

e. Soothes Eye Fatigue

  • Description: The calming effects of castor oil can relieve eye strain and fatigue, particularly for those who frequently engage in visually demanding tasks.
  • How It Works: Applying castor oil around the eyes may help reduce tension and promote relaxation, making it easier to relieve tired eyes after a long day.

3. Tips to Apply Castor Oil Safely

Using castor oil for eye care can be effective, but it’s crucial to apply it safely. Here are some tips to ensure optimal results:

a. Choose the Right Type of Castor Oil

  • Recommendation: Opt for cold-pressed, organic castor oil for topical applications to ensure purity and maximum benefits.

b. Perform a Patch Test

  • Recommendation: Before applying castor oil near your eyes, conduct a patch test on a small area of skin to check for any allergic reactions or irritation.

c. Use a Clean Applicator

  • Recommendation: Use a clean cotton swab or dropper to apply castor oil to avoid contamination and ensure hygiene.

d. Apply Carefully

  • Recommendation: For eyelash and eyebrow application, dip a clean brush or cotton swab into the oil and gently apply it along the base of the lashes or brows. Avoid direct contact with the eyes.
  • For Dry Eyes: If using castor oil drops, ensure they are specifically formulated for eyes. Follow the instructions on the product label for dosage and application.

e. Don’t Overdo It

  • Recommendation: Use castor oil sparingly. A small amount is often sufficient to reap the benefits. Overuse may lead to excessive lubrication, which can cause blurry vision or discomfort.

f. Consider Professional Advice

  • Recommendation: If you have pre-existing eye conditions or are unsure about using castor oil, consult with an eye care professional or a healthcare provider for personalized guidance.

4. How to Incorporate Castor Oil into Your Eye Care Routine

Incorporating castor oil into your eye care regimen can be simple and effective. Here’s how to do it:

a. Nighttime Application

  • Step 1: Before bedtime, clean your face and remove any makeup.
  • Step 2: Using a clean cotton swab, apply a small amount of cold-pressed castor oil to the base of your eyelashes and eyebrows.
  • Step 3: Allow it to absorb overnight. The oil will work to moisturize and nourish while you sleep.

b. For Dry Eyes

  • Step 1: If using castor oil drops specifically designed for eyes, wash your hands thoroughly before application.
  • Step 2: Tilt your head back and pull down your lower eyelid to create a pocket.
  • Step 3: Administer the recommended number of drops into the pocket and close your eyes for a moment to allow the oil to spread.

c. As a Natural Eye Mask

  • Step 1: Mix castor oil with a few drops of lavender or chamomile essential oil for added calming effects.
  • Step 2: Apply the mixture around the eyes using a gentle tapping motion.
  • Step 3: Leave the mask on for 10-15 minutes, then rinse with lukewarm water to remove excess oil.

d. For Eye Fatigue Relief

  • Step 1: Mix castor oil with a carrier oil, such as coconut or almond oil, to dilute it.
  • Step 2: Gently massage the mixture around your eyes using your fingertips. This can help relieve tension and promote relaxation.

Conclusion: The Natural Eye Care Solution

Castor oil is a versatile and natural remedy that can significantly enhance your eye care routine. From moisturizing dry eyes to promoting healthy lashes and brows, its benefits are extensive and backed by tradition. By choosing the right type of castor oil, applying it carefully, and incorporating it into your daily routine, you can enjoy healthier, more comfortable eyes.

As with any natural remedy, it’s important to proceed with caution and consult a healthcare professional if you have concerns about your eye health. Embrace the natural goodness of castor oil and unlock its potential for vibrant and healthy eyes.

10 Home Remedies for Poison Oak Itch + When to See a Doctor

Poison oak is a prevalent plant in North America that can cause severe skin reactions due to the oil it contains called urushiol. For those who come into contact with this plant, understanding how to manage the subsequent itchiness and irritation is crucial. This guide will provide you with ten effective home remedies for alleviating poison oak itch, as well as important information on when to seek medical attention.


Understanding Poison Oak

What is Poison Oak?

Poison oak is a shrub or vine that typically grows in wooded areas, fields, and along the edges of roads. It is characterized by its leaves, which usually grow in clusters of three and can resemble those of oak trees. The plant can also produce small green berries, and its leaves change color throughout the seasons, turning red or yellow in the fall.

Symptoms of Poison Oak Exposure

When individuals come into contact with poison oak, they may experience an allergic reaction, which can lead to:

  • Red, inflamed skin: Appears within hours or days after exposure.
  • Itching: Often intense and persistent.
  • Blisters: Fluid-filled bumps that can break and ooze.
  • Swelling: The affected area may become swollen and tender.
  • Pain: Discomfort can range from mild to severe.

The severity of symptoms varies based on individual sensitivity, amount of exposure, and whether the urushiol oil is still present on the skin or clothing.


10 Home Remedies for Poison Oak Itch

1. Cold Compress

A cold compress is one of the simplest and most effective remedies for alleviating itching and inflammation. The cold temperature helps numb the area and reduce blood flow, providing relief.

Instructions:

  • Soak a clean cloth or towel in cold water or use an ice pack wrapped in a thin towel.
  • Apply the compress to the affected area for 15–20 minutes as needed.
  • Repeat this several times a day to manage discomfort.

2. Oatmeal Bath

Colloidal oatmeal is known for its skin-soothing properties and is often used to treat various skin irritations, including poison oak rash. Oatmeal can help lock in moisture and create a barrier over the skin.

Instructions:

  • Add 1–2 cups of colloidal oatmeal to a lukewarm bath.
  • Stir the water to distribute the oatmeal evenly and soak for 15–20 minutes.
  • Pat your skin dry with a soft towel afterward.

3. Baking Soda Paste

Baking soda is a common household item that can help neutralize the skin’s pH and provide relief from itching. It can also help dry out blisters and soothe irritation.

Instructions:

  • Mix 1 tablespoon of baking soda with enough water to create a thick paste.
  • Apply the paste to the affected area and leave it on for 10–15 minutes before rinsing off with cool water.
  • Repeat this process a few times a day.

4. Aloe Vera Gel

Aloe vera is well-known for its cooling and soothing properties. It contains anti-inflammatory compounds that can help alleviate itching and redness caused by poison oak exposure.

Instructions:

  • Cut a fresh aloe vera leaf and scoop out the gel.
  • Apply the gel directly to the rash and allow it to absorb into the skin.
  • Reapply as needed throughout the day, especially after bathing.

5. Calamine Lotion

Calamine lotion has long been used to treat itching and rashes. It acts as a drying agent and provides a cooling sensation, helping to relieve discomfort.

Instructions:

  • Shake the calamine lotion bottle well and apply it to the affected area with a cotton ball.
  • Allow it to dry on the skin, and reapply as necessary, especially after washing.

6. Apple Cider Vinegar

Apple cider vinegar is believed to have antiseptic properties that can help alleviate itching. It can also help balance the skin’s pH level.

Instructions:

  • Dilute apple cider vinegar with an equal amount of water.
  • Soak a cotton ball in the mixture and apply it to the itchy area.
  • Leave it on for about 10 minutes, then rinse with cool water.

7. Tea Tree Oil

Tea tree oil is known for its anti-inflammatory and antimicrobial properties, making it effective for soothing irritated skin. However, it should always be diluted before application to avoid skin irritation.

Instructions:

  • Mix a few drops of tea tree oil with a carrier oil (such as coconut or olive oil) at a ratio of 1:4.
  • Apply the diluted mixture to the affected area using a cotton ball or your fingertips.

8. Coconut Oil

Coconut oil has moisturizing and anti-inflammatory properties that can help soothe irritated skin. It can also aid in preventing the rash from becoming overly dry and cracked.

Instructions:

  • Apply a thin layer of coconut oil to the affected area, massaging it gently into the skin.
  • Reapply as needed, especially after bathing or if the area feels dry.

9. Chamomile Tea Compress

Chamomile is known for its calming effects and can help relieve itching and inflammation associated with poison oak.

Instructions:

  • Brew chamomile tea and allow it to cool completely.
  • Soak a clean cloth in the cooled tea and apply it to the affected area for 15–20 minutes.
  • Repeat this several times a day as needed.

10. Herbal Remedies

Certain herbal remedies, such as calendula or witch hazel, have soothing properties that can help alleviate itching and inflammation.

Instructions:

  • Apply calendula cream or witch hazel extract directly to the rash according to the product instructions.
  • These can be used multiple times a day for best results.

When to See a Doctor

While most cases of poison oak itch can be effectively managed at home, there are specific situations where it’s essential to seek medical attention. Here’s when you should consult a healthcare professional:

1. Severe Symptoms

If you experience severe itching, pain, or swelling that disrupts your daily activities, it’s advisable to seek medical help. This includes widespread rashes that cover large areas of your body.

2. Signs of Infection

If the rash becomes infected, you may notice increased redness, warmth, swelling, and pus around the blisters. Fever or chills may also accompany these symptoms, indicating a potential infection.

3. Persistent Symptoms

If your symptoms persist for more than two weeks without improvement, or if they worsen despite home treatment, it’s time to consult a healthcare provider for further evaluation.

4. Eye or Face Involvement

If the rash affects sensitive areas such as your eyes, mouth, or genitals, seek immediate medical assistance. The skin in these areas is more delicate and may require specialized treatment.

5. History of Severe Reactions

If you have a history of severe allergic reactions to poison oak or other allergens, it’s essential to consult a doctor for guidance on treatment and prevention.


Conclusion

Dealing with poison oak itch can be both frustrating and uncomfortable, but understanding how to manage the symptoms effectively can help you find relief. By utilizing home remedies such as cold compresses, oatmeal baths, and natural oils, you can alleviate itching and promote healing.

However, if your symptoms escalate or you experience signs of infection, don’t hesitate to seek professional medical assistance. Being proactive about your health ensures you can manage the effects of poison oak effectively and prevent complications.

Remember to take precautions when spending time outdoors to minimize the risk of exposure to poison oak. Educate yourself about the plant’s appearance, wear protective clothing, and wash any potentially contaminated items promptly. With the right knowledge and remedies, you can navigate poison oak encounters safely and effectively.

Burning Throat: Symptoms, Causes, and Home Remedies

A burning throat can be a distressing symptom that affects your daily life, making eating, drinking, and even speaking uncomfortable. Understanding the causes and symptoms of a burning throat is crucial for effective management. This guide will delve into everything you need to know about burning throat, including common causes, symptoms, and a variety of home remedies to alleviate discomfort.


Symptoms of a Burning Throat

A burning sensation in the throat can manifest in several ways, and individuals may experience a combination of symptoms. Recognizing these symptoms is vital for determining the cause and appropriate treatment. Common symptoms include:

1. Sore Throat

This is often the most prominent symptom. It can feel like a persistent ache, scratchiness, or irritation in the throat.

2. Difficulty Swallowing

Pain or discomfort during swallowing is a common complaint. This sensation may be accompanied by a feeling that food is stuck in the throat.

3. Dryness and Scratchiness

A feeling of dryness, akin to a scratchy throat, can occur. This may be exacerbated by talking, swallowing, or breathing.

4. Hoarseness

Changes in voice quality, such as a raspy or strained voice, may accompany a burning throat. This is often caused by inflammation of the vocal cords.

5. Cough

A persistent dry cough can worsen the burning sensation in the throat. This cough may be triggered by irritation or the need to clear the throat.

6. Bad Breath (Halitosis)

An unpleasant odor emanating from the mouth can occur, often due to bacteria that thrive in an inflamed throat.

7. Swollen Glands

Enlarged lymph nodes in the neck or jaw area may indicate an underlying infection or inflammation.

8. Referred Pain

Sometimes, a burning throat can be accompanied by discomfort in the ears or jaw, known as referred pain, due to the interconnected nature of these areas.

If you experience severe symptoms, such as difficulty breathing or swallowing, high fever, or persistent pain that interferes with daily activities, seek medical attention immediately.


Causes of a Burning Throat

A burning sensation in the throat can arise from various factors. Understanding these causes can help guide your treatment options. Common causes include:

1. Gastroesophageal Reflux Disease (GERD)

GERD occurs when stomach acid flows back into the esophagus, irritating the lining and causing inflammation. This condition often leads to:

  • Heartburn: A burning sensation in the chest, which can radiate to the throat.
  • Regurgitation: A sour or bitter taste in the mouth from acid reflux.

Management:

  • Avoid triggering foods such as spicy, acidic, or fried items.
  • Elevate the head while sleeping to reduce nighttime reflux.

2. Allergies

Allergic reactions to substances like pollen, dust mites, pet dander, and mold can lead to throat irritation. Symptoms of allergy-related throat irritation may include:

  • Itchy eyes and nose
  • Sneezing
  • Nasal congestion

Management:

  • Over-the-counter antihistamines can help alleviate symptoms.
  • Keeping windows closed and using air purifiers can minimize exposure to allergens.

3. Infections

Viral infections, such as the common cold or flu, and bacterial infections, like strep throat, can cause throat burning. Symptoms associated with infections may include:

  • Fever
  • Fatigue
  • Coughing

Management:

  • Rest, hydration, and over-the-counter medications can alleviate symptoms.
  • Antibiotics may be required for bacterial infections.

4. Environmental Irritants

Exposure to irritants like smoke, pollution, or strong odors (such as cleaning agents or perfumes) can lead to throat irritation. Symptoms may include:

  • Coughing
  • Sneezing
  • Watery eyes

Management:

  • Avoid exposure to known irritants and ensure adequate ventilation in your home.

5. Dry Air

Breathing dry air, especially in winter months or in air-conditioned environments, can cause throat dryness and irritation. Symptoms may include:

  • Dryness in the throat and nasal passages
  • Increased susceptibility to infections

Management:

  • Use a humidifier to add moisture to the air, especially in your bedroom.

6. Throat Injury or Strain

Injuries from excessive coughing, shouting, or swallowing sharp objects can result in a burning sensation. Symptoms may include:

  • Pain or discomfort in specific areas of the throat
  • Swelling or redness

Management:

  • Rest your voice and avoid further irritation.

7. Medications

Certain medications, particularly those that cause dry mouth, can lead to throat discomfort. Common culprits include:

  • Antihistamines
  • Some blood pressure medications

Management:

  • Consult with a healthcare provider about alternative medications if dry mouth is a side effect.

Home Remedies for a Burning Throat

If you’re experiencing a burning throat, several home remedies may help alleviate discomfort. Here are some effective options:

1. Saltwater Gargle

Gargling with warm saltwater can help reduce inflammation and soothe a sore throat. This remedy works by:

  • Drawing out excess fluid from inflamed tissues
  • Reducing swelling and irritation

Instructions:

  • Mix 1 teaspoon of salt in 8 ounces of warm water and gargle for about 30 seconds, then spit it out. Repeat several times a day.

2. Honey and Lemon

Both honey and lemon have soothing properties and can help alleviate throat discomfort. Honey is a natural humectant, while lemon provides vitamin C and aids in immune function.

Instructions:

  • Mix a tablespoon of honey and the juice of half a lemon in warm water. Drink this mixture two to three times daily for relief.

3. Stay Hydrated

Staying hydrated is essential for throat health. Drinking plenty of fluids helps keep your throat moist and may alleviate the burning sensation.

Recommended Fluids:

  • Water
  • Herbal teas (like chamomile or ginger)
  • Warm broths

4. Humidifier Use

Using a humidifier in your home, especially during dry months, can add moisture to the air and prevent throat dryness.

Tips:

  • Clean the humidifier regularly to prevent mold and bacteria buildup.
  • Aim for a humidity level of around 30-50%.

5. Throat Lozenges

Sucking on throat lozenges can help soothe irritation and provide temporary relief from the burning sensation. Look for lozenges with soothing ingredients such as menthol or eucalyptus.

Instructions:

  • Follow the package directions for usage and dosage.

6. Ginger Tea

Ginger has natural anti-inflammatory properties that can help soothe a burning throat. It also aids in digestion, which can be beneficial if GERD is the underlying cause.

Instructions:

  • Steep fresh ginger slices in hot water for about 10-15 minutes. Add honey for sweetness if desired, and drink two to three times daily.

7. Apple Cider Vinegar

Apple cider vinegar has antimicrobial properties that can aid in soothing throat discomfort.

Instructions:

  • Mix 1 tablespoon of apple cider vinegar with a cup of warm water. Drink this mixture once daily. (Do not consume undiluted apple cider vinegar, as it can harm your throat.)

8. Avoid Irritants

Identify and minimize exposure to environmental irritants that may exacerbate your throat discomfort.

Tips:

  • Avoid smoking and exposure to secondhand smoke.
  • Limit contact with strong perfumes or cleaning products.

9. Rest Your Voice

If your throat discomfort is related to strain, resting your voice can be beneficial.

Tips:

  • Speak softly or avoid talking altogether for a period of time.
  • Use non-verbal communication when possible.

10. Steam Inhalation

Inhaling steam can help soothe the throat and relieve dryness.

Instructions:

  • Fill a bowl with hot water, place a towel over your head, and lean over the bowl to inhale the steam. Be cautious to avoid burns.

When to Seek Medical Attention

While many cases of a burning throat can be managed at home, it’s essential to know when to seek medical help. Consult a healthcare professional if you experience:

  • Severe pain: Intense pain or difficulty swallowing.
  • Persistent symptoms: Symptoms lasting more than a week without improvement.
  • High fever: Fever over 101°F (38.3°C) that persists.
  • Swollen lymph nodes: Lymph nodes that remain swollen or painful.
  • Signs of dehydration: Such as extreme thirst, dry mouth, or dizziness.
  • Respiratory distress: Difficulty breathing, wheezing, or chest tightness.

Conclusion

A burning throat can be uncomfortable and disruptive to daily life, but understanding its symptoms and causes is the first step toward finding relief. By incorporating home remedies and making lifestyle adjustments, you can soothe your throat and promote healing.

If your symptoms persist or worsen, it’s essential to consult a healthcare professional to rule out any serious conditions. With the right care and attention, you can manage throat discomfort and maintain your overall well-being.

Remember to prioritize your throat health and stay informed about the factors that can contribute to irritation. Taking small steps can lead to significant improvements in your comfort and quality of life.

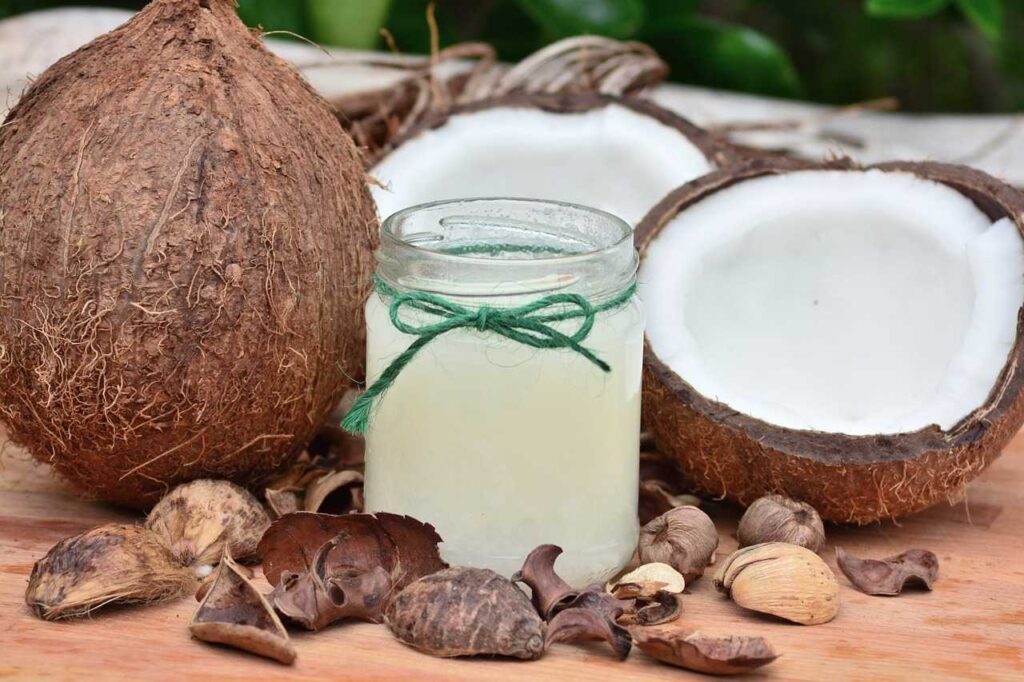
Benefits of Coconut Water for Hair

Coconut water has surged in popularity not just as a hydrating drink but also as a beneficial ingredient for hair care. Packed with essential nutrients, vitamins, and minerals, coconut water offers a plethora of benefits for promoting healthier, shinier hair. This blog will explore the advantages of incorporating coconut water into your hair care routine, how to use it effectively, and practical tips for optimal results.

Hair care is an essential part of personal grooming and self-expression. With countless products available on the market, many people are seeking natural alternatives to nourish and revitalize their hair. Coconut water, often dubbed as “nature’s energy drink,” is not just refreshing; it also serves as a powerful elixir for hair health. In this blog, we will dive deep into the benefits of coconut water for hair, including its nutritional profile, various applications, and additional tips for enhancing your hair care regimen.

1. Nutritional Profile of Coconut Water

A. What is Coconut Water?

Coconut water is the clear liquid found inside young, green coconuts. It is low in calories, naturally refreshing, and rich in electrolytes, making it a popular choice for hydration. Unlike coconut milk, which is derived from the flesh of mature coconuts and is high in fat, coconut water is low in fat and calories, making it an ideal beverage for health-conscious individuals.

B. Nutritional Composition

Coconut water contains an array of nutrients that can significantly benefit hair health:

  • Vitamins:
    • Vitamin C: An antioxidant that supports collagen production and aids in the repair of hair tissues.
    • B-Complex Vitamins: Essential for energy production and the promotion of healthy hair growth.
  • Minerals:
    • Potassium: Helps maintain hydration and supports cellular function.
    • Magnesium: Aids in protein synthesis, which is crucial for hair growth.
    • Calcium: Important for strong hair follicles.
  • Electrolytes: Coconut water is naturally rich in electrolytes, such as sodium and potassium, which help maintain hydration and proper functioning of cells.

2. Benefits of Coconut Water for Hair

A. Deep Hydration

Coconut water is an excellent natural hydrator. Proper hydration is essential for maintaining the moisture balance in your hair, preventing dryness, frizz, and breakage. Regularly applying coconut water can help lock in moisture, making your hair softer and easier to manage.

B. Stimulates Hair Growth

The vitamins and minerals found in coconut water, especially vitamin C and B-complex vitamins, play a critical role in stimulating hair growth. They help nourish the hair follicles, promoting stronger hair growth and reducing hair thinning.

C. Reduces Hair Loss

Coconut water strengthens hair follicles and prevents hair loss by providing essential nutrients to the scalp. Improved blood circulation to the scalp ensures that hair follicles receive the necessary nourishment to remain healthy and vibrant.

D. Fights Dandruff

The antifungal and antibacterial properties of coconut water can help combat dandruff and scalp irritation. Applying coconut water directly to the scalp can soothe itchiness and inflammation, reducing flakiness and promoting a healthier scalp environment.

E. Adds Shine and Luster

Using coconut water as a hair rinse can significantly enhance your hair’s natural shine. The hydrating properties help smooth the hair cuticle, reducing frizz and giving your hair a radiant, glossy appearance.

F. Balances pH Levels

Coconut water can help restore the natural pH balance of your scalp and hair. A balanced pH level is essential for preventing hair damage and promoting healthy growth, making coconut water a valuable addition to your hair care routine.

G. Lightweight Conditioning

Unlike heavy oils or creams, coconut water is lightweight and easily absorbed by both hair and scalp. It provides nourishment without weighing hair down, making it suitable for all hair types, including fine or thin hair.

H. Natural Detangler

Coconut water can also serve as a natural detangler, making it easier to comb through knots and tangles. This reduces breakage and damage, especially for individuals with curly or textured hair.

3. How to Use Coconut Water for Hair

A. Coconut Water Hair Rinse

A coconut water rinse can enhance shine and hydration. Here’s how to do it:

  1. Ingredients:
    • 1 cup of fresh coconut water
    • 1 tablespoon of apple cider vinegar (optional, for added shine)
  2. Instructions:
    • After shampooing, pour the coconut water over your hair, concentrating on the scalp and ends.
    • Massage gently into your scalp for a few minutes.
    • Leave it on for 5-10 minutes, then rinse with cool water.

B. Coconut Water Hair Mask

For deeper conditioning, a coconut water hair mask can provide added moisture and nourishment.

  1. Ingredients:
    • 1 cup of coconut water
    • 2 tablespoons of honey (for added moisture)
    • 1 tablespoon of yogurt (for added nourishment)
  2. Instructions:
    • Mix the ingredients in a bowl until well combined.
    • Apply the mask to damp hair, ensuring even coverage from roots to ends.
    • Cover your hair with a shower cap and leave it on for 30-45 minutes.
    • Rinse thoroughly with shampoo and conditioner.

C. Coconut Water Scalp Treatment

For those struggling with scalp issues, a coconut water scalp treatment can provide relief.

  1. Ingredients:
    • ½ cup of coconut water
    • A few drops of essential oils (like tea tree or lavender)
  2. Instructions:
    • Combine coconut water with essential oils in a bowl.
    • Apply directly to the scalp, focusing on areas with dandruff or dryness.
    • Leave on for at least 30 minutes before rinsing.

D. Coconut Water Spray

Create a refreshing coconut water spray for on-the-go hydration and nourishment.

  1. Ingredients:
    • 1 cup of coconut water
    • 1 tablespoon of aloe vera gel (for extra moisture)
  2. Instructions:
    • Mix the ingredients in a spray bottle.
    • Shake well before use.
    • Spray onto dry or damp hair throughout the day for hydration and shine.

4. Tips for Incorporating Coconut Water into Your Hair Care Routine

A. Choose Fresh Coconut Water

For the best results, opt for fresh coconut water rather than packaged varieties, which may contain added sugars and preservatives. Fresh coconut water is nutrient-rich and provides maximum benefits for your hair.

B. Frequency of Use

Incorporate coconut water into your hair care routine 1-2 times per week. Adjust based on your hair type and needs—if your hair is very dry or damaged, you may benefit from more frequent use.

C. Combine with Other Natural Ingredients

Experiment with combining coconut water with other natural ingredients like aloe vera, avocado, or essential oils to enhance its benefits. For instance, mixing coconut water with aloe vera can boost hydration and nourishment for dry hair.

D. Patch Test

Before using coconut water or any new hair treatment, perform a patch test to check for any allergic reactions or sensitivities. Apply a small amount to your wrist or inner elbow and wait for 24 hours to see if any irritation occurs.

E. Monitor Results

Keep track of how your hair responds to coconut water treatments. Note improvements in hydration, shine, and overall health. Adjust your routine based on your observations to find the best combination for your hair type.

5. Addressing Common Concerns

A. Are All Coconuts Created Equal?

While all coconuts provide similar benefits, the nutritional profile can vary based on factors like maturity and variety. Young coconuts yield the best coconut water, while mature coconuts are better for coconut oil or flesh.

B. Organic vs. Conventional Coconut Water

Choosing organic coconut water may reduce exposure to pesticide residues. However, both organic and conventional coconut water can contribute to a healthy hair care routine. The choice may depend on personal preferences and budget.

C. Allergies and Sensitivities

Some individuals may have allergies or sensitivities to coconut. Common symptoms include itching or swelling. If you suspect an allergy, consult a healthcare professional for guidance.

6. Additional Hair Care Tips

A. Maintain a Balanced Diet

In addition to using coconut water, maintaining a balanced diet rich in vitamins and minerals is essential for optimal hair health. Include foods high in omega-3 fatty acids, lean proteins, and leafy greens to nourish your hair from within.

B. Stay Hydrated

Drink plenty of water daily to ensure your body and hair remain hydrated. Hydration is key to maintaining the health and vitality of your hair.

C. Avoid Excessive Heat

Limit the use of heat styling tools, as excessive heat can damage hair. If you must use them, apply a heat protectant product beforehand to minimize damage.

D. Protect Your Hair

When exposed to harsh weather conditions, such as sun or cold winds, consider wearing a hat or scarf to protect your hair from damage.

E. Regular Trims

Regular hair trims help remove split ends and promote healthy hair growth. Aim to get a trim every 6-8 weeks to maintain the health of your hair.

7. Conclusion

Coconut water is not only a delicious and hydrating beverage; it is also a powerful ally in your hair care regimen. With its rich nutrient profile, hydrating properties, and ability to promote hair growth, coconut water offers a natural solution for healthier, shinier hair. By incorporating coconut water into your routine through rinses, masks, or scalp treatments, you can enjoy its myriad benefits and achieve the hair you desire.

Whether you struggle with dryness, hair loss, or dandruff, coconut water can help address these concerns while nourishing your hair naturally. Embrace the benefits of coconut water and discover the positive impact it can have on your hair health.

Incorporating coconut water into your hair care routine can be a transformative experience. Enjoy the journey to healthier hair, and remember that the key to vibrant locks lies in consistent care and the use of natural, nourishing ingredients.

Are Apples Beneficial for Weight Loss? Discover Their Surprising Health Benefits

Apples are among the most popular fruits worldwide, renowned for their delicious taste, convenience, and numerous health benefits. As more people seek effective ways to lose weight and improve their health, the question arises: Are apples beneficial for weight loss? In this blog, we will explore the nutritional profile of apples, their potential impact on weight loss, and the myriad health benefits they offer.

The journey toward effective weight loss often involves dietary changes, increased physical activity, and the incorporation of nutritious foods. Apples, with their crisp texture and sweet-tart flavor, are not only a delightful snack but also a versatile ingredient in many dishes. This blog delves into the science behind apples, examining their role in weight management and overall health improvement.

Why Focus on Weight Loss?

Weight loss is a common goal for many people, driven by various factors including health concerns, aesthetic preferences, and lifestyle choices. Achieving a healthy weight can lower the risk of chronic diseases, improve mental health, and enhance overall quality of life. Understanding the foods that support weight loss can empower individuals to make better dietary choices.

1. Nutritional Profile of Apples

A. Caloric Content

One of the most compelling reasons apples are often associated with weight loss is their low caloric content. A medium-sized apple (approximately 182 grams) contains about 95 calories. This makes apples an excellent choice for a satisfying snack without significantly contributing to daily caloric intake.

B. Fiber Content

Apples are rich in dietary fiber, particularly soluble fiber called pectin. A medium apple contains about 4 grams of fiber, which contributes to feelings of fullness and aids in digestion. Fiber slows down the digestion and absorption of nutrients, which can help regulate blood sugar levels and curb appetite.

C. Vitamins and Minerals

Apples are packed with essential vitamins and minerals that contribute to overall health. Some key nutrients found in apples include:

  • Vitamin C: An antioxidant that supports the immune system and promotes skin health.
  • Potassium: An essential mineral that helps regulate blood pressure and fluid balance.
  • Vitamin K: Important for blood clotting and bone health.

D. Antioxidants

In addition to vitamins and minerals, apples are rich in antioxidants, particularly quercetin, catechin, and chlorogenic acid. These compounds have been linked to various health benefits, including reduced inflammation and improved heart health.

2. How Apples Support Weight Loss

A. Low Energy Density

Energy density refers to the number of calories in a given volume of food. Foods with low energy density, like apples, provide fewer calories per gram, allowing you to consume larger portions without overeating. This can lead to reduced overall caloric intake, making weight loss more manageable.

B. Increased Satiety

The high fiber content in apples promotes satiety by slowing digestion and enhancing feelings of fullness. Eating an apple before a meal can reduce overall calorie consumption, making it easier to stick to a weight loss plan. Studies have shown that incorporating fruits high in fiber can help people feel fuller for longer periods.

C. Natural Sugar

While apples contain natural sugars, their fiber content helps moderate the release of glucose into the bloodstream. This prevents rapid spikes and crashes in blood sugar levels, reducing cravings for sugary snacks and promoting stable energy levels throughout the day.

D. Versatile and Convenient

Apples are incredibly versatile and can be enjoyed in various ways—raw, cooked, in salads, or as part of a smoothie. This makes them an easy addition to meals and snacks, helping individuals maintain a healthy diet without feeling deprived.

3. Health Benefits of Apples

A. Heart Health

Numerous studies suggest that regular apple consumption is associated with improved heart health. The soluble fiber in apples helps lower cholesterol levels, while the antioxidants reduce inflammation and prevent the oxidation of LDL cholesterol, both of which contribute to cardiovascular disease.

B. Blood Sugar Regulation

Apples may help regulate blood sugar levels, making them an excellent choice for individuals with diabetes or those at risk. The fiber content slows the absorption of sugar into the bloodstream, preventing spikes in blood sugar. Some studies have also shown that consuming apples is linked to a lower risk of type 2 diabetes.

C. Gut Health

The fiber in apples acts as a prebiotic, promoting the growth of beneficial gut bacteria. A healthy gut microbiome is crucial for overall health, influencing digestion, metabolism, and even mental well-being. Regularly consuming fiber-rich foods like apples can support gut health and improve digestive function.

D. Weight Management

Incorporating apples into a balanced diet can aid in weight management. Their low-calorie content, high fiber levels, and natural sweetness make them an ideal snack for those looking to lose or maintain weight.

E. Cancer Prevention

Some studies suggest that the antioxidants found in apples may play a role in reducing the risk of certain cancers. Research indicates that apple consumption may be linked to a lower risk of colorectal, breast, and lung cancers, though more studies are needed to establish definitive conclusions.

F. Enhanced Immune Function

The vitamin C content in apples supports the immune system, helping the body fend off infections and illnesses. A strong immune system is essential for maintaining overall health, especially during cold and flu season.

G. Skin Health

Antioxidants in apples can contribute to healthier skin by fighting free radicals that cause skin aging and damage. Consuming apples regularly can support skin health and promote a youthful appearance.

4. How to Incorporate Apples into Your Diet

A. Snack Ideas

  • Sliced Apples with Nut Butter: Pair apple slices with almond or peanut butter for a nutritious snack that combines healthy fats, protein, and fiber.
  • Apple Chips: Bake thin apple slices for a crunchy, low-calorie alternative to traditional chips.
  • Cinnamon Apples: Sprinkle sliced apples with cinnamon for a delicious and healthy treat.

B. Meal Additions

  • Salads: Add diced apples to salads for a refreshing crunch and natural sweetness.
  • Oatmeal: Mix chopped apples into your morning oatmeal for added fiber and flavor.
  • Smoothies: Blend apples with spinach, yogurt, and your favorite fruits for a nutritious smoothie.

C. Cooking and Baking

  • Apple Sauce: Make homemade applesauce without added sugar for a healthy dessert or topping.
  • Baked Apples: Core apples and fill them with oats, nuts, and spices, then bake for a warm and satisfying dessert.
  • Soups and Stews: Add chopped apples to savory dishes for a touch of sweetness and depth of flavor.

5. Addressing Common Concerns

A. Are All Apples Created Equal?

While all apples share similar health benefits, some varieties may have slightly different nutrient profiles. Generally, all apples provide fiber and antioxidants, but varieties like Granny Smith may contain higher levels of certain antioxidants. It’s beneficial to consume a variety of apple types to maximize health benefits.

B. Organic vs. Conventional Apples

Choosing organic apples may reduce exposure to pesticide residues. However, washing apples thoroughly can help remove surface residues. Both organic and conventional apples can contribute to a healthy diet, so the choice may depend on personal preferences and budget.

C. Allergies and Sensitivities

Some individuals may have allergies or sensitivities to apples. Common symptoms include itching, swelling, or digestive discomfort. If you suspect an allergy, consult a healthcare professional for guidance.

6. Practical Tips for Buying and Storing Apples

A. Selecting Fresh Apples

When purchasing apples, look for firm, unblemished fruits with vibrant color. Avoid apples with soft spots, bruises, or wrinkles, as these may indicate spoilage.

B. Storing Apples

Store apples in the refrigerator to prolong their freshness. Apples can be kept in a crisper drawer or in a plastic bag with ventilation holes. For optimal flavor, allow apples to come to room temperature before eating.

C. Preparing Apples

Wash apples thoroughly under running water to remove any pesticides or wax. For recipes, peel apples if desired, but keep in mind that many nutrients are found in the skin.

7. Conclusion

Apples are a delicious and nutritious fruit that can play a significant role in weight loss and overall health. Their low caloric content, high fiber levels, and wealth of vitamins and antioxidants make them an ideal choice for anyone looking to improve their diet and support their weight management goals.

By incorporating apples into your meals and snacks, you can enjoy their health benefits while satisfying your taste buds. Remember, achieving weight loss and health goals requires a balanced approach that includes a variety of nutrient-rich foods, regular physical activity, and lifestyle adjustments.

So, the next time you’re searching for a healthy snack or a flavorful ingredient, reach for an apple—your body will thank you!

Copper Peptides for Skin: Benefits, Side Effects, and How to Use

In the world of skincare, copper peptides have become a trending ingredient, often hailed as a powerful anti-aging hero. You may have come across them in serums, creams, and treatments, but what exactly are copper peptides, and why are they good for your skin?

In this blog, we’ll break down everything you need to know about copper peptides, including their benefits, potential side effects, and how to incorporate them into your skincare routine for optimal results.

What Are Copper Peptides?

Copper peptides are small, naturally occurring protein fragments that bond with copper ions, creating a compound that is highly effective in skincare. These compounds are biologically active and play an essential role in various skin functions, from wound healing to collagen production.

The human body naturally produces copper peptides, but their concentration decreases with age, which is where topical application steps in. When applied to the skin, copper peptides can stimulate a variety of beneficial activities, promoting youthful, radiant skin.

Benefits of Copper Peptides for Skin

Copper peptides offer a range of benefits, making them a go-to ingredient in anti-aging and skin rejuvenation products. Below are some of their key advantages:

1. Boosts Collagen Production

Copper peptides are renowned for stimulating collagen and elastin production. Collagen is a vital protein that gives the skin its structure and firmness. As we age, collagen levels deplete, leading to sagging skin and wrinkles. Copper peptides help replenish these levels, improving skin elasticity and firmness, resulting in a smoother, more youthful complexion.

2. Promotes Wound Healing

Another major function of copper peptides is to aid in wound healing. They accelerate the repair of skin tissue, making them ideal for treating acne scars, minor cuts, and skin irritations. This regenerative property helps reduce visible scars and speeds up recovery after treatments like micro-needling or chemical peels.

3. Improves Skin Hydration

Copper peptides help maintain the skin’s moisture barrier, keeping it hydrated and supple. By enhancing the skin’s ability to retain moisture, they prevent dryness and improve skin texture, making it soft and plump. This benefit is particularly useful for those with dry or sensitive skin.

4. Fights Free Radical Damage

Copper peptides also act as antioxidants, neutralizing free radicals that cause premature aging. Free radicals, which are often the result of environmental factors like pollution and UV rays, can damage skin cells and speed up the aging process. Copper peptides protect the skin from this damage, preserving its youthful glow.

5. Reduces Fine Lines and Wrinkles

Thanks to their ability to promote collagen production and boost skin renewal, copper peptides are highly effective at minimizing the appearance of fine lines and wrinkles. Regular use of copper peptide-based products can lead to smoother, firmer skin with fewer visible signs of aging.

6. Enhances Skin Tone and Texture

By encouraging the production of glycosaminoglycans (substances that help maintain skin structure), copper peptides can improve skin tone and texture. This makes the skin look brighter and more even, reducing the appearance of hyperpigmentation, age spots, and uneven skin tone.

Side Effects of Copper Peptides

Although copper peptides are generally considered safe for most skin types, it’s important to be aware of potential side effects and how to minimize them.

1. Skin Irritation

Some individuals may experience mild irritation when first introducing copper peptides into their skincare routine. This can include redness, itching, or a slight burning sensation. To avoid irritation, start by using copper peptides in low concentrations and gradually increase usage as your skin builds tolerance.

2. Breakouts

In rare cases, copper peptides may cause breakouts, especially for those with acne-prone skin. This could be due to an overproduction of oil triggered by the peptides. If you notice an increase in acne or clogged pores, reduce the frequency of use or switch to a gentler formulation.

3. Interactions with Other Active Ingredients

Copper peptides may interact with certain active ingredients in your skincare routine. For instance, they can lose effectiveness when used alongside vitamin C, retinoids, or strong acids. If you’re using these ingredients, it’s best to apply copper peptides at a different time of day or on alternate days to avoid potential interactions.

How to Use Copper Peptides in Your Skincare Routine

Incorporating copper peptides into your skincare routine is easy and can offer transformative results. Here’s how to do it effectively:

1. Choose the Right Product

Copper peptides are available in various forms, including serums, creams, and moisturizers. Serums are often the most potent and effective way to deliver copper peptides deep into the skin. Look for a product with a clear ingredient list that specifies the presence of copper tripeptide-1 or similar compounds.

2. Patch Test First

Before applying copper peptides to your face, perform a patch test on a small area of skin to ensure you don’t have any adverse reactions. Wait 24 hours to see if there’s any redness or irritation.

3. Apply After Cleansing

Copper peptides should be applied after cleansing and toning but before moisturizing. This allows the peptides to penetrate the skin effectively. If you’re using a serum, apply it in small amounts to the face and neck, gently massaging it in.

4. Pair with Gentle Ingredients

For the best results, pair copper peptides with gentle, hydrating ingredients such as hyaluronic acid, niacinamide, or glycerin. These ingredients work well together to provide hydration, soothing properties, and enhanced absorption of copper peptides.

5. Use Sparingly

A little goes a long way with copper peptides. You don’t need to use them every day—two to three times per week is often enough to see noticeable improvements. If you’re layering products, apply the copper peptides after any water-based treatments but before heavier creams or oils.

Final Thoughts

Copper peptides are a fantastic addition to your skincare routine, particularly if you’re focused on anti-aging, hydration, and skin repair. Their ability to stimulate collagen production, fight free radicals, and enhance skin healing makes them a versatile and powerful ingredient.

However, as with any skincare product, it’s essential to introduce them gradually, monitor for any side effects, and ensure they complement the other products in your routine. With consistent use, copper peptides can help you achieve healthier, firmer, and more radiant skin.


Key Takeaways:

  • Copper peptides promote collagen production, improve hydration, and aid in skin healing.
  • They are generally safe, but potential side effects include irritation and breakouts.
  • Avoid using copper peptides with ingredients like vitamin C or retinoids to prevent reduced effectiveness.

If you’re looking for a non-invasive way to rejuvenate your skin and keep it youthful, copper peptides may be the perfect solution. Give them a try and enjoy the glowing results!

Red Spots on Skin: Easy Causes, Treatments, and Solutions

Experiencing red spots on your skin can be alarming. They may appear suddenly and can vary in size, shape, and texture. Understanding what causes these red spots, how to treat them, and preventative measures can help you manage your skin health effectively. This comprehensive guide will walk you through everything you need to know about red spots on your skin, including common causes, treatment options, and practical solutions for relief.

What Are Red Spots?

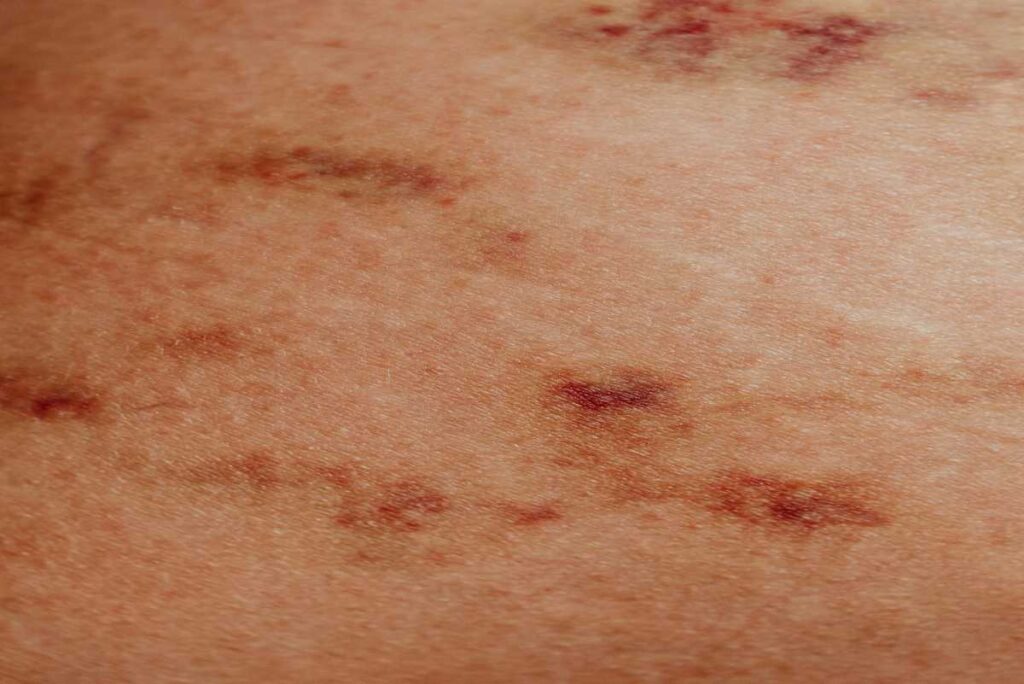
Red spots on the skin are areas of redness that can vary in size and shape. They can appear anywhere on the body and may be accompanied by other symptoms such as itching, swelling, or pain. The appearance of red spots can range from tiny dots to larger patches and can indicate various underlying conditions, ranging from benign to more serious issues.

Characteristics of Red Spots

  • Color: Usually bright red or dark red, depending on the cause.
  • Texture: Can be flat or raised; some may be itchy or painful.
  • Location: Can appear on any part of the body, including the face, arms, legs, and torso.

Importance of Understanding Red Spots

Recognizing the signs and symptoms associated with red spots can empower you to take control of your skin health. Whether they are temporary irritations or indicators of an underlying condition, understanding red spots can help you make informed decisions about when to seek treatment and how to care for your skin effectively.

Common Causes of Red Spots

Identifying the cause of red spots is essential for determining the appropriate treatment. Here are some common causes:

Allergic Reactions

Allergic reactions can cause red spots or rashes on the skin. Common triggers include:

  • Foods: Certain foods such as nuts, shellfish, dairy, and certain fruits can trigger allergic reactions.
  • Medications: Antibiotics and pain relievers may cause skin reactions in some individuals.
  • Skin Products: Soaps, lotions, or cosmetics can lead to contact dermatitis, resulting in red spots.

Symptoms: Itching, swelling, and redness are common in allergic reactions. If you suspect an allergy, try to identify the trigger and avoid it.

How to Identify Allergic Reactions:

  1. Review Recent Changes: Consider any new foods, medications, or products you’ve used recently.
  2. Observe Timing: Note when the red spots appeared in relation to exposure to potential allergens.
  3. Seek Allergy Testing: If you’re unsure of the cause, consider consulting an allergist for testing.

Skin Conditions

Certain skin conditions can lead to the formation of red spots:

  • Eczema: A chronic condition that causes dry, itchy skin and can lead to red patches. Eczema can be triggered by various factors, including environmental irritants and allergens.
  • Psoriasis: An autoimmune disorder that results in red, scaly patches on the skin. It often affects the scalp, elbows, and knees.
  • Acne: Can cause red spots or pimples on the face and body, especially during flare-ups. Acne can be exacerbated by hormonal changes, stress, and diet.

Recognizing Skin Conditions:

  1. Eczema: Look for dry, cracked patches of skin that may ooze or crust over.
  2. Psoriasis: Identify red patches covered with silvery scales, often appearing symmetrically on the body.
  3. Acne: Notice inflamed pimples or cysts, often accompanied by blackheads and whiteheads.

Infections

Infections can also result in red spots. These can be bacterial, viral, or fungal:

  • Bacterial Infections: Conditions like folliculitis (inflammation of hair follicles) or cellulitis can cause red spots. Folliculitis often appears as small, red bumps around hair follicles, while cellulitis typically causes larger areas of redness and swelling.
  • Viral Infections: Chickenpox, shingles, and measles can lead to red rashes and spots on the skin. These conditions may be accompanied by fever and other systemic symptoms.
  • Fungal Infections: Conditions like ringworm can result in red, itchy patches. Fungal infections often have a distinct ring-like appearance and can spread if not treated.

Recognizing Infections:

  1. Bacterial Infections: Look for red, swollen areas that may be warm to the touch and may also drain pus.
  2. Viral Infections: Note if red spots are accompanied by flu-like symptoms, such as fever, fatigue, or body aches.
  3. Fungal Infections: Observe for spots that have raised edges and may itch.

Heat Rash

Heat rash, or prickly heat, occurs when sweat becomes trapped under the skin, causing red spots or bumps. It often appears in hot and humid weather and is more common in infants and young children.

Symptoms of Heat Rash:

  • Red Bumps: Small, raised red spots that may appear in clusters.
  • Itching and Discomfort: A prickling or burning sensation may accompany the rash.

Preventing Heat Rash:

  • Stay Cool: Wear lightweight, breathable clothing and stay in air-conditioned environments when possible.
  • Keep Skin Dry: Pat the skin dry after sweating and avoid heavy creams that may block sweat glands.

Insect Bites

Bites from mosquitoes, fleas, or other insects can lead to localized red spots that may be itchy or swollen. These spots usually appear shortly after being bitten.

Symptoms of Insect Bites:

  • Redness and Swelling: A small red spot that may expand and become swollen.
  • Itching: A strong urge to scratch the affected area.

How to Treat Insect Bites:

  1. Clean the Area: Wash the bite with soap and water to prevent infection.
  2. Apply Cold Compress: Reduce swelling and itching with a cold pack.
  3. Use Topical Creams: Consider hydrocortisone or calamine lotion for itching relief.

Other Factors

Other factors that may contribute to red spots include:

  • Blood Vessel Issues: Conditions like petechiae or purpura, which involve tiny blood vessels breaking under the skin, can lead to small red or purple spots. These spots do not blanch when pressed.
  • Sunburn: Overexposure to the sun can cause red spots as a result of skin damage. Sunburn can also lead to peeling skin and increased sensitivity.
  • Dermatitis: Various forms of dermatitis, including seborrheic dermatitis, can result in red patches on the skin, often appearing oily or scaly.

How to Treat Red Spots

Treatment for red spots depends on their cause. Here are some effective options:

Home Remedies

  1. Cold Compress: Applying a cold compress to the affected area can help reduce swelling and soothe itching. Use a clean cloth soaked in cold water or a cold pack wrapped in a towel.
  2. Aloe Vera Gel: Known for its soothing properties, aloe vera can be applied directly to red spots to calm the skin. Look for pure aloe vera gel without additives for best results.
  3. Oatmeal Baths: Soaking in an oatmeal bath can relieve itchiness and irritation caused by allergic reactions or eczema. Simply add colloidal oatmeal to warm bathwater and soak for 15–20 minutes.
  4. Coconut Oil: This natural moisturizer can help hydrate the skin and reduce redness. Apply organic coconut oil to the affected areas as needed.
  5. Apple Cider Vinegar: Diluted apple cider vinegar may help with fungal infections and has antibacterial properties. Mix one part vinegar with three parts water and apply with a cotton ball, rinsing after a few minutes.

Over-the-Counter Treatments

  1. Hydrocortisone Cream: This anti-inflammatory cream can help reduce redness and swelling associated with allergic reactions and skin conditions. Use as directed on the affected area.
  2. Antihistamines: Oral antihistamines like diphenhydramine (Benadryl) can alleviate itching and swelling from allergic reactions. Always follow the dosage recommendations on the packaging.
  3. Calamine Lotion: Effective for soothing insect bites and rashes, calamine lotion can provide relief from itching. Apply as needed to the affected areas.
  4. Topical Antifungals: For fungal infections, over-the-counter antifungal creams like clotrimazole or miconazole can help clear up the infection and reduce redness.

Prescription Medications

If over-the-counter treatments do not provide relief, you may need to see a doctor for prescription medications:

  1. Topical Steroids: Prescription-strength steroids can be more effective for treating inflammatory skin conditions such as psoriasis and eczema.
  2. Antibiotics: If a bacterial infection is present, your doctor may prescribe oral or topical antibiotics to help clear the infection.
  3. Antiviral Medications: In cases of viral infections like shingles, antiviral medications may be necessary to speed up recovery and reduce symptoms.
  4. Immunosuppressants: For severe skin conditions like psoriasis, systemic medications may be recommended to help manage the immune response.

When to Seek Medical Help

While many cases of red spots can be managed at home, certain situations warrant a visit to a healthcare professional:

  • Persistent Spots: If red spots do not improve or worsen over time, seek medical advice to rule out underlying conditions.
  • Accompanied by Other Symptoms: If you experience fever, difficulty breathing, or other concerning symptoms, contact a doctor immediately.
  • Severe Pain or Swelling: If the red spots are painful or associated with significant swelling, a medical evaluation is necessary to assess for infection or other complications.
  • Rapidly Spreading Spots: If red spots spread quickly across the body, it could indicate a serious condition requiring prompt attention.
  • Changes in Appearance: Any sudden changes in the size, shape, or color of existing moles or spots should be evaluated by a dermatologist.

Preventative Measures

To minimize the risk of developing red spots on your skin, consider implementing the following preventative measures:

  1. Avoid Known Allergens: If you have allergies, make a list of triggers and take steps to avoid exposure.
  2. Use Gentle Skin Care Products: Opt for hypoallergenic, fragrance-free products to reduce the risk of irritations.
  3. Practice Good Hygiene: Regularly wash your skin and keep it moisturized to maintain its health and integrity.
  4. Protect Your Skin from the Sun: Use sunscreen with at least SPF 30 to protect against sunburn and skin damage.
  5. Stay Hydrated: Drinking plenty of water supports overall skin health and can help prevent dryness.
  6. Maintain a Healthy Diet: A balanced diet rich in vitamins and antioxidants can support skin health and resilience.
  7. Manage Stress: Stress can exacerbate skin conditions, so practice stress-reduction techniques such as meditation, exercise, or yoga.

Conclusion

Red spots on the skin can result from a variety of causes, ranging from benign irritations to more serious conditions. Understanding the characteristics of these spots and their common causes can help you manage your skin health effectively. Whether using home remedies, over-the-counter treatments, or seeking medical advice, taking action can alleviate discomfort and improve your skin’s appearance. By implementing preventative measures, you can maintain healthy skin and reduce the likelihood of future occurrences. If you’re ever in doubt about the cause of red spots on your skin, consult a healthcare professional for personalized advice and treatment options.

How to Use Olive Oil to Remove Makeup?

Removing off the makeup might still be one of the most challenging tasks you face every day, especially if you’ve already nodded off and can hardly hold your eyes open.

Picking the right makeup cleanser is even more difficult, particularly if you have delicate skin. And, if you run out of makeup cleanser, don’t panic because we’re about to teach you a home item that can easily replace regular makeup remover.

You can use olive oil to remove makeup. It also offers a variety of advantages for your eyes and skin. It may appear strange to wash your skin with oil, given that oil is usually the thing you are working to remove off your face.

But olive oil can be helpful in this process. Because of its greasy qualities, this natural oil has an immediate impact when used for a makeup remover, allowing you to eliminate the most resistant makeup, such as mascara and eyeliner.

But what makes olive oil unique is that it is not just an excellent makeup cleanser, but it is a fantastic moisturizer for the skin around the eyes. Yes, and this can make your entire skin glow.

Is olive oil beneficial to the skin?

Despite its alarming pore-clogging tendency, olive oil has several advantages:

It’s typically abundant with squalene, an oil that resembles your skin’s normal sebum, this it’ll make your skin exceptionally smooth and silky, and it’s additionally high in antioxidants, which function intensely to protect your skin from environmental harm.

Below are the different advantages of using olive oil. Read this post to find out incredible facts about the use of olive oil and methods to remove your makeup successfully.

What is the process of oil cleansing?

“Like dissolves like,” as we all know from chemistry class. As a result, substances will absorb other elements with identical chemical structures.

Given that oils and heavy lubricants are frequently used in cosmetics, it stands to reason why olive oil can remove greasy makeup.

Beauty chemists who manufacture oil-based makeup cleansers and wipes employ the principle of identical components dissolving in one another.

Many liquid cosmetic removers contain pure oil, while lotions blend with liquid, thickening agents, and emulsifiers.

Nevertheless, specific cosmetic cleansers aren’t particularly good at removing makeup due to the water-based elements.

They are therefore designed to eliminate exterior dirt and grease. As a result, the gentler a cleaner is, the less capable it is of removing heavy oils and grease.

Olive Oil’s Skin Advantages

Olive oil has many skin advantages, from hydrating dry spots to dissolving stubborn foundations. Below are a few advantages of olive oil –

  • Keeps moisture from drying up:

The significant advantage of olive oil is that it moisturizes the skin by decreasing moisture loss. This moisturization boosts the skin’s moisture contents, which improves its health and beauty.

  • Defends against pollution problems:

The antioxidant qualities of olive oil preserve skin cells from environmental stress and inflammation.

This implies that you’ll be protected against fine lines and wrinkles as well as discomfort or redness.

  • Defends against premature aging:

Olive oil has a high concentration of vitamins A, D, K, & E and squalene. These can help reduce oxidative strain on the skin (which can result in premature skin aging).

  • Makeup lifter:

Olive oil is excellent for dissolving waxy things such as water-resistant eyeliner and mascara. It hydrates the sensitive skin around the eyes and strengthens eyelashes in the same manner as conditioners do for hair. It also contains antioxidants and moisturizing squalene.

How do you clean makeup with olive oil?

You’ll require olive oil, absorbent tissues, and cotton wipes to eliminate makeup utilizing olive oil. There are two ways to dissolve makeup with olive oil.

You may apply the oil to a cotton ball and wipe the makeup with it, or you could take olive oil in your hand and work it into your skin to dissolve the makeup.

After using either procedure, you must use an absorbent tissue to remove the remaining oil from your face and afterward wash it.

Remember: Before using olive oil on your skin, perform a patch test.

Is olive oil eye makeup remover?

Olive oil is an excellent product for removing resistant makeup, like mascara or sparkly eyeshadow. Apply a few droplets of olive oil into a cotton ball and apply the dab on the eye to wipe makeup.

Lightly massage it on the eyes to dissolve thick makeup. When you sense your makeup has fully dissolved, rub the cotton pad in circular movements over the eye.

The mascara from the eyes would be transferred to the cotton pad using circular movements. Do this process for both the eyes.

If there are any mascara leftovers on the eyelashes, take a clean cotton ball, dab a little oil on it, and lightly massage it until these chunks of mascara dissolve and fall off the eyelids.

Should you use Extra virgin olive oil makeup remover?

Most cosmetics, including moisturizers, concealer, eyeliner, eyeshadow, and mascara, are composed of thick waxes and oils.

Extra virgin olive oil will quickly remove the base, eye shadow, eyeliner, lipstick, and other cosmetics since it has an identical chemical composition to the lubricants and oils used in cosmetics. In reality, the majority of commercial makeup cleaners are oil-based.

Because extra virgin olive oil is an organic item, it is free of the colors, aromas, emulsifying agents, thickening agents, and other ingredients found in industrial makeup removers.

It is also non-comedogenic, which ensures it will not clog skin pores. Olive oil is very affordable; odds are you probably have it in your home, but if not, you could buy up a massive quantity at the supermarket that would last a long time.

Just dab a tiny quantity of extra virgin oil with your fingers and lightly massage this over your face and eyes to eliminate makeup.

After removing your makeup, your face may retain a tiny greasy behind. To remove it, wash it using lukewarm water, then dry it with a light, clean cloth.

Here are various applications for olive oil on the skin.

Other than removing makeup, olive oil has different advantages as well. We have come up with the most accessible and most valuable benefits of extra virgin olive oil –

  • Hand lotion

When you are cooking, put a few oil droplets in your palms. You will not have to stress about putting bad-tasting moisturizer in your meals, and you shouldn’t have to keep a container of moisturizer in your kitchen.

  • Babies’ moisturizer

You may apply olive oil to the baby’s skin. Olive oil is sometimes used as baby oil and can assist with dryness, eczema, or cradle cap.

You don’t have to fear your kid consuming olive oil as they continually put their fingers into their mouths. It’s beneficial to them!

Olive oil has also been used to clean the bottoms of newborns. If your infant is sensitive to diaper rashes, consider using a towel and a combination containing olive oil & water rather than diaper wipes.

  • Remedy for hair

Nourish your scalp with olive oil to prevent breakage and frizz. Fill a glass bottle halfway with ½ cup olive oil. Pour a bowl halfway with boiling water and submerge the container in it for 5 minutes. Check the oil’s heat.

It ought to be warm but not heated. Secure your hair with plastic paper or a plastic bath cover after applying the oil. Then drape a cloth or a hair wrap over yourself. Set aside for 20-45 minutes. Rinse and dry your hair to uncover shiny locks!

Warnings and Recommendations

The elements recommended above are not meant for every skin type. These components are suitable for people with normal skin.

When dry patches, wipe your makeup using a 1:3 proportion of castor oil with extra virgin olive oil.

On the face, olive oil can create a greasy layer. If you have oily skin and lids, you might notice that the use of olive oil daily can make your skin sticky and might result in additional breakouts.

Olive oil cosmetic remover isn’t suitable for all types of makeup. Applying olive oil to eliminate waterproof face makeup might be more difficult. In that instance, excessive straining might cause fine lines and wrinkles, particularly around the eyes.

Conclusion

Finally, we recommend a patch test on your skin before applying it to your skin. If you face any issues or skin irritation, kindly do not continue using olive oil to remove makeup. Otherwise, if you have normal skin and benefit from olive oil, use them.

Instead of using expensive makeup remover from the market, reap the benefits of olive oil to remove mascara, eye makeup, foundation, and everything else.

This will benefit your skin in the long term. As mentioned above, the use of olive oil will keep the glow on your face. As you can use olive oil eye makeup remover, it can help you with the skin around the eyes too. Overall the benefits are enormous.