Types of Neck Acne and Home Remedies for Pimples on the Neck

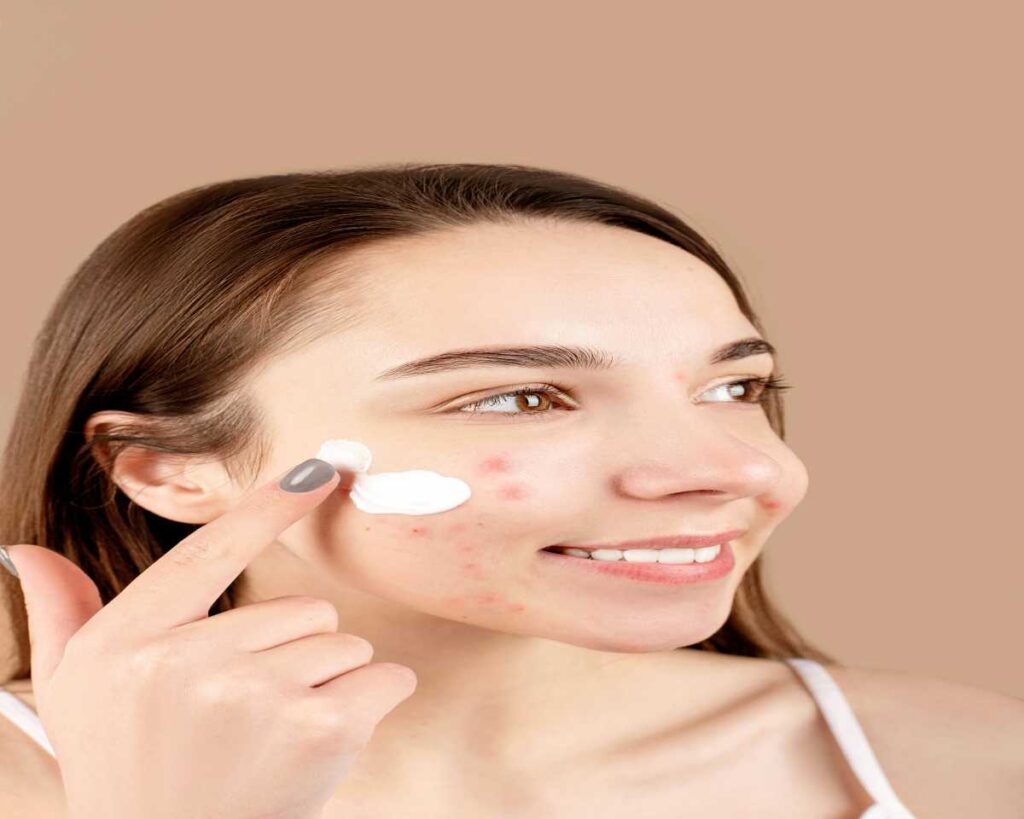
Acne isn’t limited to the face. It can appear on various parts of the body, including the neck. Pimples on the neck can be uncomfortable, unsightly, and sometimes even painful. Neck acne is quite common and can affect people of all ages. Whether it’s from hormonal fluctuations, poor skincare habits, or environmental factors, dealing with neck acne can be frustrating.

Fortunately, there are several ways to address neck acne, both with home remedies and preventive measures. In this blog, we will explore the different types of neck acne, their causes, and provide effective home remedies to help you manage and prevent pimples on your neck.


Types of Neck Acne

Before delving into remedies, it’s important to understand the different types of neck acne. Acne on the neck can vary in severity and appearance, and knowing which type you have can help guide your treatment.

1. Whiteheads

Whiteheads are small, raised bumps that appear on the skin when hair follicles become clogged with excess oil, dead skin cells, and bacteria. Whiteheads on the neck can be quite noticeable and are often skin-colored or slightly white.

  • Cause: Clogged pores, excessive oil production, and improper skincare.
  • Appearance: Small, round, and flesh-colored with a white or yellowish center.

2. Blackheads

Blackheads are open comedones formed when pores are clogged with oil and dead skin cells. Unlike whiteheads, blackheads are open to the air, causing the trapped debris to oxidize and turn black.

  • Cause: Accumulation of dirt, oil, and skin cells in open pores.
  • Appearance: Small, black, or dark spots that are flat against the skin.

3. Cystic Acne

Cystic acne is one of the most severe types of acne, occurring when clogged pores get infected and form large, painful lumps under the skin. Cystic acne on the neck can be quite painful and may take longer to heal than other types of acne.

  • Cause: Deep infection in hair follicles or sweat glands, often exacerbated by hormonal fluctuations or poor hygiene.
  • Appearance: Large, red, swollen, painful lumps beneath the skin’s surface.

4. Papules

Papules are inflamed, red bumps that form when hair follicles become irritated but don’t contain pus. These bumps are often tender to the touch.

  • Cause: Skin inflammation caused by blocked pores.
  • Appearance: Small, raised, and red bumps, often accompanied by tenderness.

5. Pustules

Pustules are similar to papules, but unlike papules, they contain pus. These pimples can be painful and often have a white or yellow center.

  • Cause: Infected pores, often with a buildup of oil, dead skin, and bacteria.
  • Appearance: Red, swollen pimples with a white or yellow pus-filled center.

Causes of Neck Acne

Understanding the underlying causes of neck acne is crucial for managing and preventing it. Several factors contribute to the development of pimples on the neck:

  1. Hormonal Changes: Hormonal fluctuations, such as those during puberty, menstruation, or pregnancy, can increase oil production in the skin, leading to clogged pores and acne.
  2. Poor Hygiene: Not cleansing the neck area regularly or allowing sweat and dirt to accumulate on the skin can clog pores and contribute to acne.
  3. Tight Clothing or Accessories: Wearing tight collars, scarves, or necklaces can create friction and trap sweat, oil, and bacteria on the skin, causing breakouts.
  4. Hair Products: Some hair products, such as shampoos, conditioners, and styling gels, can leave residue on the skin, leading to clogged pores and neck acne.
  5. Diet: A diet high in processed foods, dairy, and sugar can contribute to acne flare-ups by increasing inflammation and oil production in the skin.
  6. Stress: High levels of stress can trigger hormonal changes, leading to breakouts on the neck and other areas of the body.

Home Remedies for Pimples on the Neck

While over-the-counter treatments are available, many people prefer natural home remedies for treating acne on the neck. Below are some effective and easy-to-implement home remedies that can help reduce neck pimples:

1. Tea Tree Oil

Tea tree oil has powerful antibacterial and anti-inflammatory properties, making it an excellent remedy for acne. It helps reduce the swelling and redness of pimples while fighting off the bacteria that cause acne.

  • How to Use: Dilute a few drops of tea tree oil with a carrier oil, such as coconut or olive oil, and apply it to the affected area using a cotton swab. Leave it on for 15-20 minutes and rinse off with lukewarm water. Repeat this twice a day for best results.

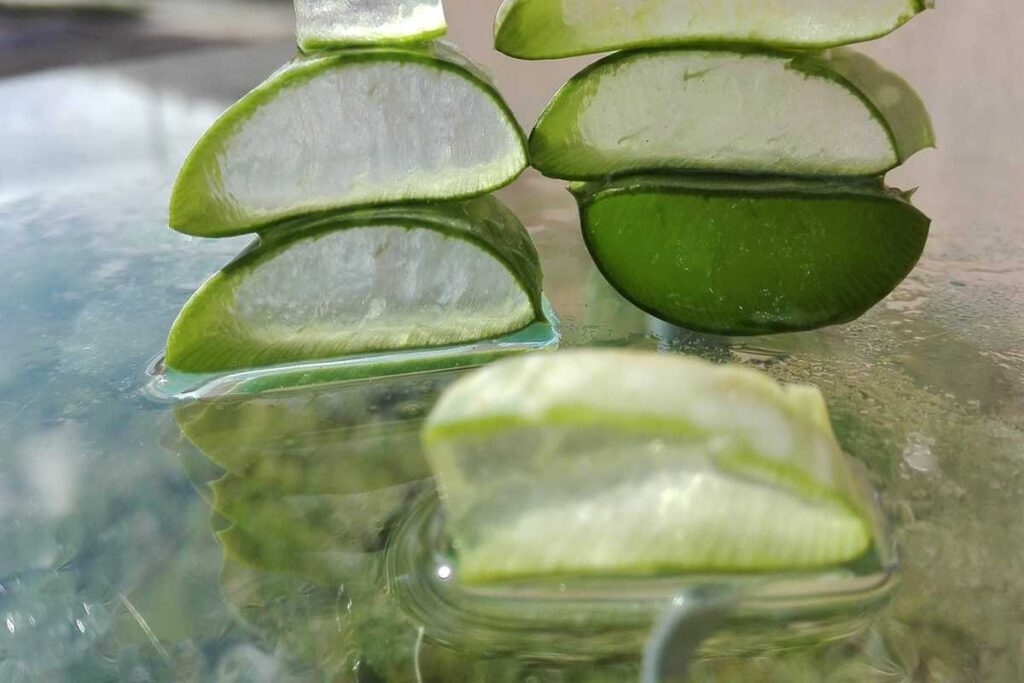
2. Aloe Vera

Aloe vera is known for its soothing and healing properties, making it ideal for treating inflamed pimples on the neck. It can reduce redness, prevent infection, and promote faster healing.

  • How to Use: Apply fresh aloe vera gel directly to the acne on your neck and leave it on for 20-30 minutes. Rinse off with water. Repeat daily for best results.

3. Apple Cider Vinegar

Apple cider vinegar contains acetic acid, which has antibacterial properties that can help kill acne-causing bacteria. It also helps balance the skin’s pH, which is important for preventing breakouts.

  • How to Use: Dilute apple cider vinegar with water (1:3 ratio) and apply it to your neck using a cotton ball. Leave it on for a few minutes before rinsing with warm water. Use this remedy once a day.

4. Honey and Cinnamon Mask

Honey has antibacterial properties, while cinnamon helps improve blood circulation and reduce inflammation. Together, they make an effective remedy for treating pimples on the neck.

  • How to Use: Mix 1 tablespoon of honey with 1 teaspoon of cinnamon powder to form a paste. Apply it to the affected areas and leave it on for 10-15 minutes. Rinse off with lukewarm water. Use this remedy 2-3 times a week.

5. Green Tea

Green tea is rich in antioxidants and has anti-inflammatory properties that can help reduce acne-causing bacteria and calm the skin. Drinking green tea and applying it topically can both be beneficial for neck acne.

  • How to Use: Brew a cup of green tea and let it cool. Once cooled, soak a cotton ball in the tea and apply it to the acne-affected area. Leave it on for 10-15 minutes before rinsing off. Drink green tea regularly to reap its internal benefits as well.

6. Turmeric Paste

Turmeric has antibacterial and anti-inflammatory properties, making it a potent remedy for acne. It helps reduce swelling, redness, and pain associated with pimples.

  • How to Use: Mix a small amount of turmeric powder with water or honey to form a paste. Apply it to the affected area and leave it on for 15-20 minutes before washing off with lukewarm water. Repeat 2-3 times a week.

7. Exfoliation with Baking Soda

Baking soda acts as a natural exfoliator that helps remove dead skin cells and unclog pores. It also has antibacterial properties, making it useful for treating acne.

  • How to Use: Mix baking soda with water to form a paste. Gently massage the paste onto your neck in circular motions for about 1-2 minutes, then rinse with warm water. Use this remedy once or twice a week.

8. Lemon Juice

Lemon juice has natural astringent properties, which can help shrink pores and reduce acne. Its high vitamin C content also promotes skin healing.

  • How to Use: Dab a small amount of lemon juice on the affected area using a cotton ball. Leave it on for 10-15 minutes before washing it off with water. Be cautious if you have sensitive skin, as lemon juice can sometimes cause irritation.

Preventive Measures for Neck Acne

In addition to home remedies, there are several preventive measures you can take to avoid neck acne in the future:

  1. Keep Your Neck Clean: Wash your neck daily to remove excess oil, dirt, and sweat. Use a gentle, non-comedogenic cleanser to avoid irritating the skin.
  2. Avoid Tight Collars: Tight clothing can create friction and trap sweat on the neck, leading to acne. Opt for looser-fitting shirts and scarves.
  3. Change Your Hair Care Products: If you notice neck acne, try switching to a more gentle, non-comedogenic shampoo or conditioner. Avoid letting your hair touch your neck if possible.
  4. Stay Hydrated: Drinking plenty of water helps keep your skin hydrated and flushes out toxins, which may contribute to acne.
  5. Avoid Touching Your Neck: Touching your neck with dirty hands can transfer bacteria and oils to your skin, leading to breakouts.

Conclusion: Managing and Preventing Neck Acne

Neck acne is a common concern, but with the right treatment and preventative measures, it can be managed effectively. By understanding the different types of neck acne and incorporating natural home remedies into your skincare routine, you can reduce the appearance of pimples and enjoy smoother, clearer skin. Consistency is key, so stick to a regular skincare regimen, and give these remedies time to work for you.

Natural Ways to Moisturize Oily Skin

Managing oily skin can often feel like a constant balancing act. On one hand, you want to keep your skin hydrated and nourished, but on the other hand, you’re trying to avoid products that will make your skin feel greasy or clogged. Fortunately, you don’t have to rely on harsh chemicals or heavy moisturizers to keep your skin moisturized. There are several natural remedies and techniques that can provide the hydration your skin needs while helping to control excess oil production. In this blog, we’ll explore the best natural ways to moisturize oily skin, so you can achieve a healthy, glowing complexion without the shine.

1. Aloe Vera

Aloe vera is a natural, soothing gel that’s packed with water, making it a fantastic option for moisturizing oily skin. It is lightweight, non-comedogenic (won’t clog pores), and helps to maintain your skin’s natural moisture balance. Aloe vera also has anti-inflammatory and antibacterial properties, which can be beneficial for oily skin prone to acne and breakouts.

How It Helps:

  • Hydrates without adding excess oil.
  • Soothes irritated or inflamed skin.
  • Helps control excess sebum production.

How to Use:

  • Apply fresh aloe vera gel directly from the plant or purchase 100% pure aloe vera gel.
  • Gently massage it into your face after cleansing, and leave it on for 10-15 minutes before rinsing off with warm water.

2. Jojoba Oil

Though it might sound counterintuitive, jojoba oil is one of the best natural oils for oily skin. This is because jojoba oil closely mimics the skin’s natural sebum, which means it can help regulate oil production. By providing just the right amount of moisture, jojoba oil tricks the skin into thinking it doesn’t need to produce excess oil, leading to a more balanced complexion.

How It Helps:

  • Balances oil production and hydrates skin.
  • Acts as a non-comedogenic moisturizer.
  • Helps control acne and prevents clogged pores.

How to Use:

  • Apply a few drops of jojoba oil to your face after cleansing, gently massaging it in.
  • You can also mix it with your favorite essential oils, such as tea tree oil, to enhance its acne-fighting benefits.

3. Honey

Honey is a natural humectant, which means it draws moisture into the skin and helps retain it. Not only does it hydrate, but it also has antibacterial properties, making it ideal for those with oily, acne-prone skin. It’s gentle on the skin and can be used as a natural moisturizer to soothe and balance the skin without clogging pores.

How It Helps:

  • Naturally hydrates without leaving a greasy residue.
  • Fights acne due to its antibacterial properties.
  • Keeps skin soft and supple.

How to Use:

  • Apply raw honey directly to your face as a mask, leaving it on for 15-20 minutes before rinsing with warm water.
  • You can also mix honey with other hydrating ingredients like aloe vera for added benefits.

4. Witch Hazel

Witch hazel is a natural astringent that tightens the skin and helps reduce excess oil production. It also has anti-inflammatory properties that can calm irritation, making it a great option for oily skin that is prone to acne or blemishes. While it may seem like witch hazel is drying, it actually helps balance oily skin by removing excess oil without stripping the skin of its necessary moisture.

How It Helps:

  • Reduces oiliness and minimizes shine.
  • Helps reduce acne and inflammation.
  • Tightens pores and tones the skin.

How to Use:

  • Apply witch hazel to a cotton pad and gently swipe it over your face after cleansing.
  • You can also mix it with aloe vera or tea tree oil for a soothing, acne-fighting treatment.

5. Green Tea

Green tea is packed with antioxidants that help protect the skin from damage caused by free radicals. It also has anti-inflammatory and antimicrobial properties that help fight acne and soothe irritated skin. When used as a moisturizer, green tea can provide hydration and control excess sebum production without the greasy feeling.

How It Helps:

  • Hydrates and balances the skin.
  • Reduces inflammation and acne.
  • Protects the skin from environmental damage.

How to Use:

  • Brew green tea and let it cool down.
  • Use a cotton ball or spray bottle to apply the tea to your face after cleansing, allowing it to absorb into the skin.
  • You can also apply a cooled green tea bag directly to irritated spots for extra calming effects.

6. Rose Water

Rose water is another natural, gentle ingredient that can work wonders for oily skin. It has soothing, anti-inflammatory properties that calm the skin while providing light hydration. Rose water is also known for its ability to balance the skin’s pH, which helps prevent excess oil production.

How It Helps:

  • Hydrates and soothes the skin without making it greasy.
  • Balances the skin’s natural pH.
  • Reduces redness and inflammation.

How to Use:

  • Spray rose water on your face as a toner after cleansing, or dab it gently with a cotton ball.
  • You can also mix it with aloe vera or witch hazel for a calming and hydrating toner.

7. Coconut Oil (In Moderation)

Coconut oil is known for its moisturizing properties, but it can be a bit heavy for those with oily skin. However, when used sparingly and on the right areas, coconut oil can provide hydration without overwhelming the skin. It is also packed with lauric acid, which helps fight acne-causing bacteria.

How It Helps:

  • Deeply moisturizes dry spots without making the entire face oily.
  • Fights bacteria and helps clear acne.
  • Leaves the skin soft and nourished.

How to Use:

  • Use a small amount (about a pea-sized amount) of virgin coconut oil and apply it to specific dry areas of your face.
  • If using it all over, make sure to only apply a thin layer and avoid overuse.

8. Cucumber

Cucumber is known for its hydrating and soothing properties. It has high water content, making it perfect for oily skin that needs light hydration. The cooling effect of cucumber also helps reduce skin irritation, puffiness, and redness, making it an excellent natural moisturizer for oily skin types.

How It Helps:

  • Hydrates and refreshes the skin.
  • Reduces puffiness and inflammation.
  • Keeps skin feeling cool and soothed.

How to Use:

  • Slice fresh cucumber and apply the slices directly to your face for a cooling effect.
  • You can also blend cucumber and apply the juice as a face mask for additional hydration.

9. Avocado

Avocado is rich in healthy fats and vitamins, making it a nourishing ingredient for dry or dehydrated skin. While it may seem too heavy for oily skin, when used in moderation, avocado can provide deep hydration and help balance oil production. The antioxidants in avocado also help fight free radicals, which can damage the skin.

How It Helps:

  • Provides rich moisture without clogging pores.
  • Reduces inflammation and helps repair damaged skin.
  • Enhances skin elasticity and smoothness.

How to Use:

  • Mash a small amount of ripe avocado and apply it as a face mask for 10-15 minutes before rinsing.
  • You can also mix it with honey for added hydration.

In Summary:

Oily skin requires moisture just like any other skin type, but it’s crucial to choose natural products that won’t add to excess oil or clog pores. These natural moisturizers can help hydrate your skin while controlling oil production and providing additional skin benefits. Here’s a quick recap of the top natural ways to moisturize oily skin:

  1. Aloe vera – Light, hydrating, and soothing for oily skin.
  2. Jojoba oil – Balances oil production without clogging pores.
  3. Honey – A natural humectant that hydrates and fights acne.
  4. Witch hazel – A natural astringent that helps reduce oiliness.
  5. Green tea – Hydrates, reduces inflammation, and protects skin.
  6. Rose water – Soothes, hydrates, and balances skin pH.
  7. Coconut oil (in moderation) – Moisturizes without overwhelming skin.
  8. Cucumber – Refreshes and hydrates the skin naturally.
  9. Avocado – Deeply nourishes and repairs skin with healthy fats.

By incorporating these natural moisturizers into your skincare routine, you can maintain healthy, balanced, and hydrated skin without the risk of excess shine or clogged pores.

4o mini

12 Green Tea Face Packs for Different Skin Types

Green tea, packed with antioxidants, vitamins, and minerals, is a powerhouse ingredient in skincare. Whether you have oily, dry, sensitive, or combination skin, green tea can provide specific benefits to enhance your skincare routine. Here are 12 green tea face packs tailored to different skin types and concerns, perfect for nourishing and revitalizing your skin naturally.


1. Green Tea and Honey Face Pack for Dry Skin

Why It Works
Honey is a natural humectant that attracts moisture, making it perfect for dry skin. Combined with green tea, which hydrates and soothes, this face pack leaves skin soft and supple.

Ingredients

  • 1 tablespoon green tea (cooled, brewed tea or powdered form)
  • 1 tablespoon honey

How to Use
Mix the ingredients to form a smooth paste. Apply to the face and leave it on for 15–20 minutes, then rinse off with lukewarm water.


2. Green Tea and Lemon Face Pack for Oily Skin

Why It Works
Lemon’s astringent properties help balance excess oil, while green tea’s antioxidants reduce acne-causing bacteria and control sebum production.

Ingredients

  • 1 tablespoon green tea
  • A few drops of lemon juice

How to Use
Blend the green tea and lemon juice together. Apply to your face, avoiding sensitive areas, and leave it on for 10–15 minutes. Rinse with cool water.


3. Green Tea and Aloe Vera Face Pack for Sensitive Skin

Why It Works
Aloe vera calms and soothes irritation, making it ideal for sensitive skin, while green tea’s anti-inflammatory properties provide additional comfort.

Ingredients

  • 1 tablespoon green tea
  • 1 tablespoon aloe vera gel

How to Use
Mix green tea with aloe vera gel. Apply gently to the face and leave it on for 15–20 minutes before rinsing with lukewarm water.


4. Green Tea and Yogurt Face Pack for Glowing Skin

Why It Works
Yogurt’s lactic acid gently exfoliates, brightening the skin and enhancing green tea’s ability to provide a radiant glow.

Ingredients

  • 1 tablespoon green tea
  • 1 tablespoon plain yogurt

How to Use
Combine green tea and yogurt until smooth. Apply evenly, leave it on for 10–15 minutes, then rinse off with cool water.


5. Green Tea and Turmeric Face Pack for Acne-Prone Skin

Why It Works
Turmeric’s antibacterial properties help combat acne, while green tea soothes inflammation and reduces redness.

Ingredients

  • 1 tablespoon green tea
  • 1/4 teaspoon turmeric

How to Use
Mix the ingredients well and apply carefully to the face. Let it sit for 10–15 minutes, then rinse thoroughly with cool water.


6. Green Tea and Cucumber Face Pack for Puffy Skin

Why It Works
Cucumber cools and reduces puffiness, while green tea’s antioxidants help refresh and tighten the skin.

Ingredients

  • 1 tablespoon green tea
  • 1 tablespoon cucumber juice

How to Use
Combine green tea and cucumber juice. Apply under the eyes or on the face, leave it on for 15 minutes, then rinse with cold water.


7. Green Tea and Banana Face Pack for Hydration

Why It Works
Banana’s hydrating properties work perfectly with green tea to restore moisture and revitalize dull skin.

Ingredients

  • 1 tablespoon green tea
  • 1/2 mashed ripe banana

How to Use
Blend green tea and mashed banana to a smooth consistency. Apply to the face and leave it on for 20 minutes before rinsing.


8. Green Tea and Papaya Face Pack for Pigmentation

Why It Works
Papaya contains enzymes that help even out skin tone, while green tea’s antioxidants work to reduce dark spots.

Ingredients

  • 1 tablespoon green tea
  • 1 tablespoon mashed ripe papaya

How to Use
Mix ingredients thoroughly and apply to affected areas. Leave it on for 15 minutes, then rinse with lukewarm water.


9. Green Tea and Baking Soda Face Pack for Blackheads

Why It Works
Baking soda acts as a gentle exfoliant to remove blackheads, while green tea keeps skin calm and balanced.

Ingredients

  • 1 tablespoon green tea
  • 1/2 teaspoon baking soda

How to Use
Combine the ingredients to form a paste. Apply gently, focusing on blackhead-prone areas, and massage lightly. Leave on for 10 minutes before rinsing with cool water.


10. Green Tea and Almond Oil Face Pack for Anti-Aging

Why It Works
Almond oil’s vitamin E and fatty acids complement green tea’s antioxidants to nourish and minimize fine lines.

Ingredients

  • 1 tablespoon green tea
  • A few drops of almond oil

How to Use
Mix green tea and almond oil. Massage into the skin, leave it on for 15 minutes, then rinse with lukewarm water.


11. Green Tea and Rice Flour Face Pack for Brightening

Why It Works
Rice flour gently exfoliates and brightens, working with green tea to enhance your complexion’s natural glow.

Ingredients

  • 1 tablespoon green tea
  • 1 tablespoon rice flour

How to Use
Mix ingredients to form a paste. Apply evenly, leave it on for 15 minutes, then rinse off with cool water, massaging gently.


12. Green Tea and Oats Face Pack for Exfoliation

Why It Works
Oats are a natural exfoliator that removes dead skin cells, while green tea provides a calming and hydrating effect.

Ingredients

  • 1 tablespoon green tea
  • 1 tablespoon finely ground oats

How to Use
Blend the ingredients into a paste. Apply to the face, massage in gentle circles, leave it on for 10 minutes, then rinse with cool water.


Conclusion: Choose the Right Green Tea Face Pack for Your Skin

Green tea’s versatility makes it a valuable ingredient for every skin type, addressing concerns from dryness to acne and pigmentation. By incorporating these green tea face packs into your skincare routine, you can enjoy a natural, affordable way to keep your skin healthy, glowing, and youthful. Select a pack that best suits your skin needs, and pamper yourself with the refreshing benefits of green tea.

11 Remarkable Benefits of Night Creams for Your Skin

Night creams are an essential part of any effective skincare routine, offering targeted nourishment while your body rests. Unlike day creams, which are designed to protect against environmental stressors like UV rays and pollution, night creams are formulated to support skin regeneration and repair. Here’s a look at 11 remarkable benefits of using night creams and why they’re a game-changer for healthy, glowing skin.


1. Intensive Hydration While You Sleep

Deep Moisturizing Action
Night creams are typically formulated with rich, hydrating ingredients that provide intense moisture, helping to counter dryness and dehydration. While you sleep, the cream works to replenish moisture levels, leaving your skin soft and smooth by morning.

Tip: Look for night creams with ingredients like hyaluronic acid, glycerin, or ceramides to lock in moisture overnight.

2. Supports Skin Repair and Regeneration

Boosts Natural Healing Process
During the night, your skin goes through a natural healing and regeneration process. Night creams are designed to enhance this by supplying essential nutrients and antioxidants that support cell repair, helping to reduce the impact of daily stressors and environmental damage.

Tip: Opt for night creams that contain retinol or peptides, known for their skin-renewing properties.

3. Reduces the Appearance of Fine Lines and Wrinkles

Anti-Aging Benefits
Many night creams contain powerful anti-aging ingredients like retinoids, vitamin C, and peptides. These compounds help stimulate collagen production, which can reduce the appearance of fine lines and wrinkles over time, leading to a smoother, more youthful-looking complexion.

Tip: Consistent use of a night cream with anti-aging properties can help you achieve longer-lasting skin resilience and elasticity.

4. Improves Skin Tone and Texture

Evens Out Complexion
Regular use of a night cream can improve your skin’s texture and tone by encouraging the removal of dead skin cells and promoting healthy skin turnover. Ingredients like alpha hydroxy acids (AHAs) or beta hydroxy acids (BHAs) gently exfoliate the skin overnight, resulting in a brighter, more even complexion.

Tip: Night creams with exfoliating acids are best suited for those who have dull or uneven skin tones.

5. Fights Signs of Aging with Antioxidants

Neutralizes Free Radicals
Night creams are often loaded with antioxidants such as vitamins E and C, which help combat free radicals—unstable molecules that can cause skin damage and accelerate aging. These antioxidants work overnight to protect and repair skin, resulting in a healthier and more resilient complexion.

Tip: Antioxidant-rich night creams are especially beneficial for people exposed to pollution or high levels of UV radiation.

6. Soothes Irritated or Sensitive Skin

Calming and Rejuvenating
For those with sensitive or irritated skin, night creams containing soothing ingredients like aloe vera, chamomile, and oatmeal can help calm redness and reduce inflammation. These ingredients work while you sleep, allowing your skin to wake up feeling less reactive and more balanced.

Tip: Choose a fragrance-free, hypoallergenic night cream if you have sensitive skin.

7. Boosts Skin Elasticity

Promotes Firmness
As we age, our skin gradually loses elasticity, leading to sagging. Night creams often contain ingredients like collagen-boosting peptides and elastin, which can help reinforce skin structure and improve firmness over time. This added support gives your skin a more lifted and toned appearance.

Tip: Regular use of a night cream that boosts elasticity can help reduce visible signs of aging and maintain a firmer complexion.

8. Minimizes Dark Spots and Hyperpigmentation

Brightening Effects
Night creams formulated with brightening ingredients such as niacinamide or licorice extract can help lighten dark spots and reduce hyperpigmentation. By applying a night cream consistently, you’ll see gradual improvements in the brightness and evenness of your skin tone.

Tip: Avoid direct sun exposure in the day after using brightening night creams, as skin can be more sensitive to UV rays.

9. Enhances Skin’s Natural Barrier Function

Strengthens Skin Defense
A healthy skin barrier is essential for protecting against moisture loss and environmental stress. Night creams with ceramides, fatty acids, and other barrier-strengthening ingredients can help rebuild and maintain this protective layer, improving your skin’s resilience to dryness and irritation.

Tip: If your skin feels rough or irritated, a barrier-repair night cream can help restore softness and comfort.

10. Reduces Puffy Eyes and Dark Circles

Tackles Under-Eye Concerns
Some night creams contain ingredients specifically targeting the delicate eye area, reducing puffiness and minimizing dark circles. Ingredients like caffeine, peptides, and vitamin K work to stimulate circulation and reduce fluid buildup, so you can wake up with refreshed and revitalized eyes.

Tip: Gently pat night cream around the eye area with your ring finger, as this finger applies the least pressure to the delicate skin.

11. Prepares Skin for Morning Skincare Routine

Enhances Daytime Skin Care
Using a night cream not only benefits your skin overnight but also preps it for your morning skincare routine. Well-hydrated, nourished skin absorbs morning products more effectively, meaning you’ll get the most out of your daytime serums, moisturizers, and sunscreens.

Tip: A consistent night cream routine supports a well-rounded skincare regimen, giving you a head start on your morning care.


Final Thoughts

Incorporating a night cream into your skincare routine provides targeted nourishment and rejuvenation that works while you sleep. By choosing a formula suited to your skin type and goals, you can enjoy a range of benefits, from hydration and anti-aging effects to improved tone and resilience. With regular use, you’ll wake up to healthier, glowing skin that’s ready to take on the day.


Related Tips for Night Cream Use:

  • Use your night cream on cleansed, toned skin to maximize absorption.
  • Start with a smaller amount of product if you’re new to night creams, and gradually increase as your skin adjusts.
  • Pair with other nighttime skincare essentials like serums for a complete, skin-rejuvenating experience.

Oat Milk: Nutrition, Health Benefits, And How To Prepare

Oat milk has surged in popularity in recent years, emerging as a beloved dairy alternative for many. Known for its creamy texture and slightly sweet flavor, oat milk is made from whole oats and is a fantastic option for those who are lactose intolerant, vegan, or simply looking to reduce their dairy intake. In this blog, we’ll explore the nutritional profile of oat milk, its health benefits, and how to prepare it at home, providing you with a comprehensive guide to this delightful plant-based beverage.


What is Oat Milk?

Oat milk is a plant-based milk made by blending oats with water and then straining the mixture to remove the solids. The result is a creamy, dairy-free milk that is versatile and can be used in various recipes, from smoothies to coffee and baked goods. Oat milk can be found in most grocery stores, but it’s also simple to make at home with just a few ingredients.


Nutritional Profile of Oat Milk

The nutritional content of oat milk can vary based on the brand and whether it’s sweetened or fortified. Here’s a general breakdown of the nutrition you can expect from one cup (240 ml) of unsweetened oat milk:

  • Calories: Approximately 60-120 calories
  • Fat: 1-5 grams (depending on the brand and added oils)
  • Carbohydrates: 12-20 grams
  • Fiber: 1-2 grams
  • Protein: 1-3 grams
  • Calcium: Often fortified (check labels for specific amounts)
  • Vitamin D: Often fortified (check labels for specific amounts)
  • Vitamin B12: Often fortified (check labels for specific amounts)

Note: Always check the nutrition labels, as some brands add sweeteners or flavorings that can affect the nutritional value.


Health Benefits of Oat Milk

Oat milk is not only delicious but also offers several health benefits:

  1. Lactose-Free Alternative: Oat milk is naturally lactose-free, making it an excellent choice for individuals with lactose intolerance or those following a vegan diet.
  2. Rich in Fiber: Oat milk contains beta-glucans, a type of soluble fiber that can help reduce cholesterol levels, support heart health, and improve gut health.
  3. Low in Allergens: Oat milk is free from common allergens such as soy, nuts, and dairy, making it suitable for individuals with allergies or sensitivities.
  4. Sustainable Choice: The production of oat milk has a lower environmental impact compared to dairy milk and other plant-based milks, as oats require less water and land to grow.
  5. Heart Health: The beta-glucans in oat milk can help lower cholesterol levels, which may reduce the risk of heart disease. Additionally, oat milk is often fortified with heart-healthy nutrients like calcium and vitamin D.
  6. Good Source of Antioxidants: Oat milk contains antioxidants, including phenolic compounds, which help protect the body from oxidative stress and may reduce inflammation.
  7. Versatile Ingredient: Oat milk can be used in various recipes, including smoothies, coffee, baking, and cooking, making it a versatile addition to your diet.

How to Prepare Oat Milk at Home

Making oat milk at home is simple and requires just a few ingredients. Here’s a step-by-step guide:

Ingredients:

  • 1 cup of rolled oats (gluten-free if needed)
  • 4 cups of water
  • Optional: sweetener (like maple syrup or honey), a pinch of salt, and vanilla extract for flavoring

Instructions:

  1. Blend:
    • In a blender, combine the rolled oats and water. If desired, add sweetener, salt, or vanilla extract.
    • Blend on high for 30 seconds to 1 minute until well combined.
  2. Strain:
    • Pour the blended mixture through a nut milk bag, cheesecloth, or a fine mesh strainer into a large bowl or pitcher.
    • Gently squeeze or press to extract as much liquid as possible, leaving the oat pulp behind.
  3. Store:
    • Transfer the oat milk to a clean glass bottle or jar and store it in the refrigerator. It can be kept for up to 5 days. Shake well before each use, as separation may occur.
  4. Use the Pulp:
    • Don’t throw away the leftover oat pulp! It can be used in smoothies, baked goods, or added to oatmeal for extra fiber.

Tips for Making the Best Oat Milk

  • Avoid Over-Blending: Blend just until combined. Over-blending can make the oat milk slimy due to the release of too much starch.
  • Flavor Variations: Experiment with flavors by adding cocoa powder, cinnamon, or different sweeteners.
  • Thickness Control: Adjust the water-to-oat ratio to achieve your desired thickness. For creamier oat milk, use less water.

Conclusion

Oat milk is a nutritious, versatile, and delicious alternative to dairy milk that can easily be incorporated into your diet. With its impressive nutritional profile and health benefits, it’s no wonder that oat milk has become a favorite among those looking for a plant-based milk option. Whether you purchase it from the store or make it at home, oat milk is a fantastic addition to smoothies, coffee, cereals, and many recipes. Embrace the goodness of oat milk and enjoy its creamy texture and delightful flavor while reaping its numerous health benefits!

15 Best Quad Strengthening Exercises and Their Benefits

Strengthening your quadriceps is essential for overall leg strength, stability, and athletic performance. The quadriceps, located at the front of your thighs, play a crucial role in activities like walking, running, jumping, and squatting. Whether you’re an athlete looking to enhance your performance or someone aiming to improve your everyday mobility, incorporating quad strengthening exercises into your routine is vital. In this blog, we’ll explore the 15 best quad strengthening exercises and their benefits, ensuring you have a well-rounded approach to building strong quads.


1. Bodyweight Squats

Benefits: Bodyweight squats are a foundational exercise that effectively targets the quads, glutes, and hamstrings. They also help improve flexibility and balance.

How to Perform:

  1. Stand with your feet shoulder-width apart.
  2. Lower your body by bending your knees and pushing your hips back, as if sitting in a chair.
  3. Keep your chest up and back straight.
  4. Go as low as you can while maintaining good form, then push through your heels to return to standing.

2. Lunges

Benefits: Lunges are excellent for building unilateral strength, ensuring both legs are worked evenly. They also enhance balance and coordination.

How to Perform:

  1. Stand upright with your feet together.
  2. Step forward with one leg, lowering your hips until both knees are bent at about 90 degrees.
  3. Push back to the starting position and repeat on the other leg.

3. Leg Press

Benefits: The leg press machine allows you to lift heavier weights safely, targeting the quads while also engaging the glutes and hamstrings.

How to Perform:

  1. Sit on the leg press machine with your back against the seat and feet shoulder-width apart on the platform.
  2. Push the platform away by extending your knees and hips.
  3. Slowly return to the starting position without locking your knees.

4. Step-Ups

Benefits: Step-ups mimic natural movements like climbing stairs and are great for building strength and power in the quads.

How to Perform:

  1. Stand in front of a sturdy bench or step.
  2. Place one foot on the step and push through your heel to lift your body up.
  3. Step down with the same foot and repeat, alternating legs.

5. Bulgarian Split Squats

Benefits: This exercise targets the quads while also working on balance and stability, making it ideal for athletes.

How to Perform:

  1. Stand a few feet in front of a bench or step.
  2. Place one foot on the bench behind you.
  3. Lower your body into a lunge, keeping your front knee over your ankle.
  4. Push back up to the starting position and repeat on the other leg.

6. Sumo Squats

Benefits: Sumo squats emphasize the inner thighs and glutes, along with the quads, providing a well-rounded lower body workout.

How to Perform:

  1. Stand with your feet wider than shoulder-width apart and toes pointed outward.
  2. Lower your body into a squat, keeping your chest up and knees over your toes.
  3. Push through your heels to return to standing.

7. Squat Jumps

Benefits: Squat jumps are a plyometric exercise that builds explosive strength in the quads and enhances overall athletic performance.

How to Perform:

  1. Start in a squat position.
  2. Jump explosively upward, reaching for the ceiling.
  3. Land softly back into the squat position and repeat.

8. Wall Sits

Benefits: Wall sits are a static exercise that builds endurance in the quads and can help improve your overall leg strength.

How to Perform:

  1. Stand with your back against a wall and slide down until your knees are at a 90-degree angle.
  2. Hold this position for as long as you can, keeping your back flat against the wall.

9. Single-Leg Deadlifts

Benefits: This exercise not only targets the quads but also improves balance and engages the hamstrings and glutes.

How to Perform:

  1. Stand on one leg, holding a dumbbell in the opposite hand.
  2. Hinge at the hip, lowering the dumbbell toward the floor while keeping your back straight.
  3. Return to the starting position and repeat on the other leg.

10. Leg Extensions

Benefits: Leg extensions isolate the quadriceps, making them effective for building strength and muscle size.

How to Perform:

  1. Sit on a leg extension machine with your back against the pad and feet under the bar.
  2. Extend your legs until they are straight and slowly lower them back down.

11. Resistance Band Squats

Benefits: Using a resistance band adds extra challenge to squats, targeting the quads and improving stability.

How to Perform:

  1. Place a resistance band around your thighs, just above your knees.
  2. Perform squats as you would normally, ensuring the band provides tension throughout the movement.

12. Pistol Squats

Benefits: Pistol squats are a challenging single-leg exercise that builds strength, balance, and flexibility in the quads.

How to Perform:

  1. Stand on one leg with the other leg extended in front of you.
  2. Lower your body into a squat while keeping the extended leg off the ground.
  3. Push through your heel to return to standing.

13. Clamshells

Benefits: While primarily targeting the hip muscles, clamshells engage the quads and promote overall leg strength and stability.

How to Perform:

  1. Lie on your side with your knees bent at a 90-degree angle.
  2. Keeping your feet together, lift your top knee while keeping your pelvis stable.
  3. Lower the knee back down and repeat on both sides.

14. Calf Raises

Benefits: While primarily targeting the calves, calf raises also engage the quads as they work together during the movement.

How to Perform:

  1. Stand on a flat surface with your feet shoulder-width apart.
  2. Rise up onto your toes, lifting your heels off the ground.
  3. Lower back down and repeat.

15. Skater Jumps

Benefits: Skater jumps are a dynamic exercise that builds explosive strength in the quads while also improving coordination and agility.

How to Perform:

  1. Stand with your feet shoulder-width apart.
  2. Jump to the right, landing on your right foot while bringing your left foot behind you.
  3. Jump to the left, landing on your left foot, and repeat.

Conclusion

Incorporating these 15 quad strengthening exercises into your fitness routine can lead to improved leg strength, stability, and overall athletic performance. Whether you’re a seasoned athlete or just starting your fitness journey, it’s essential to focus on building strong quads for better mobility and injury prevention.

Be sure to start with proper form to avoid injury and gradually increase intensity as your strength improves. With consistency and dedication, you’ll notice significant gains in your quad strength and overall leg fitness.

11 Must-Try Easy Homemade Pomegranate Face Packs

Pomegranates are not just delicious and nutritious; they also offer a wealth of benefits for the skin. Rich in antioxidants, vitamins, and minerals, pomegranates can help improve skin texture, promote a healthy glow, and combat signs of aging. Creating homemade face packs using pomegranate is an excellent way to harness its natural properties for skincare. In this blog, we’ll explore 11 must-try easy homemade pomegranate face packs that can rejuvenate your skin and enhance your beauty routine.


1. Pomegranate and Honey Face Pack

Benefits: Honey is known for its moisturizing properties and ability to soothe the skin, while pomegranate provides antioxidants that help protect and nourish.

Ingredients:

  • 1 tablespoon of pomegranate juice
  • 1 tablespoon of honey

Instructions:

  1. Mix the pomegranate juice and honey in a bowl.
  2. Apply the mixture to your face and neck, avoiding the eye area.
  3. Leave it on for 15-20 minutes and rinse with warm water.

2. Pomegranate and Yogurt Face Pack

Benefits: Yogurt contains lactic acid, which gently exfoliates the skin and helps to brighten the complexion. Together with pomegranate, this pack revitalizes dull skin.

Ingredients:

  • 2 tablespoons of pomegranate juice
  • 2 tablespoons of plain yogurt

Instructions:

  1. Combine the pomegranate juice and yogurt in a bowl.
  2. Apply to clean skin and let it sit for 20 minutes.
  3. Rinse off with lukewarm water for a fresh glow.

3. Pomegranate and Oatmeal Face Pack

Benefits: Oatmeal acts as a gentle exfoliant and helps absorb excess oil, making this pack suitable for oily and combination skin.

Ingredients:

  • 1 tablespoon of pomegranate juice
  • 2 tablespoons of ground oatmeal

Instructions:

  1. Mix the pomegranate juice with ground oatmeal to form a paste.
  2. Apply it evenly on your face and massage gently for a few minutes.
  3. Leave it on for 10-15 minutes and rinse with warm water.

4. Pomegranate and Aloe Vera Face Pack

Benefits: Aloe vera is renowned for its soothing and hydrating properties, making this combination perfect for calming irritated skin.

Ingredients:

  • 2 tablespoons of pomegranate juice
  • 2 tablespoons of fresh aloe vera gel

Instructions:

  1. Blend the pomegranate juice with aloe vera gel.
  2. Apply the mixture to your face and leave it on for 20-30 minutes.
  3. Rinse with cool water to refresh your skin.

5. Pomegranate and Turmeric Face Pack

Benefits: Turmeric has anti-inflammatory and antibacterial properties, making this face pack great for reducing acne and blemishes.

Ingredients:

  • 1 tablespoon of pomegranate juice
  • ½ teaspoon of turmeric powder

Instructions:

  1. Mix the pomegranate juice and turmeric powder until well combined.
  2. Apply to affected areas or the entire face, avoiding sensitive areas.
  3. Leave it on for 15 minutes and wash off with lukewarm water.

6. Pomegranate and Banana Face Pack

Benefits: Banana is rich in vitamins and minerals that hydrate and nourish the skin, while pomegranate enhances its antioxidant properties.

Ingredients:

  • 1 ripe banana
  • 1 tablespoon of pomegranate juice

Instructions:

  1. Mash the banana in a bowl and mix in the pomegranate juice.
  2. Apply the paste to your face and neck.
  3. Leave it on for 20 minutes, then rinse with warm water.

7. Pomegranate and Coconut Oil Face Pack

Benefits: Coconut oil is deeply moisturizing and can help improve skin texture. This pack is excellent for dry or mature skin.

Ingredients:

  • 1 tablespoon of pomegranate juice
  • 1 tablespoon of coconut oil

Instructions:

  1. Combine the pomegranate juice and melted coconut oil.
  2. Massage the mixture onto your face and neck.
  3. Allow it to sit for 15-20 minutes, then wash off with a mild cleanser.

8. Pomegranate and Green Tea Face Pack

Benefits: Green tea is loaded with antioxidants that protect the skin from damage. This pack can help reduce puffiness and improve skin tone.

Ingredients:

  • 1 tablespoon of pomegranate juice
  • 1 tablespoon of brewed green tea (cooled)

Instructions:

  1. Mix the pomegranate juice with cooled green tea.
  2. Apply to your face using a cotton pad or your fingers.
  3. Leave it on for 20 minutes before rinsing with cool water.

9. Pomegranate and Sandalwood Face Pack

Benefits: Sandalwood has calming properties and helps brighten the skin. This pack is ideal for treating blemishes and uneven skin tone.

Ingredients:

  • 1 tablespoon of pomegranate juice
  • 1 tablespoon of sandalwood powder
  • Water (as needed)

Instructions:

  1. Combine the pomegranate juice and sandalwood powder, adding water to achieve a paste consistency.
  2. Apply the mixture to your face and neck.
  3. Leave it on for 20-30 minutes, then wash off with lukewarm water.

10. Pomegranate and Milk Face Pack

Benefits: Milk contains lactic acid, which helps to exfoliate and brighten the skin, making it softer and smoother.

Ingredients:

  • 2 tablespoons of pomegranate juice
  • 2 tablespoons of milk

Instructions:

  1. Mix the pomegranate juice and milk in a bowl.
  2. Apply to your face and let it sit for 20 minutes.
  3. Rinse with warm water for a refreshed appearance.

11. Pomegranate and Essential Oils Face Pack

Benefits: Essential oils, such as lavender or tea tree, can enhance the benefits of pomegranate by providing additional hydration and antibacterial properties.

Ingredients:

  • 1 tablespoon of pomegranate juice
  • 1 drop of essential oil (lavender or tea tree)

Instructions:

  1. Combine the pomegranate juice with your chosen essential oil.
  2. Apply to your face, avoiding the eye area.
  3. Leave it on for 15 minutes and rinse thoroughly.

Conclusion

Incorporating these 11 easy homemade pomegranate face packs into your skincare routine can provide your skin with the nourishment and hydration it craves. The natural properties of pomegranate, combined with other beneficial ingredients, can help you achieve a healthier, glowing complexion.

Always perform a patch test before trying new face packs, especially if you have sensitive skin. With consistency and the right ingredients, you can enjoy the numerous benefits of pomegranate and enhance your beauty regimen naturally. Start experimenting with these face packs today and embrace the power of nature for beautiful skin!

Is It Possible To Get Glowing Skin Naturally In Just A Week?

Achieving glowing skin naturally in just a week may sound ambitious, but with dedication and the right strategies, it is indeed possible. Your skin reflects your overall health, and by making some simple lifestyle and dietary changes, you can improve its appearance significantly in a short amount of time. This blog will explore effective methods for enhancing your skin’s glow naturally within just one week.


Understanding Glowing Skin

Glowing skin is often associated with good health and vitality. It appears radiant, well-hydrated, and free from blemishes. Factors that contribute to a lack of glow include stress, poor diet, dehydration, lack of sleep, and exposure to environmental pollutants. By addressing these factors, you can promote a healthy complexion.


Day 1: Hydration is Key

Hydrate Your Body:

The foundation for glowing skin begins with hydration. Water plays a crucial role in maintaining skin elasticity and flushing out toxins. Aim to drink at least 8-10 glasses of water daily.

Incorporate Hydrating Foods:

  • Include fruits and vegetables with high water content, such as cucumbers, watermelon, oranges, and strawberries, in your diet.
  • Herbal teas and coconut water are also excellent choices to keep your skin hydrated.

Tip: Start your day with a glass of warm water with lemon to kickstart your metabolism and detoxify your body.


Day 2: Nourish Your Skin from Within

Eat a Balanced Diet:

Focus on incorporating a variety of nutrients into your meals. Foods rich in antioxidants, vitamins, and healthy fats are essential for healthy skin.

Key Foods to Include:

  • Fruits and Vegetables: Berries, spinach, kale, and carrots are rich in vitamins A, C, and E, which are crucial for skin health.
  • Healthy Fats: Avocados, nuts, and fatty fish (like salmon) provide omega-3 fatty acids that help maintain skin’s moisture barrier.

Tip: Consider adding a daily smoothie packed with greens and fruits to boost your nutrient intake.


Day 3: Establish a Skincare Routine

Cleansing and Exfoliation:

Establish a consistent skincare routine to cleanse and exfoliate your skin effectively.

Steps to Follow:

  • Cleanse: Use a gentle, natural cleanser to remove dirt and impurities without stripping the skin’s natural oils.
  • Exfoliate: Exfoliate your skin 2-3 times a week using a natural scrub (like brown sugar or oatmeal) to remove dead skin cells and promote cell turnover.

Moisturize:

Apply a natural moisturizer, such as coconut oil or aloe vera gel, to hydrate and soothe your skin.

Tip: Always patch-test new products to ensure they are suitable for your skin type.


Day 4: Get Moving with Exercise

Exercise for Healthy Skin:

Physical activity boosts blood circulation, which helps deliver essential nutrients to your skin. Exercise also aids in detoxification through sweating, helping to clear pores and reduce breakouts.

Recommended Activities:

  • Aim for at least 30 minutes of moderate exercise daily. This can include jogging, yoga, dancing, or even a brisk walk.
  • Incorporate facial exercises or yoga to enhance blood flow to your face and promote a natural glow.

Tip: Consider outdoor activities to benefit from fresh air and natural sunlight, which can improve mood and skin health.


Day 5: Prioritize Sleep and Stress Management

Sleep for Skin Recovery:

Adequate sleep is essential for skin regeneration. Aim for 7-9 hours of quality sleep each night to allow your skin to repair itself.

Stress Management Techniques:

  • Engage in relaxation practices such as meditation, deep breathing, or journaling to reduce stress, which can negatively impact skin health.
  • Spend time doing things you enjoy, whether it’s reading, painting, or spending time with loved ones.

Tip: Establish a bedtime routine that promotes relaxation, such as reading or taking a warm bath.


Day 6: Sun Protection and Natural Remedies

Protect Your Skin:

Sun exposure can lead to premature aging and skin damage. Protect your skin by wearing sunscreen daily, even on cloudy days.

Natural Remedies for Glowing Skin:

  • Face Masks: Use natural ingredients like honey, yogurt, and turmeric to create homemade face masks that brighten the skin and enhance glow.
  • Honey Mask: Mix honey with lemon juice for a hydrating and brightening mask. Leave it on for 15-20 minutes before rinsing.

Tip: Apply a soothing aloe vera gel after sun exposure to calm the skin and prevent irritation.


Day 7: Evaluate and Maintain

Reflect on Your Progress:

Take a moment to assess how your skin has responded to the changes you’ve implemented throughout the week. Notice any improvements in texture, hydration, and overall radiance.

Create a Sustainable Routine:

  • Identify which habits have made the most difference and incorporate them into your daily routine moving forward.
  • Continue to prioritize hydration, balanced nutrition, and self-care practices that promote skin health.

Tip: Consider journaling your skincare journey, noting any products or techniques that worked well for you.


Conclusion

Achieving glowing skin naturally in just a week is a realistic goal when you commit to a holistic approach that encompasses hydration, nutrition, skincare, exercise, and stress management. By following these tips and making small adjustments to your daily routine, you can enhance your skin’s appearance and promote a radiant, healthy glow.

Remember, consistency is key. While significant changes may be noticeable within a week, maintaining a healthy lifestyle will ensure long-lasting results. Embrace the journey toward healthier skin, and enjoy the benefits that come with it!