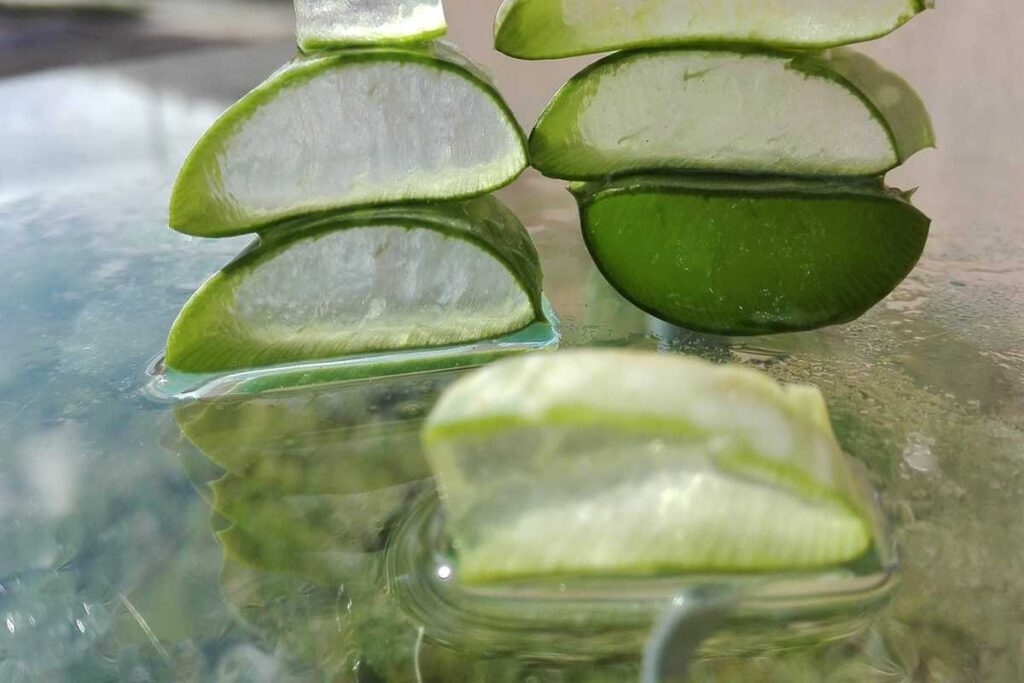
Top 7 Beauty Recipes with Potato Juice for Glowing Skin

Potato juice is a powerful natural remedy that has been used for generations in skincare. Packed with vitamins, minerals, and antioxidants, it can help brighten skin, reduce dark circles, and promote an even complexion. In this blog, we’ll explore the top seven beauty recipes using potato juice that can enhance your skincare routine and help you achieve radiant skin.


Benefits of Potato Juice for Skin

  1. Brightening Properties: Potato juice contains natural bleaching agents that can lighten dark spots and improve skin tone.
  2. Anti-Aging: The antioxidants in potato juice help combat free radicals, reducing the appearance of fine lines and wrinkles.
  3. Moisturizing: It can hydrate the skin and prevent dryness, making it suitable for various skin types.
  4. Soothing Irritation: Potato juice has anti-inflammatory properties that can soothe irritated skin and reduce redness.
  5. Acne Control: Its antibacterial properties may help prevent acne breakouts and clear existing blemishes.

Top 7 Beauty Recipes with Potato Juice

1. Potato Juice for Dark Circles

Ingredients:

  • 1 medium-sized potato
  • Cotton pads

Instructions:

  1. Peel and grate the potato.
  2. Squeeze the grated potato to extract the juice.
  3. Soak cotton pads in the potato juice and place them over your eyes.
  4. Leave them on for 15-20 minutes, then rinse your face with cool water.

Benefits: This treatment helps reduce dark circles and puffiness around the eyes, leaving them looking refreshed.

2. Potato Juice and Lemon Mask for Brightening

Ingredients:

  • 1 medium-sized potato
  • 1 teaspoon lemon juice

Instructions:

  1. Extract juice from the grated potato as mentioned above.
  2. Mix the potato juice with lemon juice in a bowl.
  3. Apply the mixture to your face and neck using a cotton ball.
  4. Leave it on for 15-20 minutes, then rinse with lukewarm water.

Benefits: This mask brightens the skin and helps reduce dark spots.

3. Potato Juice and Honey Face Pack for Hydration

Ingredients:

  • 1 medium-sized potato
  • 1 tablespoon honey

Instructions:

  1. Extract the juice from the potato.
  2. Combine the potato juice with honey in a bowl.
  3. Apply the mixture evenly on your face and leave it on for 20 minutes.
  4. Rinse with warm water.

Benefits: This face pack hydrates and nourishes the skin, leaving it soft and supple.

4. Potato Juice for Acne Treatment

Ingredients:

  • 1 medium-sized potato
  • 1 teaspoon turmeric powder

Instructions:

  1. Extract the potato juice.
  2. Mix in the turmeric powder to form a paste.
  3. Apply the paste to the affected areas of your skin.
  4. Leave it on for 15-20 minutes and rinse off with lukewarm water.

Benefits: This treatment helps reduce acne and prevent future breakouts due to the antibacterial properties of turmeric.

5. Potato Juice Scrub for Exfoliation

Ingredients:

  • 1 medium-sized potato
  • 2 tablespoons sugar

Instructions:

  1. Grate the potato and extract the juice.
  2. Mix the potato juice with sugar to create a scrub.
  3. Gently massage the mixture onto your face in circular motions for a few minutes.
  4. Rinse with warm water.

Benefits: This scrub exfoliates dead skin cells, revealing a brighter complexion.

6. Potato Juice and Cucumber Mask for Soothing Skin

Ingredients:

  • 1 medium-sized potato
  • 1/2 cucumber

Instructions:

  1. Peel and blend the potato and cucumber together to make a smooth paste.
  2. Apply the mixture to your face and neck.
  3. Leave it on for 20-30 minutes, then rinse with cool water.

Benefits: This mask soothes irritated skin and provides hydration, making it ideal for sunburned or sensitive skin.

7. Potato Juice and Aloe Vera Gel for Anti-Aging

Ingredients:

  • 1 medium-sized potato
  • 2 tablespoons aloe vera gel

Instructions:

  1. Extract the juice from the potato.
  2. Mix the potato juice with aloe vera gel until well combined.
  3. Apply the mixture to your face and neck.
  4. Leave it on for 20-30 minutes and rinse with lukewarm water.

Benefits: This anti-aging mask hydrates the skin and reduces the appearance of fine lines and wrinkles.

Conclusion

Potato juice is a versatile and effective ingredient that can enhance your skincare routine and help you achieve glowing skin. With these seven beauty recipes, you can harness the natural benefits of potato juice to address various skin concerns, from dark circles to dryness. Remember to perform a patch test before trying new recipes and enjoy the process of nurturing your skin naturally!

How to Make a Lemon and Baking Soda Face Mask

Lemon and baking soda are two natural ingredients that have gained popularity in skincare for their potential benefits. When combined, they create a face mask that can brighten the skin, reduce acne, and promote a healthy glow. In this blog, we’ll explore the benefits of using a lemon and baking soda face mask, provide a simple recipe, and offer tips for applying it safely and effectively.


Benefits of Lemon and Baking Soda for Your Skin

  1. Lemon:
    • Brightening Properties: Lemon juice is rich in vitamin C and citric acid, which can help lighten dark spots and even out skin tone.
    • Antibacterial Qualities: Its natural antibacterial properties make it effective against acne-causing bacteria.
    • Exfoliation: The acidic nature of lemon helps exfoliate dead skin cells, revealing brighter skin underneath.
  2. Baking Soda:
    • Exfoliation: Baking soda acts as a gentle exfoliant, helping to remove dead skin cells and unclog pores.
    • Balancing pH: It can help balance the skin’s pH levels, making it suitable for various skin types.
    • Soothing Irritation: Baking soda has soothing properties that can calm irritated skin and reduce redness.

Precautions

Before you start making and applying the face mask, here are a few precautions to keep in mind:

  • Patch Test: Always perform a patch test before applying any new product to your face. Apply a small amount of the mixture on a discreet area of skin and wait 24 hours to see if any adverse reactions occur.
  • Sensitivity: Lemon juice can make your skin sensitive to sunlight. It’s best to use this mask in the evening and avoid sun exposure afterward.
  • Skin Type: This mask may not be suitable for very dry or sensitive skin types. If you have eczema, rosacea, or other skin conditions, consult with a dermatologist before using it.

How to Make a Lemon and Baking Soda Face Mask

Ingredients:

  • 1 tablespoon of fresh lemon juice (about half a lemon)
  • 1 tablespoon of baking soda
  • Optional: 1 teaspoon of honey (for added moisture and antibacterial benefits)

Instructions:

  1. Gather Your Ingredients:
    • Ensure you have fresh lemons, baking soda, and honey if you choose to use it. You’ll also need a small bowl and a spoon for mixing.
  2. Prepare the Lemon Juice:
    • Squeeze the juice from half a lemon into the bowl, making sure to remove any seeds.
  3. Mix the Ingredients:
    • Add 1 tablespoon of baking soda to the lemon juice. If using honey, add it to the mixture as well.
    • Stir the mixture until it forms a smooth paste. You may notice fizzing as the baking soda reacts with the lemon juice; this is normal!
  4. Application:
    • Start with a clean, dry face. Use your fingers or a clean brush to apply the mask evenly over your face, avoiding the eye area and any open wounds.
    • Leave the mask on for about 10–15 minutes. You may feel a slight tingling sensation, which is normal, but if it becomes uncomfortable, wash it off immediately.
  5. Rinse Off:
    • After the designated time, rinse your face with warm water, gently massaging in a circular motion to exfoliate your skin. Follow up with cold water to close your pores.
  6. Moisturize:
    • Pat your face dry with a clean towel and apply your favorite moisturizer to hydrate your skin. This is important as the mask may leave your skin feeling slightly dry.

Tips for Best Results

  • Frequency: Use this face mask once a week for the best results. Overuse can lead to skin irritation due to the acidity of lemon juice.
  • Stay Hydrated: Drink plenty of water and maintain a balanced diet to support healthy skin from the inside out.
  • Sun Protection: Always apply sunscreen during the day if you’ve used this mask, as lemon juice can increase sun sensitivity.

Conclusion

A lemon and baking soda face mask can be a simple yet effective way to brighten your complexion and promote clearer skin. By understanding the benefits and following the steps outlined above, you can incorporate this natural remedy into your skincare routine safely. Remember to listen to your skin and adjust your usage accordingly. Enjoy your radiant, glowing skin!

How to Use Olive Oil to Get Tanned Skin

With summer around the corner or a sunny vacation on the horizon, many people look forward to achieving a beautiful tan. While sun exposure can give your skin a lovely bronzed look, it’s essential to do so safely to avoid sunburn and skin damage. Olive oil, a natural moisturizer, has gained popularity for its potential to enhance tanning while providing nourishment to the skin. In this blog, we will explore how to use olive oil effectively for tanning, its benefits, and safety precautions to consider.


Benefits of Using Olive Oil for Tanning

  1. Natural Moisturizer: Olive oil is rich in fatty acids and antioxidants, which help keep the skin hydrated and prevent dryness that often comes with sun exposure.
  2. Nutrient-Rich: Packed with vitamins A, D, E, and K, olive oil nourishes the skin, promoting a healthy glow while you tan.
  3. Enhanced Tan: The natural oils in olive oil can help enhance and deepen your tan, giving you a more even and radiant color.
  4. Soothing Properties: Olive oil has anti-inflammatory properties that can help soothe sunburned skin and reduce redness.

How to Use Olive Oil for Tanning

To safely use olive oil for tanning, follow these steps:

1. Choose the Right Olive Oil

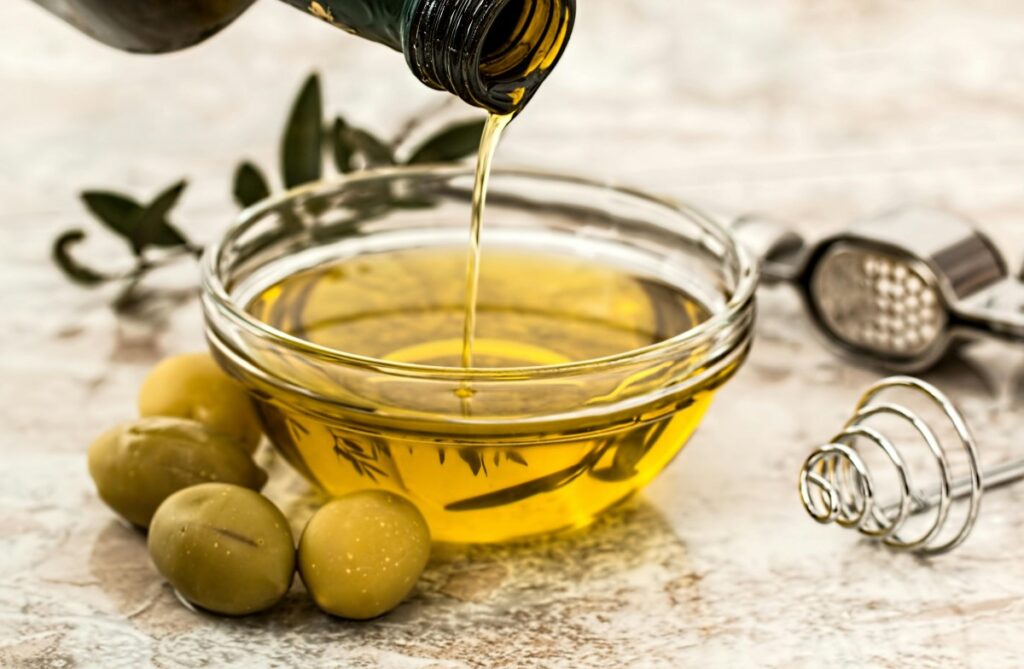
Opt for extra virgin olive oil, as it is the least processed and retains the highest levels of nutrients and antioxidants. Look for cold-pressed varieties for the best quality.

2. Prepare Your Skin

  • Exfoliate: Before applying olive oil, gently exfoliate your skin to remove dead skin cells. This helps achieve a more even tan. You can use a homemade scrub made of sugar and olive oil or a store-bought exfoliant.
  • Cleanse: Make sure your skin is clean and dry before applying olive oil. Shower and pat your skin dry with a towel.

3. Apply Olive Oil

  • Use as a Base: Pour a small amount of olive oil into your hands and rub them together. Apply it evenly across your body, focusing on areas that will be exposed to the sun, such as your arms, legs, and shoulders. Make sure to cover all areas evenly.
  • Massage Gently: Massage the oil into your skin using circular motions. This not only ensures even coverage but also helps the oil absorb better.

4. Sun Exposure

  • Timing: To achieve a tan, spend time in the sun during peak hours (usually between 10 AM and 4 PM), but be mindful of the risks of prolonged exposure. Start with short periods (15-30 minutes) and gradually increase as your skin becomes accustomed to the sun.
  • Reapply as Needed: Reapply olive oil every hour or after swimming or sweating to maintain hydration and tanning benefits.

5. Aftercare

  • Cool Down: After tanning, rinse off any excess olive oil with cool water. This helps to soothe the skin and remove any oil that may have attracted too much heat.
  • Moisturize: Follow up with a moisturizer or after-sun lotion to keep your skin hydrated and prolong your tan. Products with aloe vera or coconut oil work well for this.

Safety Precautions

While using olive oil for tanning can be beneficial, it’s essential to prioritize skin safety:

  • Limit Sun Exposure: Excessive sun exposure can lead to skin damage and increase the risk of skin cancer. Aim for short, controlled sessions in the sun.
  • Use Sunscreen: Consider using a broad-spectrum sunscreen with at least SPF 30 on your face and any areas that may be more sensitive. You can still use olive oil, but a layer of sunscreen will provide extra protection.
  • Know Your Skin Type: If you have fair or sensitive skin, be cautious with sun exposure, as you may burn more easily.
  • Monitor Your Skin: Pay attention to how your skin reacts. If you notice redness or irritation, reduce your sun exposure and take a break from tanning.

Conclusion

Using olive oil as a natural tanning aid can enhance your sun-kissed glow while nourishing and hydrating your skin. By following the steps outlined in this guide and taking necessary precautions, you can achieve a beautiful tan safely and effectively. Remember to listen to your skin, limit your sun exposure, and enjoy the sunny days ahead! With proper care, you’ll be able to showcase a healthy, radiant tan that complements your natural beauty.

8 Homemade Egg White Face Masks for Clear Skin

Egg whites have long been celebrated in skincare for their ability to tighten, tone, and improve the overall appearance of the skin. Rich in protein and vitamins, egg whites can help reduce the appearance of pores, control oil production, and provide a natural glow. In this blog, we will explore eight different homemade egg white face masks that you can easily create in your kitchen to achieve clear, healthy skin.


Benefits of Egg Whites for Your Skin

Before diving into the recipes, let’s highlight the key benefits of using egg whites in your skincare routine:

  1. Tightening Effect: Egg whites can help tighten the skin, reducing the appearance of fine lines and wrinkles.
  2. Oil Control: They are effective in absorbing excess oil, making them ideal for oily and acne-prone skin.
  3. Pore Minimization: Egg whites can help shrink the size of pores, giving the skin a smoother appearance.
  4. Nutrient-Rich: They contain proteins, vitamins, and minerals that nourish and rejuvenate the skin.

Precautions

Before using egg whites on your skin, keep these precautions in mind:

  • Allergy Test: Conduct a patch test by applying a small amount of egg white on your inner arm to check for any allergic reactions.
  • Freshness Matters: Use fresh, organic eggs whenever possible to ensure the best quality and effectiveness.
  • Avoid Open Wounds: Do not apply egg whites to broken or irritated skin, as it may cause further irritation.

8 Homemade Egg White Face Masks

1. Basic Egg White Mask

Ingredients:

  • 1 egg white

Instructions:

  1. Whisk the egg white until frothy.
  2. Apply it directly to your clean face using your fingers or a brush.
  3. Leave it on for 15–20 minutes until it dries.
  4. Rinse with warm water.

2. Egg White and Lemon Juice Mask

Benefits: Brightens skin and reduces oiliness.

Ingredients:

  • 1 egg white
  • 1 teaspoon lemon juice

Instructions:

  1. Mix the egg white and lemon juice until well combined.
  2. Apply to the face and leave on for 15 minutes.
  3. Rinse with cool water to close pores.

3. Egg White and Honey Mask

Benefits: Hydrates and nourishes the skin.

Ingredients:

  • 1 egg white
  • 1 tablespoon honey

Instructions:

  1. Whisk the egg white and honey together.
  2. Apply to your face and neck.
  3. Leave on for 20 minutes before rinsing with warm water.

4. Egg White and Yogurt Mask

Benefits: Exfoliates and brightens skin tone.

Ingredients:

  • 1 egg white
  • 2 tablespoons plain yogurt

Instructions:

  1. Combine the egg white and yogurt in a bowl.
  2. Apply the mixture to your face and let it sit for 15 minutes.
  3. Rinse off with lukewarm water.

5. Egg White and Cucumber Mask

Benefits: Refreshes and soothes irritated skin.

Ingredients:

  • 1 egg white
  • 1/2 cucumber (blended)

Instructions:

  1. Blend half a cucumber until smooth and mix with the egg white.
  2. Apply the mixture to your face and let it sit for 15–20 minutes.
  3. Rinse with cool water.

6. Egg White and Oatmeal Mask

Benefits: Exfoliates and absorbs excess oil.

Ingredients:

  • 1 egg white
  • 2 tablespoons finely ground oatmeal

Instructions:

  1. Mix the egg white with the ground oatmeal until you have a paste.
  2. Apply to your face and leave on for 15 minutes.
  3. Rinse with warm water, gently scrubbing to exfoliate.

7. Egg White and Aloe Vera Mask

Benefits: Calms and hydrates the skin.

Ingredients:

  • 1 egg white
  • 1 tablespoon aloe vera gel

Instructions:

  1. Combine the egg white with aloe vera gel in a bowl.
  2. Apply to your face and let it sit for 20 minutes.
  3. Rinse off with cool water.

8. Egg White and Tea Tree Oil Mask

Benefits: Fights acne and soothes inflammation.

Ingredients:

  • 1 egg white
  • 3 drops of tea tree oil

Instructions:

  1. Mix the egg white and tea tree oil.
  2. Apply to affected areas or your entire face.
  3. Leave on for 15 minutes and rinse with warm water.

How Often to Use Egg White Masks

For best results, use these egg white masks 1–2 times a week. Overuse can lead to dryness, so pay attention to how your skin responds and adjust accordingly.

Conclusion

Egg whites are a versatile and effective ingredient for creating homemade face masks that promote clear and healthy skin. With these eight recipes, you can easily incorporate egg whites into your skincare routine and enjoy their many benefits. Remember to perform patch tests, use fresh ingredients, and most importantly, have fun experimenting with these natural remedies! Your skin will thank you for it.

Top 21 Herbs & Spices You Can Add to Your Skin Care Routine

Adding herbs and spices to your skincare routine can be a game-changer. They’re packed with vitamins, antioxidants, and natural healing properties that not only nourish your skin but also help address issues like acne, dryness, and aging. Using these natural ingredients can boost your skin’s health without the harsh side effects sometimes seen with chemical products. Here’s a detailed look at 21 powerful herbs and spices you can add to your skincare routine to promote a glowing, healthy complexion.


1. Turmeric

Turmeric has been a staple in skincare for centuries due to its anti-inflammatory and antibacterial qualities. The active compound, curcumin, fights free radicals, reduces inflammation, and brightens the skin, making it great for acne-prone and dull skin.

How to Use:

Mix a small amount of turmeric powder with yogurt or honey to create a face mask. Apply it for 10-15 minutes, then rinse off to reveal a brighter complexion. Be cautious as turmeric can stain, so rinse thoroughly.


2. Aloe Vera

Aloe Vera is known for its soothing and hydrating properties. It helps to lock moisture into the skin, calms inflammation, and speeds up healing, which makes it ideal for sunburns and sensitive skin.

How to Use:

Use fresh aloe gel from the leaf and apply it directly to your skin as a hydrating mask. It’s especially effective when used as an overnight mask for maximum hydration and soothing.


3. Chamomile

Chamomile is excellent for calming irritated skin and reducing redness due to its anti-inflammatory and antioxidant properties. It’s a go-to for sensitive skin and helps reduce eczema symptoms as well.

How to Use:

Brew chamomile tea and let it cool. Use it as a soothing toner or facial spray. Chamomile tea bags can also be applied directly under the eyes to reduce puffiness.


4. Lavender

Lavender is beloved for its calming scent, but it’s also a powerful antibacterial that helps reduce acne and soothes inflamed skin. It’s beneficial for both acne-prone and sensitive skin.

How to Use:

Mix a few drops of lavender essential oil into a carrier oil (like jojoba or almond oil) and apply it to your skin. Lavender oil can also be added to face masks to balance and calm the skin.


5. Green Tea

Green tea is packed with antioxidants, particularly EGCG, which helps combat signs of aging, reduces inflammation, and promotes a clearer complexion. It also helps regulate sebum production, making it excellent for oily skin.

How to Use:

Use cooled green tea as a toner or mist. You can also use green tea leaves in face masks to help reduce redness and improve elasticity.


6. Neem

Neem is known for its antibacterial properties and is especially helpful for acne-prone skin. It reduces inflammation, controls excess oil, and helps fade dark spots, providing a clearer complexion over time.

How to Use:

Mix neem powder with water to make a paste and apply it as a mask for 10-15 minutes. Rinse with warm water to reveal clearer skin. Neem oil can also be diluted and applied to stubborn acne spots.


7. Rosemary

Rosemary has antioxidants that fight free radicals and stimulate blood circulation, which can help improve the appearance of dull skin and give it a natural glow.

How to Use:

Add rosemary essential oil to your daily moisturizer or dilute it in a carrier oil to massage into the skin. You can also brew rosemary tea to use as a toner to refresh your skin.


8. Calendula

Calendula, also known as marigold, has powerful healing and anti-inflammatory properties, making it ideal for treating sensitive, dry, or irritated skin.

How to Use:

Brew calendula tea and use it as a toner, or apply calendula-infused oil to your skin as a gentle moisturizer. It can be especially soothing for eczema or sensitive skin types.


9. Saffron

Saffron is known for its brightening properties, helping to reduce pigmentation and lighten dark spots. This ancient beauty spice also improves skin texture and glow.

How to Use:

Add a few saffron strands to milk or rose water and let it sit for 10 minutes to infuse. Use a cotton ball to apply the mixture as a toner or leave-on serum.


10. Mint

Mint is refreshing and has antibacterial properties that help control oil and prevent acne. The menthol in mint provides a cooling effect, which can reduce inflammation and soothe skin.

How to Use:

Crush fresh mint leaves and mix with a little water to create a paste. Apply as a spot treatment on acne or use in a face mask to cool down inflamed skin.


11. Basil

Basil has natural antibacterial and anti-inflammatory benefits that make it helpful for acne and irritated skin. It’s known to purify and cleanse the skin, reducing breakouts.

How to Use:

Make a basil paste by grinding fresh basil leaves with water. Apply it to the face for 10-15 minutes to help clarify the skin.


12. Ginger

Ginger is packed with antioxidants that fight aging, improve circulation, and reduce hyperpigmentation, making it a wonderful ingredient for dull or tired-looking skin.

How to Use:

Add a small amount of ginger powder to honey or yogurt and use it as a brightening face mask. Ginger tea can also be used as a toner to help even out skin tone.


13. Holy Basil (Tulsi)

Tulsi is highly regarded in Ayurvedic medicine for its healing properties. It has antibacterial and detoxifying qualities that are ideal for acne-prone skin.

How to Use:

Use Tulsi powder in a face mask with honey or aloe vera gel, or brew Tulsi tea and use it as a natural toner.


14. Cinnamon

Cinnamon stimulates blood flow, reduces signs of aging, and has antimicrobial properties. It can plump up skin and is great for circulation but should be used sparingly as it can be strong.

How to Use:

Mix a tiny amount of cinnamon with honey and apply it as a mask. Leave it on for 5-10 minutes to avoid irritation, as cinnamon can be potent.


15. Peppermint

Peppermint has a cooling effect and helps control oil production, making it ideal for oily or acne-prone skin.

How to Use:

Use peppermint tea as a toner or mist, or dilute peppermint essential oil in a carrier oil for a refreshing and invigorating skin treatment.


16. Fenugreek

Fenugreek is rich in antioxidants and has anti-inflammatory properties, which can help prevent signs of aging and rejuvenate the skin.

How to Use:

Soak fenugreek seeds overnight, grind them into a paste, and use as a face mask. This helps firm the skin and reduce fine lines.


17. Licorice Root

Licorice root is renowned for its skin-brightening properties. It helps to reduce pigmentation and fade dark spots.

How to Use:

Licorice root extract can be used in serums or masks to even out skin tone and add brightness. Add licorice powder to your favorite face mask for added benefits.


18. Sage

Sage helps control oil and has antibacterial properties, making it excellent for oily and acne-prone skin.

How to Use:

Brew sage tea and use it as a toner, or add sage oil diluted in a carrier oil to your skincare for clearer, fresher skin.


19. Bay Leaf

Bay leaves contain vitamins and minerals that improve skin texture and reduce inflammation. They help cleanse the skin and keep it radiant.

How to Use:

Boil bay leaves in water, cool, and use the liquid as a toner. You can also add bay leaf powder to a DIY face mask for extra nourishment.


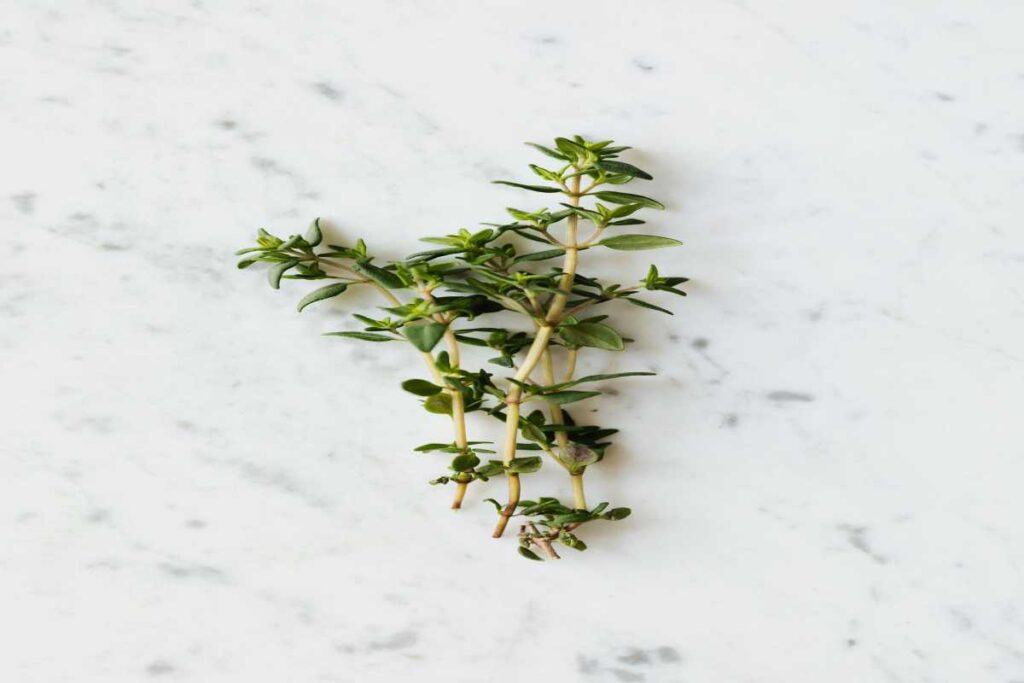
20. Thyme

Thyme has antibacterial properties that help fight acne and clear congested skin.

How to Use:

Thyme tea can be used as a toner to keep acne at bay, or dried thyme can be added to masks for a refreshing effect.


21. Oregano

Oregano is rich in antioxidants and has antiseptic properties, making it great for acne and inflammation.

How to Use:

Dilute oregano essential oil in a carrier oil and use it as a spot treatment on acne-prone areas for targeted care.


Conclusion

These herbs and spices offer powerful benefits when added to your skincare routine, providing natural remedies for everything from acne to aging. Patch-test any new ingredient before using it on your face to avoid irritation. Embrace these potent, natural skincare ingredients to enjoy healthier, more radiant skin!

How to Use Apple Cider Vinegar for Skin Tag Removal

Skin tags are small, benign growths that can appear anywhere on the body, often in areas where skin rubs against skin or clothing. While they are harmless, many people seek to remove them for cosmetic reasons. Apple cider vinegar (ACV) has gained popularity as a natural remedy for skin tag removal due to its acidic properties and potential benefits for skin health. In this blog, we will explore how to use apple cider vinegar for skin tag removal, along with its benefits, precautions, and alternative methods.

1. Understanding Skin Tags

What Are Skin Tags?

Skin tags, or acrochordons, are small, soft pieces of skin that hang off the body. They are usually flesh-colored or slightly darker and can vary in size. Skin tags are most commonly found in areas such as:

  • Neck
  • Underarms
  • Eyelids
  • Groin
  • Under breasts

Causes of Skin Tags

Skin tags are generally caused by:

  • Friction: Skin-to-skin contact or friction from clothing can lead to skin tags.
  • Genetics: Some people are more prone to developing skin tags due to hereditary factors.
  • Hormonal Changes: Hormonal fluctuations, such as during pregnancy or obesity, may increase the likelihood of skin tags.
  • Age: Skin tags are more common in older adults.

2. Why Use Apple Cider Vinegar?

Apple cider vinegar is a popular natural remedy due to its antibacterial, antifungal, and anti-inflammatory properties. Its high acidity can help break down the cells in the skin tag, potentially leading to its removal. Here are some reasons to consider using apple cider vinegar for skin tag removal:

  • Natural and Non-Invasive: Unlike surgical options, ACV offers a more natural approach to skin tag removal.
  • Affordability: ACV is an inexpensive remedy compared to other treatments.
  • Additional Skin Benefits: Apple cider vinegar may help improve overall skin health by balancing pH levels and acting as a toner.

3. How to Use Apple Cider Vinegar for Skin Tag Removal

Method 1: Direct Application

Ingredients:

  • Organic apple cider vinegar
  • Cotton ball or cotton pad
  • Band-aid or medical tape

Instructions:

  1. Clean the Area: Wash the area around the skin tag with mild soap and water. Pat it dry gently with a clean towel.
  2. Soak the Cotton Ball: Dip a cotton ball in organic apple cider vinegar, ensuring it is saturated but not dripping.
  3. Apply to the Skin Tag: Place the soaked cotton ball directly on the skin tag and secure it with a band-aid or medical tape to keep it in place.
  4. Leave It On: Allow the cotton ball to sit on the skin tag for 15-30 minutes.
  5. Rinse: After the time is up, remove the cotton ball and rinse the area with warm water.
  6. Repeat: Do this process twice daily until the skin tag darkens, shrinks, and eventually falls off (this can take several days to weeks).

Method 2: ACV and Water Mixture

Ingredients:

  • Organic apple cider vinegar
  • Water
  • Cotton ball or cotton pad
  • Band-aid or medical tape

Instructions:

  1. Dilute the ACV: Mix equal parts of apple cider vinegar and water in a small bowl.
  2. Clean the Area: Wash the area around the skin tag with mild soap and water. Pat it dry gently with a clean towel.
  3. Soak the Cotton Ball: Dip a cotton ball into the diluted ACV mixture, making sure it’s saturated.
  4. Apply to the Skin Tag: Place the soaked cotton ball on the skin tag and secure it with a band-aid or medical tape.
  5. Leave It On: Let it sit for about 30 minutes.
  6. Rinse: Remove the cotton ball and rinse the area with warm water.
  7. Repeat: Follow this method twice daily until the skin tag is gone.

4. Precautions and Tips

While apple cider vinegar is generally safe for topical use, there are some precautions to consider:

  • Patch Test: Before applying ACV to the skin tag, perform a patch test on a small area of skin to check for any allergic reactions or irritation.
  • Avoid Sensitive Areas: Do not apply ACV to sensitive areas such as the eyes, mucous membranes, or broken skin.
  • Dilution: Always dilute ACV with water before applying it to the skin, especially if you have sensitive skin.
  • Consult a Doctor: If you have multiple skin tags, or if a skin tag changes in color or size, consult a healthcare professional to rule out any underlying conditions.

5. Alternative Methods for Skin Tag Removal

If apple cider vinegar does not work for you or if you prefer professional options, consider the following alternative methods:

  • Cryotherapy: A dermatologist can freeze the skin tag using liquid nitrogen, causing it to fall off.
  • Electrosurgery: This method uses electrical currents to burn off the skin tag.
  • Ligation: This involves tying off the skin tag at its base with a surgical thread to cut off its blood supply, leading to its eventual removal.

6. When to See a Doctor

While skin tags are usually harmless, you should consult a healthcare professional if:

  • The skin tag changes in color, size, or shape.
  • You experience pain, bleeding, or irritation in the area.
  • You have concerns about the nature of the skin tag or any other skin growth.

7. Conclusion

Apple cider vinegar can be an effective natural remedy for skin tag removal due to its acidic properties and skin benefits. By following the methods outlined above and taking necessary precautions, you may successfully remove skin tags at home. However, if you have any concerns or if the skin tag does not respond to treatment, it’s always best to consult a healthcare professional. With patience and proper care, you can enjoy clearer skin and boost your confidence!

Using Aloe Vera for Dark Spots on Your Skin: Tips

Introduction to Aloe Vera

Aloe vera, known for its soothing and healing properties, has been used for centuries in traditional medicine and skincare. The gel extracted from its leaves is packed with vitamins, minerals, and antioxidants, making it a popular natural remedy for various skin concerns, including dark spots. In this blog, we’ll explore how to use aloe vera to reduce dark spots, tips for application, and its benefits for achieving a more even complexion.

Benefits of Aloe Vera for Dark Spots

  1. Natural Skin Lightener
    Aloe vera contains aloin, a compound known for its skin-lightening properties. It can help inhibit the production of melanin, which is responsible for dark spots and hyperpigmentation.
  2. Anti-Inflammatory Properties
    The anti-inflammatory properties of aloe vera can help soothe irritated skin, reducing redness and promoting healing, which may aid in fading dark spots.
  3. Rich in Antioxidants
    Aloe vera is rich in antioxidants, such as vitamins C and E, which help protect the skin from free radical damage and promote a brighter complexion.
  4. Moisturizing Effects
    Aloe vera hydrates the skin without leaving a greasy residue, making it suitable for all skin types. Well-hydrated skin is more likely to appear healthy and radiant.
  5. Promotes Skin Regeneration
    Aloe vera encourages cell turnover and skin regeneration, which can help in the fading of dark spots and the overall improvement of skin texture.

Tips for Using Aloe Vera for Dark Spots

  1. Choose Fresh Aloe Vera
    For maximum benefits, use fresh aloe vera gel directly from the plant. Cut a leaf and scoop out the gel for immediate application.
  2. Regular Application
    Apply aloe vera gel to dark spots consistently, preferably twice daily, for the best results. Consistency is key when treating hyperpigmentation.
  3. Combine with Other Ingredients
    Enhance the effectiveness of aloe vera by combining it with other natural ingredients:
    • Lemon Juice: Mix aloe vera gel with a few drops of lemon juice for additional skin-lightening effects. (Note: Lemon juice can make your skin sensitive to sunlight, so use this combination at night and apply sunscreen during the day.)
    • Honey: Combine aloe vera with honey for added moisture and soothing properties.
    • Turmeric: Mixing aloe vera with turmeric can enhance its anti-inflammatory and skin-brightening effects.
  4. Patch Test
    Before applying aloe vera on dark spots, perform a patch test to check for any allergic reactions, especially if you have sensitive skin.
  5. Leave it On
    Allow the aloe vera gel to sit on the skin for at least 30 minutes before rinsing it off. For maximum benefits, you can leave it on overnight.
  6. Sun Protection
    Always apply sunscreen during the day when using aloe vera for dark spots, as sun exposure can worsen hyperpigmentation. Protecting your skin from UV rays is crucial for maintaining an even skin tone.
  7. Be Patient
    Natural remedies take time to show results. Be patient and consistent with your application, and monitor your skin for improvements over several weeks.

Conclusion

Aloe vera is a powerful natural remedy for addressing dark spots and achieving a more even complexion. Its skin-lightening properties, combined with its anti-inflammatory and moisturizing benefits, make it an excellent choice for those looking to reduce hyperpigmentation. By incorporating aloe vera into your skincare routine and following the tips provided, you can work towards brighter, healthier skin. Remember, consistent application and sun protection are essential for the best results. Enjoy the journey to clearer skin with the help of this remarkable plant!

The Benefits of Charcoal Soap for Skin

In recent years, activated charcoal has made waves in the beauty industry, and one product that has gained particular attention is charcoal soap. This dark, unassuming bar may seem simple, but it offers numerous benefits for your skin. Let’s explore why charcoal soap is worth incorporating into your daily skincare regimen.

1. Deep Cleansing and Detoxification

Activated charcoal is renowned for its deep cleansing abilities. Its porous structure allows it to draw out dirt, oil, toxins, and impurities from the skin. Charcoal soap works like a magnet, binding to debris and pulling it away from the pores, leaving your skin feeling clean, fresh, and rejuvenated. This makes it especially useful for those with oily or acne-prone skin, where excess sebum and impurities can clog pores and lead to breakouts.

2. Exfoliation Without Irritation

Charcoal soap acts as a mild exfoliant, gently removing dead skin cells without causing irritation. This helps to smoothen your skin’s texture and promote a brighter complexion. Unlike harsh chemical exfoliants, charcoal soap is gentle enough for everyday use while still effectively sloughing away dead skin cells, dirt, and grime.

3. Balancing Oily Skin

One of the biggest benefits of charcoal soap is its ability to absorb excess oil. If you have oily skin or tend to get shiny throughout the day, this soap can help reduce oil buildup without stripping your skin of its natural moisture. It balances the skin’s oil production, ensuring that your skin stays hydrated but not overly greasy, which can also help minimize the appearance of pores.

4. Acne-Fighting Properties

Because charcoal soap deeply cleanses and detoxifies the skin, it’s a powerful tool in the fight against acne. It can help prevent and reduce acne breakouts by unclogging pores, removing excess oil, and eliminating acne-causing bacteria. Additionally, its exfoliating properties help in fading acne scars over time. The soap also calms down inflammation and redness associated with acne, leaving you with clearer, more even-toned skin.

5. Suits All Skin Types

Whether you have oily, dry, combination, or sensitive skin, charcoal soap can work for you. For oily skin, it helps control sebum; for dry skin, it locks in moisture after drawing out impurities. People with sensitive skin benefit from its gentle, non-abrasive formula, as it doesn’t typically cause irritation. It’s also ideal for combination skin, as it can help balance different areas of your face, addressing oiliness and dryness simultaneously.

6. Anti-Aging Benefits

Charcoal soap not only cleanses but also promotes smoother and firmer skin by helping to reduce the appearance of wrinkles, fine lines, and sagging skin. The soap’s detoxifying and exfoliating properties encourage cell renewal, making your skin look youthful and refreshed over time.

7. Soothes Skin Conditions

Charcoal soap can also help alleviate symptoms of certain skin conditions, such as eczema and psoriasis. Its ability to calm down inflammation and reduce itching makes it a great choice for those suffering from skin irritations. Additionally, it helps to remove dead skin cells that can build up with these conditions, making the skin feel less rough and irritated.

8. Minimizes the Appearance of Pores

Large pores can make your skin look uneven and lead to more oil production and blemishes. Charcoal soap works to reduce the size of your pores by pulling out dirt and impurities that cause them to become enlarged. Regular use of charcoal soap can help you achieve a smoother, more refined complexion.

9. Removes Toxins

Our skin is exposed to toxins and pollutants every day from the environment, whether from smog, dust, or chemicals in the air. Charcoal soap acts as a detoxifying agent, removing these harmful particles and promoting healthier skin.

How to Use Charcoal Soap in Your Routine

To enjoy the full benefits of charcoal soap, simply lather it between your hands or onto a washcloth and gently apply it to your face and body. Massage the lather onto your skin in circular motions for about 30 seconds before rinsing thoroughly with water. Be sure to follow up with a moisturizer to keep your skin hydrated.

Conclusion

Charcoal soap offers a natural and effective way to cleanse, detoxify, and rejuvenate your skin. Its ability to treat acne, reduce oiliness, and minimize pores makes it a skincare essential, while its gentle exfoliation and anti-aging benefits make it suitable for all skin types. By incorporating charcoal soap into your daily routine, you’ll enjoy a clearer, smoother, and more radiant complexion in no time!