How Drinking Water Helps Your Skin: Benefits and Tips

Water is essential for our overall health, but did you know it plays a crucial role in maintaining healthy, glowing skin? Hydrating properly not only keeps your body functioning optimally, but it also supports your skin’s natural ability to repair and regenerate. In this article, we’ll explore the many benefits of drinking water for your skin and share tips on how to stay hydrated for a clear, youthful complexion.


1. The Connection Between Hydration and Skin Health

Your skin is the largest organ in your body, and like all organs, it needs adequate hydration to function properly. When you’re dehydrated, your skin can become dry, flaky, and dull. Proper hydration helps maintain skin elasticity, prevents premature aging, and supports your skin’s barrier function, which helps protect against irritants and pollutants.


2. Benefits of Drinking Water for Your Skin

2.1. Improves Skin Hydration

Drinking water is the most effective way to hydrate your skin from the inside out. While topical moisturizers help lock in moisture, staying hydrated ensures that your skin has the internal moisture it needs to stay soft and supple. Well-hydrated skin is less likely to feel tight, dry, or irritated.

2.2. Reduces Dryness and Flakiness

Dehydrated skin often appears dry and flaky. By drinking enough water throughout the day, you help maintain moisture levels in your skin, preventing it from becoming parched. This leads to a smoother, healthier-looking complexion, especially in areas prone to dryness, such as your cheeks, elbows, and hands.

2.3. Supports Skin Elasticity and Firmness

Skin elasticity refers to how well your skin bounces back when stretched. Hydrated skin retains its elasticity and firmness, which helps prevent sagging and wrinkles. Adequate water intake can make your skin look more youthful and reduce the appearance of fine lines and wrinkles.

2.4. Helps Prevent Acne and Breakouts

Water helps flush toxins from your body, including those that may contribute to acne. By improving circulation and helping to detoxify your system, drinking water can reduce the likelihood of clogged pores and breakouts. Staying hydrated also helps balance oil production on your skin, keeping your complexion clearer.

2.5. Promotes a Healthy Glow

Drinking plenty of water helps improve blood flow, which carries essential nutrients to your skin. This increased circulation promotes a natural glow and enhances skin radiance. If your skin appears dull or tired, water may be the simple solution to bringing back that healthy, vibrant appearance.

2.6. Speeds Up Skin Repair

Water is essential for the body’s repair processes, including skin regeneration. Whether it’s from sun exposure, acne scars, or environmental damage, drinking water helps speed up the healing of your skin. It supports collagen production, a protein responsible for maintaining skin structure and resilience.

2.7. Reduces Puffiness

Hydration can help combat puffiness and swelling in the skin, especially under the eyes. When you’re dehydrated, your body may retain water, leading to bloating or puffiness. Drinking enough water helps flush out excess salt, which can reduce these bloated effects and help your skin appear more toned and refreshed.


3. How Much Water Should You Drink for Healthy Skin?

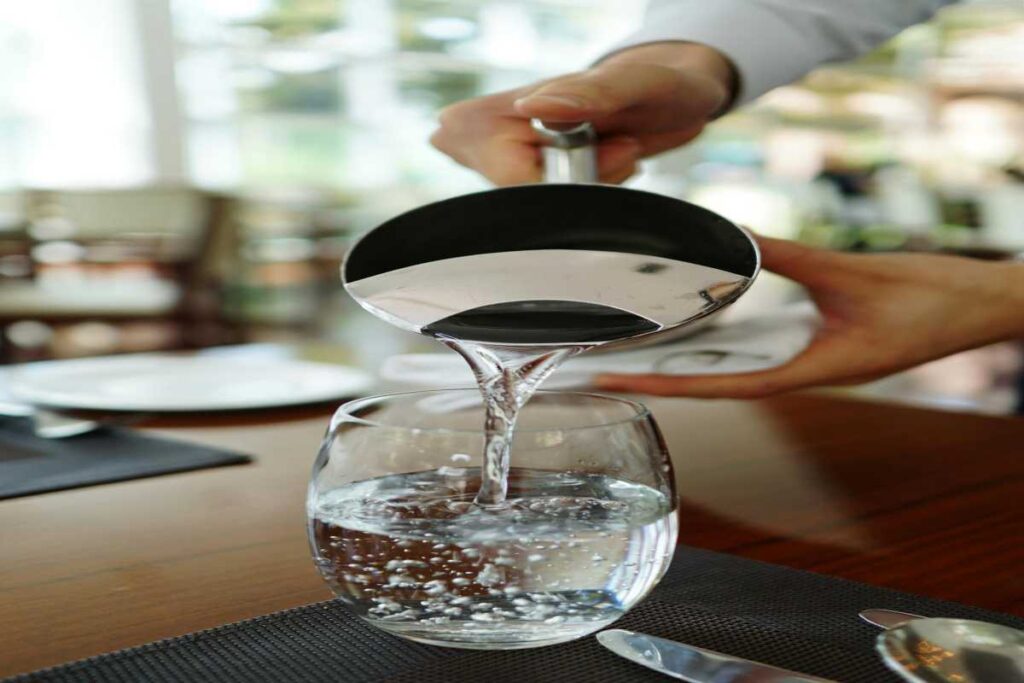
The amount of water you need can vary based on factors like your age, activity level, and the climate you live in. However, a general recommendation is to drink at least 8 glasses (64 ounces) of water a day. This is the common “8×8 rule,” and while it may be a good starting point, you might need more if you’re active, live in a hot climate, or consume caffeinated beverages that can lead to dehydration.

Some people find that increasing their water intake improves their skin’s appearance, while others may need to balance hydration with proper nutrition and skincare products.


4. Tips to Stay Hydrated for Glowing Skin

Here are a few tips to help you stay on track with your hydration and achieve glowing skin:

4.1. Start Your Day with Water

Begin each morning by drinking a glass of water as soon as you wake up. This helps kickstart your metabolism, hydrate your body after a long night’s rest, and sets the tone for the rest of the day.

4.2. Keep a Water Bottle Handy

Carry a water bottle with you throughout the day to make it easier to remember to drink water regularly. Keep it on your desk, in your bag, or near your workout gear so you’re constantly reminded to hydrate.

4.3. Infuse Your Water with Flavor

If plain water doesn’t excite you, try infusing it with natural flavors like lemon, cucumber, or mint. Adding fruits or herbs not only makes water more enjoyable but also provides extra nutrients that benefit your skin.
4.4. Eat Water-Rich Foods

In addition to drinking water, you can boost your hydration by consuming foods that have high water content. Examples include watermelon, cucumbers, oranges, and strawberries. These hydrating foods help supplement your fluid intake and contribute to skin health.

4.5. Monitor Your Urine Color

A good way to monitor your hydration levels is by paying attention to the color of your urine. If it’s light yellow or clear, you’re likely drinking enough water. If it’s darker, it may be a sign that you need to drink more water.

4.6. Avoid Excessive Caffeine and Alcohol

Both caffeine and alcohol can contribute to dehydration, which can negatively affect your skin. If you consume these beverages, make sure to balance them with extra water intake to prevent dehydration.


5. Other Ways to Keep Your Skin Hydrated

In addition to drinking water, here are some other ways to keep your skin hydrated:

  • Use a Humidifier: In dry or cold environments, a humidifier can add moisture to the air and prevent your skin from becoming dry and flaky.
  • Moisturize Regularly: Use a good moisturizer to lock in water and keep your skin hydrated. Look for products containing ingredients like hyaluronic acid and glycerin, which attract moisture to the skin.
  • Avoid Hot Showers: Hot water can strip your skin of natural oils, leading to dryness. Opt for lukewarm showers to maintain your skin’s moisture balance.
  • Use Sunscreen: Sun exposure can dehydrate your skin and cause premature aging. Always protect your skin with a broad-spectrum sunscreen to maintain hydration and prevent damage.

6. Conclusion

Drinking water is one of the simplest yet most effective ways to support your skin’s health and achieve a radiant, youthful complexion. Whether you’re trying to prevent dryness, reduce acne, or simply maintain a healthy glow, proper hydration is key. By drinking enough water and following a balanced skincare routine, you can give your skin the hydration it needs to stay soft, smooth, and vibrant.

All About 3B Natural Hair: Characteristics, Care Tips, and Styling Ideas

Natural hair comes in a variety of textures, and each type has its own unique characteristics. One popular curl pattern is 3B hair, which features defined, voluminous curls that are usually medium in thickness and have a springy, bouncy texture. If you have 3B natural hair, you might be wondering how to take care of it and which styles suit it best. In this article, we will explore the characteristics of 3B hair, how to care for it, and some styling ideas to keep your curls looking fabulous.


1. What Is 3B Natural Hair?

3B hair refers to one of the curl types in the Anderson Curl Classification System, which divides hair textures into types based on the size of the curl pattern. 3B hair sits in the Type 3 category, known for its defined curls, and is characterized by:

  • Medium to tight curls: The curls are more defined than Type 3A hair but not as tight as Type 3C.
  • Springy texture: The curls tend to bounce and spring back into place, offering a lot of volume.
  • Medium thickness: 3B hair can range from fine to medium in texture. The strands are usually thicker than 3A hair but not as coarse as 3C.
  • Slight frizz: While 3B curls can hold definition, they are prone to frizz if not properly moisturized and styled.

3B hair often requires a balance of moisture and curl definition to maintain its natural shape.


2. Common Challenges of 3B Natural Hair

While 3B hair is beautiful, it can present a few unique challenges. Here are some things to keep in mind:

  • Frizz: The natural texture of 3B hair can be prone to frizz, especially in humid conditions or if the hair is not properly moisturized.
  • Shrinkage: Due to the tight curl pattern, 3B hair may shrink significantly when dry. This can make it appear shorter than its actual length, which may be frustrating for some.
  • Dryness: Like most curly hair, 3B hair can be naturally dry because the curls make it difficult for natural oils to travel down the hair shaft. Therefore, it requires extra moisture and hydration.
  • Tangling: Curls can easily tangle if not detangled properly, so gentle combing or finger detangling is necessary.

3. How to Care for 3B Natural Hair

Taking care of 3B natural hair requires moisture, gentle handling, and specific products designed to enhance curl definition. Follow these tips to keep your curls healthy, defined, and beautiful:

3.1. Cleanse With a Sulfate-Free Shampoo

Because 3B hair is prone to dryness, it’s best to use a sulfate-free shampoo to avoid stripping the hair of its natural oils. Look for shampoos that hydrate and cleanse the scalp without leaving the hair feeling brittle.

3.2. Deep Condition Regularly

Deep conditioning is essential for keeping 3B hair moisturized and nourished. Use a rich deep conditioner at least once a week to restore moisture and improve the elasticity of your curls. Look for products that contain ingredients like shea butter, argan oil, or avocado oil.

3.3. Use a Leave-In Conditioner

A good leave-in conditioner is essential to maintain moisture and prevent frizz. It helps to define curls and keeps them soft and hydrated throughout the day. Apply a leave-in conditioner to damp hair after washing and gently comb through to ensure even distribution.

3.4. Moisturize Daily

Keep your curls hydrated by applying a moisturizing cream or oil daily or as needed. Make sure to focus on the ends, as they tend to be the driest part of the hair. Products with ingredients like coconut oil, jojoba oil, and castor oil can help lock in moisture and add shine.

3.5. Avoid Heat Styling

Frequent heat styling can damage 3B curls, leading to breakage or a loss of curl definition. It’s best to minimize the use of flat irons and curling wands. Instead, let your natural curls shine by air-drying or diffusing your hair on a low heat setting.

3.6. Detangle Gently

3B hair can be prone to tangling, so it’s important to detangle it gently. Use a wide-tooth comb or your fingers to carefully work through knots, especially when the hair is wet and conditioned. Start from the tips and work your way up to the roots.


4. Styling Ideas for 3B Natural Hair

3B hair offers versatility when it comes to styling. Whether you want to embrace your natural curls or try something new, here are a few styling ideas:

4.1. Wash and Go

A wash-and-go is a simple and popular way to rock your natural curls. Apply a curl cream or styling gel to damp hair, scrunch your curls to encourage definition, and allow your hair to air-dry or use a diffuser. This style is low-maintenance but allows your natural curls to shine.

4.2. Twist-Out or Braid-Out

A twist-out or braid-out is a great way to define curls while adding some stretch to your natural hair. Simply divide your hair into sections, twist or braid it, and allow it to dry completely before unravelling. This method can give you more elongated, defined curls with less shrinkage.

4.3. Curly Updo

For a stylish, chic look, try a curly updo. A high puff or a curly bun can be a great way to keep your hair off your face while showcasing your natural curl pattern. Use accessories like hair ties or clips to add a fun touch.

4.4. Bantu Knots

Bantu knots are another option for 3B natural hair. These small, coiled buns give your curls a defined, textured look once you unravel them. You can create the knots on wet hair for a tight curl or on dry hair for a looser, wavier finish.

4.5. Curly Fro

For those who love volume, a curly afro is a bold, beautiful style. Use a curl cream or gel to define your curls, then use a pick or your fingers to fluff your hair for maximum volume. This style celebrates the natural shape and texture of your hair.


5. Common Products for 3B Natural Hair

When it comes to selecting products for 3B natural hair, it’s important to look for ones that provide moisture, definition, and frizz control. Here are some popular product types for 3B hair:

  • Curl Creams: These are great for adding moisture and defining curls.
  • Leave-In Conditioners: These help with hydration and curl definition.
  • Curl Gels: Provide strong hold and control frizz.
  • Oils and Serums: Add shine and reduce frizz.
  • Shampoos and Conditioners: Choose sulfate-free formulas to prevent dryness.

6. Conclusion: Embracing Your 3B Natural Hair

3B natural hair is beautiful and full of potential. With the right care, products, and styling techniques, you can embrace your natural curls and show off their volume, bounce, and definition. Remember, moisture is key to keeping your curls healthy and frizz-free, so always focus on hydration and gentle handling. Whether you prefer a wash-and-go or a styled updo, there are endless ways to flaunt your stunning 3B hair!

Permanent Hair Straightening: Everything You Need to Know

If you’re tired of spending hours every week straightening your hair or battling frizz, permanent hair straightening may seem like an appealing option. This treatment promises sleek, straight hair that lasts for months. However, before making the decision, it’s essential to understand what permanent hair straightening is, how it works, the pros and cons, and whether it’s the right option for you. Here’s everything you need to know about permanent hair straightening.


1. What Is Permanent Hair Straightening?

Permanent hair straightening is a chemical treatment designed to alter the structure of your hair, making it smooth and straight for an extended period. Unlike temporary methods (like flat ironing or blow-drying), permanent straightening alters the hair’s natural curl pattern, providing a long-lasting result that requires little maintenance.

There are several techniques used in permanent hair straightening, each with its own method of transforming the hair’s texture:

  • Chemical Relaxing
  • Japanese Hair Straightening (Thermal Reconditioning)
  • Keratin Treatment (Brazilian Blowout)

2. How Does Permanent Hair Straightening Work?

The process of permanent hair straightening involves using chemicals to break down the disulfide bonds in your hair. These bonds are responsible for your hair’s natural curl or wave. By breaking and re-forming these bonds, the hair can be reshaped into a straight form. Here’s how the process works:

2.1. Step 1: Applying a Chemical Solution

A chemical solution is applied to the hair to break down the disulfide bonds. This solution typically contains ingredients like sodium hydroxide or ammonium thioglycolate, which help soften the hair and make it malleable.

2.2. Step 2: Rinsing and Neutralizing

Once the chemical solution has had time to work, it is rinsed out, and a neutralizer is applied to restore the hair’s pH balance and re-form the bonds in their new, straight shape.

2.3. Step 3: Heat Application

In treatments like Japanese hair straightening, heat is used to further straighten and lock in the new shape. The hair is then styled using heat tools to ensure it remains smooth and straight.

2.4. Step 4: Post-Treatment Care

After the treatment, you’ll need to follow specific aftercare instructions, which often include avoiding washing the hair for a few days and using sulfate-free shampoos to maintain the results.


3. Different Types of Permanent Hair Straightening

There are several methods of permanent hair straightening, and each works differently:

3.1. Chemical Relaxing

Chemical relaxers are the most common method for permanent straightening, particularly for curly or coiled hair. This process involves applying a chemical cream to the hair to break down the natural curls. There are two main types of relaxers:

  • Lye Relaxers: Contain sodium hydroxide and are stronger but more effective for tightly coiled hair.
  • No-Lye Relaxers: Contain calcium hydroxide or guanidine, which are gentler on the scalp but less effective for very curly hair.

3.2. Japanese Hair Straightening (Thermal Reconditioning)

Japanese hair straightening is a more advanced technique that combines chemical treatments and heat. The process involves straightening the hair with a chemical solution, followed by the application of heat to lock in the straight shape. This method is best suited for those with medium to coarse hair.

3.3. Keratin Treatments (Brazilian Blowouts)

Keratin treatments or Brazilian blowouts focus on infusing hair with a keratin formula that helps straighten hair while adding smoothness and shine. While this is a semi-permanent solution, it can last several months, depending on hair type and maintenance. This method is less harsh on the hair and offers a natural, glossy finish.


4. Pros and Cons of Permanent Hair Straightening

Before committing to permanent hair straightening, it’s essential to weigh the benefits and potential drawbacks.

4.1. Pros

  • Long-lasting results: Permanent hair straightening provides sleek, straight hair for months, reducing the need for daily styling.
  • Time-saving: You’ll spend less time straightening your hair in the morning, making your routine faster and easier.
  • Frizz control: Straightened hair is typically smoother and shinier, which helps to reduce frizz and flyaways, even in humid weather.
  • Improved manageability: Straightened hair is easier to comb and style, especially for those with coarse or curly hair.

4.2. Cons

  • Hair damage: The chemicals used in the straightening process can cause damage to the hair, leaving it dry or prone to breakage, particularly with repeated treatments.
  • Expensive: Permanent hair straightening can be costly, with prices ranging from $100 to $600 or more, depending on the treatment type and the salon.
  • Maintenance required: Over time, hair regrowth will become noticeable, and the treatment may need to be redone, which can lead to additional costs and potential hair damage.
  • Not suitable for all hair types: While permanent straightening is effective for many hair types, it may not work well on very fine or damaged hair. It is also not recommended for very fragile or over-processed hair.

5. Aftercare for Permanent Hair Straightening

After you’ve undergone a permanent hair straightening treatment, proper aftercare is essential to maintain the results and keep your hair healthy:

  • Avoid washing your hair for 48-72 hours after the treatment to allow the chemical bonds to set.
  • Use sulfate-free shampoos and conditioners to preserve the straightened texture and prevent hair from becoming dry or damaged.
  • Avoid heat styling for the first few days after the treatment, as your hair needs time to adjust to the new shape.
  • Moisturize your hair regularly with hydrating treatments to keep it soft and prevent damage from the chemicals.
  • Trim regularly to prevent split ends and keep your hair looking sleek and healthy.

6. How Long Does Permanent Hair Straightening Last?

The results of permanent hair straightening typically last anywhere from 4 to 6 months, depending on your hair growth and the treatment method used. Over time, as your natural hair grows, you’ll notice roots that are no longer straightened, and touch-ups will be necessary to maintain the sleek look.

  • Hair Regrowth: As your hair grows out, you’ll need to schedule touch-up treatments for the roots. This is typically done every 4-6 months.
  • Maintenance: To extend the life of the straightening treatment, minimize heat styling and use moisturizing hair care products to maintain smoothness and shine.

7. Is Permanent Hair Straightening Right for You?

Permanent hair straightening can be a fantastic option for those who want long-lasting, frizz-free, and easy-to-manage straight hair. However, it’s important to understand that this treatment involves chemicals that can potentially cause damage to your hair. If your hair is already damaged or overly processed, permanent straightening may not be suitable.

Before making the decision, consult with a professional stylist to discuss the best treatment options for your hair type and condition. Always ensure the salon uses high-quality products to minimize damage and maximize results.

Glycerin for Hair: Benefits, How to Apply, and Side Effects

Glycerin, also known as glycerol, is a natural compound that has found its way into many beauty and hair care products due to its moisturizing and hydrating properties. It is a clear, odorless, and colorless liquid commonly used in soaps, lotions, and creams. But how does glycerin work for hair? In this guide, we’ll explore the benefits of glycerin for hair, how to apply it, and the potential side effects you should be aware of.


1. Benefits of Glycerin for Hair

Glycerin has multiple advantages when it comes to promoting healthy, strong, and shiny hair. Here’s how it can help:

1.1. Deep Moisturization

Glycerin is a humectant, which means it draws moisture from the environment and locks it into the hair. This property makes it especially beneficial for dry, brittle hair and scalp.

  • Why it helps: By moisturizing the hair, glycerin helps reduce dryness and frizz, leaving your hair soft, smooth, and more manageable.

1.2. Enhances Hair Shine

The moisturizing effect of glycerin can also give your hair a natural, healthy shine. It smooths the hair cuticle and reflects light, improving your hair’s overall appearance.

  • Why it helps: If your hair lacks luster due to damage or dryness, glycerin can revive its shine by sealing in moisture and preventing dullness.

1.3. Improves Scalp Health

Glycerin helps hydrate the scalp, preventing dryness and flakiness. It also helps in soothing irritation and maintaining the skin’s moisture balance.

  • Why it helps: A well-moisturized scalp promotes a healthy environment for hair growth, reducing the chances of dandruff and dryness.

1.4. Reduces Frizz and Flyaways

Because glycerin moisturizes and smooths the hair cuticle, it helps control frizz and flyaways, making your hair look sleeker and more polished.

  • Why it helps: Glycerin helps maintain the moisture balance in the hair, preventing the hair from becoming too dry and frizzy, especially in humid conditions.

1.5. Promotes Hair Growth

While not a miracle cure for hair loss, glycerin’s ability to moisturize the scalp can create a better environment for hair follicles to thrive. A hydrated scalp can potentially support hair growth by minimizing breakage and encouraging healthier hair.

  • Why it helps: By preventing excessive dryness and maintaining moisture, glycerin contributes to healthier hair, which can indirectly promote stronger hair growth.

2. How to Apply Glycerin to Your Hair

Glycerin can be applied in a variety of ways to benefit your hair, either as a standalone treatment or mixed with other ingredients. Here are some methods for using glycerin on your hair:

2.1. Glycerin and Water Spray

This is one of the easiest ways to incorporate glycerin into your hair care routine. The mixture of glycerin and water creates a moisturizing spray that helps hydrate and soften your hair.

  • How to use: Mix one part glycerin with two parts distilled water in a spray bottle. Shake well and lightly mist your hair, focusing on the ends. Use it after washing your hair, or any time you feel your hair is dry and needs extra hydration.

2.2. Glycerin Hair Mask

To deeply nourish and hydrate your hair, you can create a DIY hair mask by combining glycerin with other nourishing ingredients.

  • How to use: Combine glycerin with honey, aloe vera, or olive oil to make a hair mask. Apply the mask to damp hair, leave it on for 15-20 minutes, and then rinse thoroughly. This will help restore moisture to dry hair and improve its overall texture.

2.3. Glycerin Scalp Treatment

To treat a dry, itchy, or flaky scalp, glycerin can be massaged directly into the scalp.

  • How to use: Mix a few drops of glycerin with coconut or olive oil and massage it into your scalp. Leave it on for 20-30 minutes before washing it out with a mild shampoo. This can help hydrate your scalp and alleviate dryness or irritation.

2.4. Glycerin-Infused Conditioner

You can add glycerin to your regular conditioner to enhance its moisturizing effects.

  • How to use: Add a few drops of glycerin to your conditioner bottle and mix it well. Use it as you normally would in the shower to keep your hair hydrated and frizz-free.

3. Side Effects of Glycerin for Hair

While glycerin is generally safe for most people, there are some potential side effects to be aware of:

3.1. Causes Build-Up

If you live in a particularly humid climate, glycerin may draw too much moisture from the air, leading to build-up on the hair and making it feel sticky or weighed down. This could result in a greasy appearance or scalp irritation.

  • How to avoid: Use glycerin sparingly and always dilute it with water or other ingredients. Regularly clarify your hair with a deep cleansing shampoo to avoid build-up.

3.2. Can Make Hair Dry in Extreme Conditions

In extremely dry environments or during winter months, glycerin can draw moisture from your hair rather than the air, potentially leaving your hair more dehydrated than before.

  • How to avoid: Avoid using glycerin in very dry conditions or use it in combination with other oils like jojoba or argan oil to lock in moisture.

3.3. Allergic Reactions

Although rare, some individuals may experience an allergic reaction to glycerin, which could cause scalp irritation or itching.

  • How to avoid: Conduct a patch test before using glycerin on your scalp or hair. Apply a small amount to your inner wrist or behind your ear and wait for 24 hours to see if any adverse reactions occur.

3.4. Sticky Residue

When used in excess, glycerin can leave a sticky residue on the hair, especially if too much is applied or if not rinsed properly.

  • How to avoid: Use glycerin in moderation, and ensure that you rinse it thoroughly if you’re using it as a treatment or mask.

4. Conclusion: Is Glycerin Good for Your Hair?

Glycerin can be a fantastic addition to your hair care routine, especially if you’re looking to combat dryness, frizz, and lack of shine. It’s a versatile ingredient that can hydrate your hair, enhance its appearance, and promote scalp health. However, like any product, it’s essential to use glycerin correctly and in moderation to avoid side effects like build-up or dehydration.

By understanding how glycerin works and how to apply it properly, you can enjoy the many benefits it offers for your hair. Always remember to experiment with small amounts and adjust usage based on your hair’s unique needs.

Benefits of Coconut Water for Hair

Coconut water has long been celebrated for its hydrating properties and nutritional benefits when consumed. But did you know that it can also do wonders for your hair? Packed with vitamins, minerals, and antioxidants, coconut water is a natural ingredient that nourishes, hydrates, and strengthens your hair from root to tip. Whether you’re dealing with dry hair, split ends, or a flaky scalp, coconut water can help restore health and shine to your locks.

In this article, we’ll explore the various benefits of coconut water for hair and how you can incorporate it into your hair care routine.


Key Benefits of Coconut Water for Hair

1. Hydrates and Moisturizes Hair

Coconut water is an excellent hydrating agent, which helps replenish moisture in your hair. It is lightweight and easily absorbed by the scalp and hair strands. Regular application of coconut water can help prevent dry, brittle hair, leaving it feeling soft, smooth, and nourished. Whether you have naturally dry hair or just need some extra hydration, coconut water can restore the moisture balance without weighing your hair down.

2. Promotes Hair Growth

Coconut water is rich in essential nutrients like potassium, magnesium, and calcium, which are essential for healthy hair growth. These nutrients nourish the scalp and stimulate blood circulation, encouraging stronger and faster hair growth. The antioxidants found in coconut water also help protect hair follicles from damage, which can lead to thinning hair and hair loss.

3. Improves Scalp Health

A healthy scalp is the foundation of healthy hair. Coconut water has natural antifungal and antibacterial properties that can help maintain a clean and healthy scalp. It can help balance the pH levels of the scalp, preventing conditions like dandruff, itching, and flakiness. By keeping the scalp clean and nourished, coconut water promotes a healthier environment for hair growth.

4. Adds Shine and Softness

Coconut water helps to restore the natural shine of your hair by sealing in moisture and adding smoothness to the strands. It can combat dullness and frizz, leaving your hair looking glossy and healthy. With regular use, coconut water can help enhance the texture of your hair, making it feel silkier and more manageable.

5. Prevents Hair Damage

The antioxidants in coconut water help neutralize free radicals that can cause oxidative stress and hair damage. This can prevent premature aging of the hair, keeping it strong and youthful-looking. By using coconut water, you can protect your hair from environmental pollutants, sun damage, and other external factors that can lead to weakened hair.

6. Reduces Frizz and Tangles

Coconut water’s natural moisturizing and smoothing properties help reduce frizz and tangles in your hair. It makes it easier to comb through your hair without causing breakage or damage. Whether your hair is straight, wavy, or curly, coconut water can help keep it smooth and manageable throughout the day.

7. Balances Oil Production

If you have oily hair or an oily scalp, coconut water can help regulate sebum production. Its light, watery texture helps remove excess oils without stripping your scalp of essential nutrients. This balance of oil production can keep your scalp and hair feeling fresh and clean, without making it greasy or too dry.


How to Use Coconut Water for Hair

There are several ways you can incorporate coconut water into your hair care routine:

1. Coconut Water Hair Rinse

To use coconut water as a hair rinse, simply pour fresh coconut water onto your scalp and hair after washing your hair. Massage it into your scalp for a few minutes, then leave it on for 10-15 minutes before rinsing it out with cool water. This method helps hydrate and nourish your hair while improving scalp health.

2. Coconut Water Hair Mask

You can create a deep conditioning treatment by mixing coconut water with other nourishing ingredients like honey, yogurt, or aloe vera. Apply the mixture to your scalp and hair, focusing on the ends. Leave it on for 20-30 minutes before rinsing it out with warm water. This mask will deeply hydrate and add shine to your hair.

3. Coconut Water Leave-In Conditioner

For an easy leave-in treatment, mix coconut water with a few drops of essential oils (like lavender or tea tree oil) and store it in a spray bottle. After washing your hair, spray the mixture onto damp hair and comb through. This will provide extra hydration, smoothness, and frizz control throughout the day.

4. Scalp Massage with Coconut Water

For a nourishing scalp massage, soak your fingertips in fresh coconut water and gently massage your scalp in circular motions for a few minutes. This will stimulate blood circulation, improve scalp health, and promote hair growth. It also helps remove any build-up on the scalp, giving your hair a cleaner, fresher feel.


Tips for Using Coconut Water on Your Hair

  • Use Fresh Coconut Water: Always use fresh, natural coconut water rather than the packaged versions that may contain added preservatives or sugar. Fresh coconut water provides the most nutrients and benefits.
  • Combine with Other Ingredients: For added benefits, you can mix coconut water with ingredients like aloe vera, honey, or olive oil, depending on your hair’s needs. These additions can further nourish and hydrate your hair.
  • Be Consistent: To see the full benefits of coconut water for your hair, try to incorporate it into your routine at least once or twice a week.

Conclusion

Coconut water is a natural, affordable, and effective solution for enhancing the health and beauty of your hair. From promoting hair growth to improving scalp health and adding shine, coconut water offers a wide range of benefits for every hair type. Whether you’re dealing with dry hair, dandruff, or simply looking to improve your hair’s overall health, coconut water is a great addition to your hair care routine.

By using coconut water regularly, you’ll enjoy healthier, shinier, and more manageable hair, naturally. Give it a try and experience the many benefits for yourself!

How To Apply Henna for Hair

Henna has been used for centuries as a natural dye and hair treatment, prized for its ability to add rich color and nourish hair. Whether you’re looking to dye your hair a beautiful shade of red or simply want to improve hair health, henna is an excellent alternative to chemical hair dyes. Not only does it give your hair a unique, natural color, but it also strengthens and conditions it, promoting healthy hair growth.

In this article, we’ll guide you through the process of applying henna to your hair, including preparation, the application process, and some tips for achieving the best results.


Benefits of Using Henna for Hair

Before we get into the step-by-step guide, let’s first explore the benefits of using henna for hair:

  1. Natural Hair Dye
    Henna provides a natural alternative to chemical hair dyes. It creates rich red, orange, or brown hues depending on your natural hair color, without harmful chemicals like ammonia or peroxide.
  2. Strengthens Hair
    Henna coats the hair shaft, adding strength and volume. It can help to reduce split ends and breakage, leaving your hair healthier.
  3. Improves Scalp Health
    Henna has natural antifungal and antibacterial properties, which can help maintain a healthy scalp and reduce dandruff and other scalp conditions.
  4. Adds Shine
    Henna leaves a beautiful shine on the hair, giving it a healthy, vibrant look.
  5. Prevents Premature Graying
    Regular henna treatments can slow down the appearance of gray hairs by promoting hair color naturally.

What You’ll Need

  • Henna Powder (available at health food stores, beauty shops, or online)
  • Warm Water or Tea (to mix the henna paste)
  • A Bowl and Spoon (for mixing)
  • Gloves (to avoid staining your hands)
  • Plastic Wrap or Shower Cap (to cover your hair while it sets)
  • Plastic or Wooden Spoon (do not use metal as it can affect the henna paste)
  • Old Towel or Shirt (to protect your clothing from staining)
  • Vinegar or Lemon Juice (optional, for added acidity)
  • Essential Oils (optional, to enhance the scent of the paste)

How to Prepare and Apply Henna for Hair: Step-by-Step

Step 1: Prepare the Henna Paste

  • Mix the Henna Powder: Start by placing the henna powder into a bowl. Depending on your hair length, you may need anywhere from 50g to 150g of henna powder. For longer hair, use more.
  • Add Warm Water or Tea: Gradually add warm water (or herbal tea for added benefits) to the henna powder. Stir the mixture with a plastic or wooden spoon until it forms a thick, smooth paste. The consistency should be similar to mashed potatoes or yogurt.
  • Optional Additives: You can also add a small amount of lemon juice or vinegar to the paste, which helps release more dye and intensify the color. Adding a few drops of essential oils like lavender or eucalyptus can also reduce the strong smell of henna.
  • Let It Sit: Cover the paste and let it sit for 2-4 hours (or overnight, if possible). This helps the dye to fully release and gives you the most vibrant color.

Step 2: Prepare Your Hair

  • Clean and Dry Hair: Wash your hair with a mild shampoo to remove any product buildup or oils. Make sure your hair is completely dry before applying henna, as this ensures the paste will adhere better.
  • Protect Your Skin and Clothes: Henna can stain skin and clothing, so wear an old shirt, and wrap an old towel around your shoulders. Apply a thin layer of petroleum jelly or oil around your hairline, ears, and neck to protect your skin from staining.

Step 3: Apply the Henna Paste

  • Divide Your Hair: Section your hair into small, manageable parts. This makes the application process easier and more uniform.
  • Start from the Roots: Using your gloved hands or a brush, begin applying the henna paste to your hair, starting from the roots and working your way down to the tips. Make sure the hair is fully coated with the paste, and continue applying until all sections of your hair are covered.
  • Massage the Paste In: Once the paste is applied, gently massage it into your scalp and hair to ensure even distribution.
  • Wrap It Up: After applying the henna paste, gather your hair and wrap it in a bun or secure it with a clip. Cover your hair with a plastic wrap or shower cap to help retain heat and allow the dye to develop.

Step 4: Let the Henna Set

  • Wait for the Dye to Develop: Leave the henna paste on your hair for at least 1-2 hours. For deeper, more intense color, you can leave it on for up to 4 hours, or even overnight. The longer you leave it on, the more vibrant the color will be.
  • Relax and Wait: During this time, you can relax or do other activities, but avoid getting the paste wet.

Step 5: Rinse and Condition

  • Rinse Thoroughly: After the wait time is over, rinse the henna out of your hair with lukewarm water. Avoid using shampoo at this stage as it can strip the color. Just rinse until the water runs clear, and you’ll notice that your hair feels thicker and stronger.
  • Condition: Once you’ve rinsed the henna out, apply a mild conditioner to your hair. Henna can be drying, so conditioning will help restore moisture and softness.

Tips for Achieving the Best Results

  • Test First: If it’s your first time using henna, perform a patch test on a small section of your hair to ensure you’re happy with the color.
  • Consistency is Key: For the best results, use henna regularly (every 4-6 weeks). Over time, you’ll notice a build-up of color, which will deepen with each application.
  • Avoid Chemical Dyes: Since henna is a natural dye, it’s best to avoid using chemical hair dyes immediately after applying henna. The chemicals can interfere with the henna’s natural properties.
  • Experiment with Blends: You can mix henna with other natural ingredients like indigo or cassia to achieve different shades (e.g., brown, black, or copper tones).

Conclusion

Applying henna for hair is an effective and natural way to dye your hair while also nourishing it. By following the steps outlined in this guide, you can achieve rich, vibrant color without the need for harsh chemicals. Remember, the results may vary based on your natural hair color, so feel free to experiment with different application times and mixtures to find your perfect shade. Embrace the beauty of henna and enjoy healthier, shinier hair!

How to Wash Coconut Oil Out of Hair: 12 Natural Ways

Coconut oil is a popular natural treatment for hair because of its deep conditioning and nourishing properties. However, removing it from your hair can sometimes be tricky, especially if you’ve applied a generous amount. While coconut oil is great for moisturizing and strengthening hair, it can leave your hair feeling greasy if not properly washed out. Below are 12 natural and effective methods to remove coconut oil from your hair without harsh chemicals.


1. Use a Clarifying Shampoo

Clarifying shampoos are designed to remove excess oil, buildup, and impurities. This type of shampoo is perfect for washing out coconut oil, as it deeply cleanses the scalp and hair.

  • How to use: Wet your hair, apply a generous amount of clarifying shampoo, and work it into a lather. Rinse thoroughly. You may need to shampoo twice to fully remove the oil.
  • Tip: Be mindful not to overuse clarifying shampoo, as it can strip natural oils from your hair if used too frequently.

2. Regular Shampoo + Dish Soap

If you don’t have a clarifying shampoo, regular shampoo combined with a small amount of dish soap can help break down the oil.

  • How to use: Mix a few drops of dish soap with your regular shampoo. Lather it into your hair and rinse. Follow up with a deep conditioner to restore moisture.
  • Tip: Dish soap is effective in removing grease, but it’s drying, so don’t use it too often.

3. Baking Soda and Shampoo

Baking soda is another natural option for removing oil from your hair. It helps absorb excess grease and buildup.

  • How to use: Mix a tablespoon of baking soda with your regular shampoo. Apply the mixture to wet hair and work it into a lather. Rinse thoroughly and condition.
  • Tip: Baking soda can be drying, so be sure to moisturize your hair afterward with a good conditioner.

4. Apple Cider Vinegar Rinse

Apple cider vinegar (ACV) helps to remove product buildup, balance the scalp’s pH, and eliminate excess oil.

  • How to use: Mix 1 part apple cider vinegar with 3 parts water. After shampooing, pour the mixture onto your scalp and hair, then rinse with cool water.
  • Tip: ACV also adds shine to your hair, so it’s a great post-wash treatment.

5. Lemon Juice and Water

Lemon juice is known for its oil-cutting properties and can help cleanse your scalp and hair of coconut oil residue.

  • How to use: Mix the juice of one lemon with 1 cup of warm water. After shampooing, apply the mixture to your hair and scalp. Massage gently and rinse thoroughly with warm water.
  • Tip: Lemon juice can make your hair dry, so follow with a conditioner to restore moisture.

6. Aloe Vera Gel

Aloe vera not only hydrates the scalp but also helps to break down oils and product buildup in the hair.

  • How to use: Apply a small amount of aloe vera gel to your scalp and hair, massaging it gently. Leave it on for a few minutes, then wash your hair with your regular shampoo.
  • Tip: Aloe vera also helps soothe the scalp if you have any irritation from the coconut oil.

7. Warm Water and Shampoo

Sometimes, simply using warm water to rinse out the coconut oil can help break it down, especially if you haven’t applied too much.

  • How to use: Wet your hair with warm water and apply a generous amount of shampoo. Massage the shampoo into your scalp and hair, then rinse thoroughly. Repeat as necessary.
  • Tip: Warm water helps loosen the oil, making it easier for the shampoo to remove it.

8. Castile Soap

Castile soap is a natural soap that effectively removes oils and dirt without drying out the hair.

  • How to use: Apply a small amount of liquid Castile soap to wet hair. Lather it into your hair, then rinse thoroughly with warm water.
  • Tip: Castile soap is gentle on the scalp and hair, so it can be used more frequently without stripping moisture.

9. Herbal Teas (Chamomile, Peppermint, or Green Tea)

Herbal teas like chamomile, peppermint, or green tea can help cleanse and refresh your hair while breaking down coconut oil.

  • How to use: Brew a strong cup of tea, let it cool, and use it as a final rinse after shampooing your hair.
  • Tip: Herbal teas also provide nourishment, antioxidants, and scalp soothing benefits.

10. Coconut Oil and Sugar Scrub

If you’re struggling to get coconut oil out of your hair, using a sugar scrub can help lift and dissolve the oil without harsh chemicals.

  • How to use: Mix a tablespoon of sugar with your regular shampoo. Massage the mixture into your scalp and hair, focusing on the areas with the most oil. Rinse thoroughly and follow with a conditioner.
  • Tip: Sugar exfoliates the scalp and helps remove buildup, but be gentle to avoid scalp irritation.

11. Coconut Oil and Salt Scrub

Combining coconut oil with salt can work as a natural scrub to help remove excess oil and buildup.

  • How to use: Mix a tablespoon of sea salt with a teaspoon of coconut oil. Gently massage this mixture into your scalp for a few minutes before rinsing with warm water.
  • Tip: Be careful not to scrub too aggressively, as the salt can irritate the scalp if used too roughly.

12. Tea Tree Oil Shampoo

Tea tree oil is known for its antifungal and antibacterial properties, making it a great natural remedy for cleansing the scalp and removing coconut oil buildup.

  • How to use: Add a few drops of tea tree oil to your regular shampoo. Lather it into your hair, then rinse thoroughly.
  • Tip: Tea tree oil can be very potent, so use it sparingly to avoid irritation.

Conclusion

Coconut oil can be incredibly beneficial for your hair, but sometimes it can be a challenge to wash out. Whether you’re using a clarifying shampoo, a DIY scrub, or natural ingredients like apple cider vinegar or baking soda, these methods will help you effectively remove coconut oil from your hair. Always follow up with a deep conditioner to restore moisture, as some of these methods may leave your hair feeling dry. By using the right techniques, you can enjoy the benefits of coconut oil without worrying about it weighing down your hair.