What Causes Dry Skin in Ears? 8 Home Remedies & Prevention

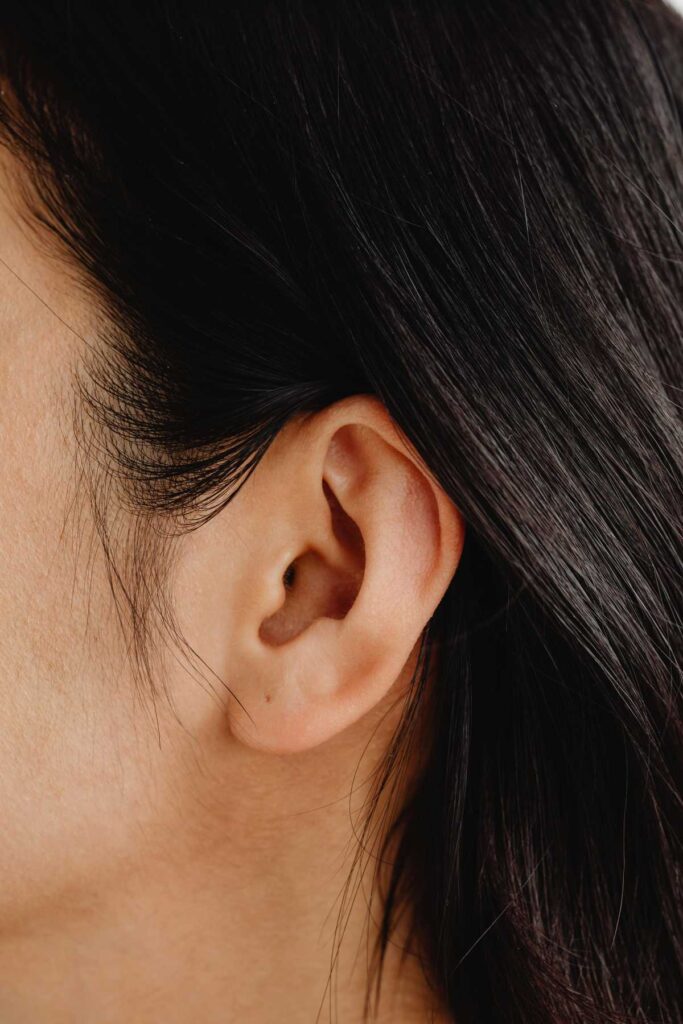
Dry skin in the ears is a common issue that can lead to discomfort, itchiness, and irritation. This condition can affect anyone, regardless of age or skin type, and it can arise from various factors. Understanding the causes, remedies, and prevention methods can help you maintain healthy skin in and around your ears. In this blog, we will explore the causes of dry skin in the ears and provide eight effective home remedies to alleviate the issue.

What Causes Dry Skin in Ears?

  1. Environmental Factors
    Exposure to harsh weather conditions, such as cold temperatures, low humidity, and wind, can lead to dry skin in the ears. Seasonal changes can also exacerbate dryness.
  2. Skin Conditions
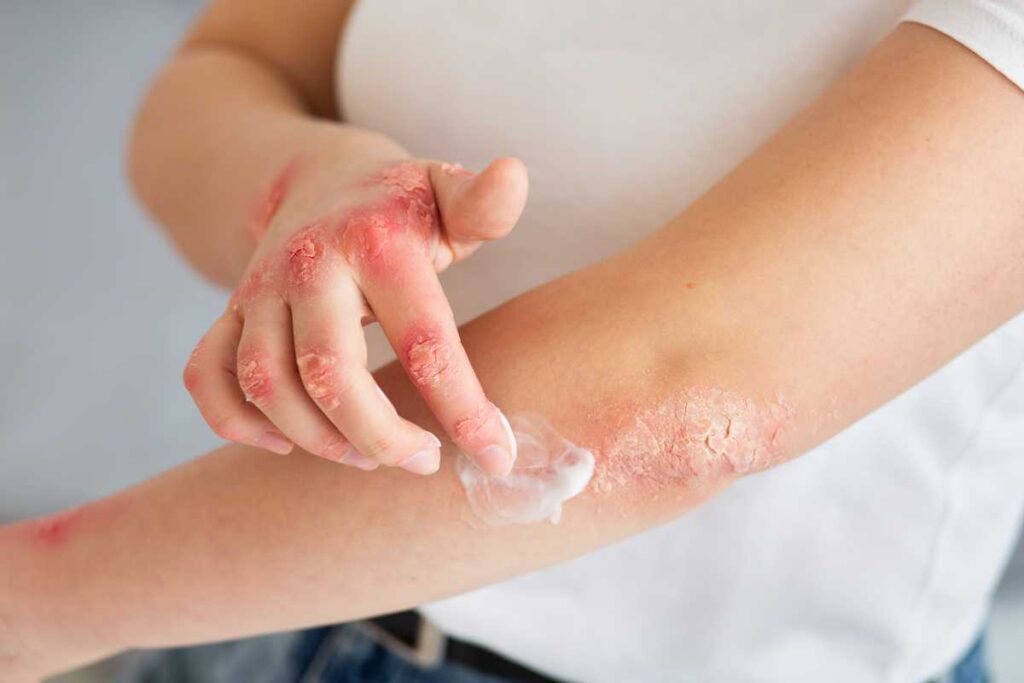
    Certain skin conditions, such as eczema, psoriasis, or dermatitis, can cause dryness and irritation in the ear area. These conditions often require specific treatments to manage symptoms.
  3. Allergic Reactions
    Allergies to certain substances, such as cosmetics, soaps, or even jewelry, can result in dryness and irritation in the ears. This is often accompanied by redness and itching.
  4. Improper Cleaning
    Using cotton swabs or other objects to clean the ears can damage the skin and lead to dryness. Over-cleaning can strip the skin of its natural oils, resulting in irritation.
  5. Infections
    Fungal or bacterial infections can cause dry, flaky skin in the ears. These infections may require medical treatment to resolve effectively.
  6. Lack of Moisture
    Not moisturizing the skin in the ear area can lead to dryness. The skin in this region is sensitive and can easily become dehydrated.
  7. Hormonal Changes
    Hormonal fluctuations, such as those occurring during pregnancy or menopause, can affect skin hydration levels and contribute to dryness.
  8. Underlying Health Issues
    Certain medical conditions, such as diabetes or thyroid disorders, can affect skin health and lead to dryness.
8 Home Remedies for Dry Skin in Ears

  1. Coconut Oil
    Coconut oil is a natural moisturizer that can help soothe dry skin. Apply a small amount of coconut oil to the affected area using a cotton ball or your fingertip. Its anti-inflammatory properties can also help reduce irritation.
  2. Olive Oil
    Olive oil is another excellent natural moisturizer. Warm a few drops of olive oil and gently massage it into the dry skin of the ears. This will help lock in moisture and promote healing.
  3. Aloe Vera Gel
    Aloe vera has soothing and hydrating properties, making it ideal for dry skin. Apply pure aloe vera gel to the dry areas in and around the ears to alleviate irritation and promote healing.
  4. Oatmeal Baths
    Oatmeal is known for its skin-soothing properties. You can make an oatmeal paste by mixing ground oatmeal with water and applying it to the affected areas. Leave it on for 15-20 minutes before rinsing off.
  5. Humidifier
    Using a humidifier in your home, especially during dry winter months, can add moisture to the air and help prevent dry skin. This is especially helpful if you live in a dry climate.
  6. Avoid Irritants
    Identify and avoid products that may irritate the skin in your ears. This includes harsh soaps, shampoos, and cosmetics. Opt for hypoallergenic and fragrance-free products whenever possible.
  7. Hydrate
    Drinking enough water is essential for maintaining skin hydration. Aim for at least 8 glasses of water per day to keep your skin hydrated from the inside out.
  8. Gentle Cleaning
    When cleaning your ears, be gentle. Avoid using cotton swabs inside the ear canal. Instead, use a damp cloth to wipe the outer ear and keep the area clean without causing irritation.

Prevention Tips

  1. Moisturize Regularly
    Make it a habit to apply moisturizer to your ears after bathing or showering. This will help lock in moisture and prevent dryness.
  2. Wear Appropriate Clothing
    In cold or windy weather, protect your ears by wearing hats or earmuffs. This can help shield the skin from harsh environmental factors.
  3. Limit Hot Showers
    While hot showers can be relaxing, they can also strip your skin of natural oils. Opt for lukewarm water instead and limit your shower time.
  4. Maintain a Healthy Diet
    A balanced diet rich in vitamins and minerals can contribute to overall skin health. Include foods high in omega-3 fatty acids, such as fish and flaxseeds, which can help keep your skin hydrated.
  5. Consult a Dermatologist
    If dry skin in your ears persists despite home remedies, consult a dermatologist for professional advice. They can identify underlying skin conditions and recommend appropriate treatments.

Conclusion

Dry skin in the ears can be uncomfortable, but with the right understanding and care, it can be effectively managed. By identifying the underlying causes and incorporating home remedies into your skincare routine, you can soothe irritation and maintain healthy skin. Remember to be gentle with your ears and prioritize hydration to prevent dryness in the future. If symptoms persist, don’t hesitate to seek professional help for tailored advice and treatment. Your ears deserve the best care for healthy, comfortable skin!

What Is Skin Gritting? Benefits, Precautions, and More

In recent years, skin gritting has emerged as a popular skincare technique, garnering attention from beauty enthusiasts and experts alike. This method, which involves a gentle exfoliation process, promises to reveal smoother, healthier skin. If you’re curious about skin gritting, this blog will explore what it is, its benefits, precautions, and how to incorporate it into your skincare routine.

What Is Skin Gritting?

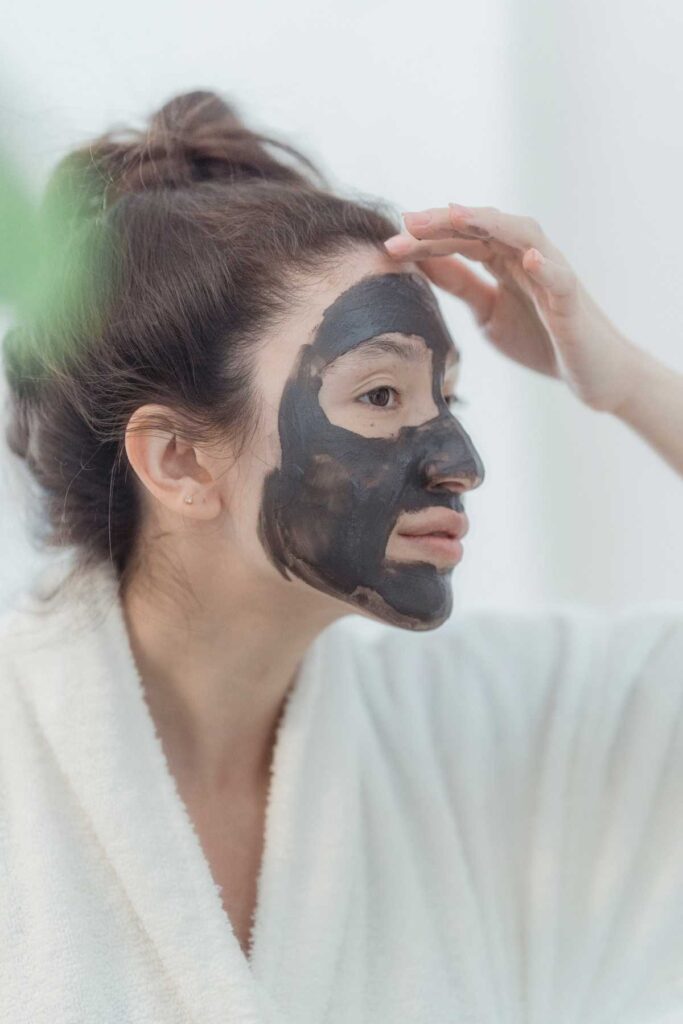
Skin gritting is a method of exfoliation that involves using a combination of physical and chemical exfoliants to slough off dead skin cells, unclog pores, and improve the overall texture of the skin. The process typically involves the application of a gritty substance, such as a scrub or a product containing exfoliating agents, followed by gentle massaging and rinsing.

Key Features:

  • Physical Exfoliation: Involves scrubs or gritty textures that physically remove dead skin cells.
  • Chemical Exfoliation: Incorporates acids or enzymes that dissolve dead skin cells and promote cell turnover.
  • Technique: Usually involves massaging the product onto damp skin in circular motions for a few minutes before rinsing off.

Benefits of Skin Gritting

  1. Improved Skin Texture
    Skin gritting effectively removes dead skin cells, leading to smoother skin. Regular exfoliation can minimize the appearance of rough patches, resulting in a more refined and polished complexion.
  2. Unclogged Pores
    By exfoliating the skin, skin gritting helps to unclog pores that can lead to acne and blackheads. This can result in a clearer complexion and reduced breakouts.
  3. Enhanced Absorption of Products
    Exfoliating the skin allows serums, moisturizers, and other skincare products to penetrate more effectively. This can enhance their effectiveness, leading to better overall skin health.
  4. Even Skin Tone
    Regular exfoliation can help fade dark spots and hyperpigmentation, leading to a more even skin tone. It promotes cell turnover, allowing fresh, new skin to emerge.
  5. Radiant Glow
    Exfoliating with skin gritting can reveal brighter skin by removing dull, dead cells. This can result in a radiant and youthful appearance.

Precautions to Consider

  1. Frequency of Use
    While exfoliation is beneficial, over-exfoliating can lead to skin irritation, redness, and sensitivity. It’s generally recommended to grit your skin no more than 2-3 times a week, depending on your skin type.
  2. Skin Type Considerations
    Those with sensitive or reactive skin should approach skin gritting with caution. Consider using gentler exfoliating products or consult a dermatologist before incorporating this technique.
  3. Choose the Right Products
    Selecting the right exfoliating products is crucial. Avoid scrubs with large, harsh particles that can cause micro-tears in the skin. Look for products containing fine granules or natural exfoliants.
  4. Patch Test
    Always conduct a patch test before using new exfoliating products, especially if you have sensitive skin. Apply a small amount of the product on a discreet area and observe for any adverse reactions.
  5. Follow Up with Moisturization
    After skin gritting, your skin may feel dry or tight. It’s essential to follow up with a hydrating moisturizer or serum to replenish moisture and soothe the skin.

How to Incorporate Skin Gritting into Your Routine

  1. Select Your Products
    Choose a gentle exfoliating scrub or a chemical exfoliant containing ingredients like AHAs (alpha hydroxy acids) or BHAs (beta hydroxy acids). Ensure the product suits your skin type.
  2. Prepare Your Skin
    Start with clean, damp skin. If using a physical scrub, wet your face with lukewarm water to soften the skin.
  3. Apply and Massage
    Take a small amount of the product and apply it to your skin. Using gentle circular motions, massage the product onto your face for 1-2 minutes, focusing on areas that may need extra attention.
  4. Rinse Thoroughly
    After massaging, rinse your face thoroughly with lukewarm water. Make sure all product residue is removed.
  5. Moisturize
    Pat your skin dry with a clean towel and apply a hydrating moisturizer or serum to lock in moisture.

Conclusion

Skin gritting can be an effective technique for achieving smoother, brighter skin when done correctly and in moderation. Understanding the benefits and precautions is essential to maximize its effectiveness while minimizing potential irritation. By incorporating skin gritting into your skincare routine, you can enjoy the many advantages it offers, leading to a healthier, more radiant complexion. As with any skincare practice, listen to your skin, adjust your routine as needed, and consult a dermatologist if you have any concerns. Happy exfoliating!

15 Gorgeous Fall Nail Ideas to Try This Season

As the air gets crisper and the leaves start to turn, it’s the perfect time to embrace the warmth of autumn in your nail looks. This season’s trending nail styles are all about rich tones, cozy vibes, and nature-inspired details that capture the magic of fall. Here are 15 gorgeous fall nail ideas that will elevate your seasonal style.


1. Moody Matte Maroons

Nothing says fall like rich maroon shades. Try a matte finish to add sophistication and depth to your nails. Maroon pairs beautifully with subtle metallic or matte black accents for a touch of glam.

Tip: Apply a matte top coat to any maroon polish to get the look!


2. Olive Green Elegance

Olive green is a standout shade for fall, offering a unique twist on traditional autumn colors. This earthy, muted hue brings a fresh, natural vibe and pairs well with gold or dark brown accents.

Idea: Try olive green on all nails, then add gold foil details to a couple of accent nails for extra flair.


3. Burnt Orange Ombre

Ombre nails in shades of burnt orange mimic the look of fall leaves and add a warm, gradient effect to your nails. Start with a deep, rusty orange at the base and blend into a lighter orange for a cozy, glowing look.

Tip: Use a makeup sponge to blend the colors for a flawless ombre.


4. Forest-Inspired Greens and Browns

Create a forest-themed nail set using greens, browns, and touches of gold. This look is perfect for nature lovers who want to carry the beauty of fall foliage with them wherever they go.

Design Tip: Use a toothpick or thin brush to create tiny leaves or branches on a couple of accent nails.


5. Plaid Patterns

Plaid is a quintessential autumn print, and it looks fabulous on nails! A plaid accent nail in shades of brown, beige, and cream adds a seasonal, preppy touch.

Tip: Use nail tape or thin nail brushes to create precise plaid lines.


6. Warm Mustard Yellow

Mustard yellow is a perfect balance of warmth and brightness for fall. This color looks stunning on its own or paired with brown and rust accents. It’s an unexpected choice that feels cheerful yet seasonal.

Idea: Pair mustard nails with small black dots or line details for a minimal, chic design.


7. Rustic Brown and Gold Foil

Brown nails with gold foil accents add an elegant and rustic touch to your fall nail style. Choose a rich chocolate or caramel brown and add touches of gold foil for a high-contrast, eye-catching effect.

Tip: Gold foil sheets or metallic nail polish can be used to create this look.


8. Pumpkin Spice Gradient

Get inspired by everyone’s favorite fall flavor with a pumpkin spice gradient. Use shades of orange, brown, and beige for a stunning ombre effect that’s cozy and festive.

Design Tip: Start with a light beige base on one end and blend into a warm orange at the tip.


9. Dark Floral Accents

Floral doesn’t have to be just for spring. Dark florals in moody shades like burgundy, black, and purple can add a romantic touch to fall nails.

Idea: Try a dark base color with tiny floral designs in lighter or contrasting colors for an elegant touch.


10. Warm Terracotta Tones

Terracotta is a popular shade that embodies the warmth of fall. This orange-brown color looks chic and sophisticated on its own or with subtle gold accents.

Tip: A terracotta shade with a glossy finish will bring out the richness of this color beautifully.


11. Sparkling Copper Tips

Add a twist to the classic French manicure with copper-tipped nails. A clear or nude base with metallic copper tips is perfect for a subtle but festive look.

Idea: Pair this design with copper accessories to make your nails pop even more.


12. Vibrant Wine Tones

Deep red and wine shades are a classic choice for fall. These colors add a touch of drama and elegance to any outfit, and they look beautiful on all skin tones.

Design Tip: For a little extra sparkle, try adding a layer of glitter to one or two accent nails.


13. Neutral Mocha Nails

For a more minimalist look, neutral mocha shades are both chic and versatile. These taupe and brown hues can be styled with sweaters, boots, and other fall fashion staples.

Idea: Add a matte top coat for an extra cozy, suede-like finish.


14. Dusty Blue with Gold Accents

Dusty blue isn’t a typical fall color, but it adds a fresh twist to seasonal tones. Pair it with gold accents to create a contrast that feels luxurious and modern.

Design Tip: Gold foil or thin gold lines on top of a dusty blue base will elevate this look.


15. Deep Purple and Plum

Purple and plum shades are rich, royal colors perfect for autumn. These colors add a mysterious, moody vibe to your nails and pair well with both matte and glossy finishes.

Tip: Try layering a deep purple polish with a plum glitter top coat for a stunning, dimensional look.


Final Thoughts

This fall, embrace the season with nail art that reflects the beautiful colors and cozy vibes of autumn. From earthy tones to moody shades and playful patterns, there’s no shortage of ways to let your nails shine. Whether you love a bold look or prefer something more understated, these fall nail ideas are sure to keep you looking chic all season long.

How to Fix a Broken Nail at Home: 5 Ways That Actually Work

A broken nail can be a frustrating experience, whether it’s from an accident, wear and tear, or simply being too active. Fortunately, you don’t need to visit a salon or a professional to address this issue. With a few simple tools and techniques, you can fix a broken nail at home. Here are five effective methods to repair a broken nail quickly and easily.


1. Use a Tea Bag or Coffee Filter

One of the most popular methods for repairing a broken nail is using a tea bag or coffee filter. This method is simple and uses materials you likely have at home.

What You’ll Need:

  • Tea bag (black tea works best) or coffee filter
  • Scissors
  • Nail glue or clear polish
  • Tweezers (optional)

Steps:

  1. Prepare the Patch: Cut a small piece of the tea bag or coffee filter to fit over the broken area of your nail. The piece should be slightly larger than the break.
  2. Apply Nail Glue: Carefully apply a thin layer of nail glue to the broken area of your nail. If you don’t have nail glue, clear nail polish can work in a pinch.
  3. Place the Patch: While the glue is still wet, place the tea bag or coffee filter patch over the break. Press it down gently with your fingertip or tweezers to ensure it adheres well.
  4. Seal the Repair: Once the glue has dried (about 5-10 minutes), apply another layer of glue or clear polish over the top of the patch for extra strength.
  5. File and Shape: Once everything is dry, gently file the edges to smooth out the surface and shape your nail as desired.

Benefits:

This method is a quick and effective way to repair a broken nail, and it blends in well, especially when using clear polish over it.


2. Use a Nail Strengthener or Hardener

If you have a broken nail that isn’t too severely damaged, a nail strengthener can help reinforce the nail while it heals.

What You’ll Need:

  • Nail strengthener or hardener
  • Nail file

Steps:

  1. File the Nail: Gently file any jagged edges around the break to prevent further tearing and to create a smooth surface.
  2. Apply Nail Strengthener: Apply a generous coat of nail strengthener or hardener over the entire nail, focusing on the broken area.
  3. Allow to Dry: Let the strengthener dry completely. You can apply a second coat for added durability.

Benefits:

Nail strengtheners are designed to help reinforce and protect nails, which can help prevent future breaks and promote healthier nail growth.


3. Use Clear Nail Polish and a Paper Towel

This quick fix utilizes clear nail polish and a small piece of paper towel or tissue to stabilize the broken area.

What You’ll Need:

  • Clear nail polish
  • Paper towel or tissue
  • Scissors

Steps:

  1. Prepare the Patch: Cut a small piece of paper towel or tissue that fits over the break.
  2. Apply Clear Polish: Brush a thin layer of clear nail polish over the broken area of your nail.
  3. Place the Patch: While the polish is still wet, place the paper towel or tissue patch over the break.
  4. Seal It: Apply another layer of clear polish over the patch, sealing it in place.
  5. Dry and File: Allow the polish to dry completely before gently filing the nail to smooth the surface.

Benefits:

This method is easy and quick, and the paper towel adds a bit of strength to the repair.


4. Use Super Glue

Super glue can be a helpful tool for fixing broken nails, especially if the break is deeper and needs extra support.

What You’ll Need:

  • Super glue (preferably nail glue)
  • Nail file
  • Clear nail polish (optional)

Steps:

  1. File the Nail: Carefully file down the broken area to create a smooth edge and remove any jagged pieces.
  2. Apply Super Glue: Put a small amount of super glue on the broken area, making sure it covers the break.
  3. Hold in Place: Gently press the two sides of the nail together and hold for a few seconds until the glue sets.
  4. Seal the Repair: Once the glue has dried, you can apply a layer of clear nail polish over the top to reinforce the repair.

Benefits:

Super glue creates a strong bond and can provide a durable fix for more severe breaks.


5. Temporary Fake Nail or Tip

If your broken nail is very short or completely broken, you may opt for a temporary fake nail or tip for a quick fix.

What You’ll Need:

  • Fake nail or nail tip
  • Nail glue
  • Nail file

Steps:

  1. Choose the Right Size: Select a fake nail or tip that matches the size and shape of your broken nail.
  2. Apply Nail Glue: Put a small amount of nail glue on the back of the fake nail or tip.
  3. Press On: Position the fake nail over the broken nail and press down gently. Hold it in place for a few seconds until it adheres.
  4. Shape and File: Once the glue is dry, file and shape the fake nail to match your other nails.

Benefits:

This method provides an instant solution and allows you to continue with your daily activities without worrying about the broken nail.


Conclusion

Fixing a broken nail at home doesn’t have to be a hassle. With these five effective methods, you can quickly and easily address the issue and prevent further damage. Whether you choose to use a tea bag, nail strengthener, super glue, or a temporary fake nail, these techniques can help restore the look and function of your nails. Remember to treat your nails gently and avoid harsh chemicals to promote healthier nails in the long run. Happy nail fixing.

Chemical Burn: Common Causes, Symptoms, and Treatment

Chemical burns are injuries caused by exposure to corrosive substances, which can result in significant tissue damage. These burns can occur in various settings, including homes, workplaces, and industrial environments. Understanding the common causes, symptoms, and treatment options for chemical burns is crucial for preventing serious injuries and ensuring proper care when incidents occur. In this blog, we will explore these aspects in detail.


What is a Chemical Burn?

A chemical burn occurs when skin or other tissues come into contact with a harmful chemical agent. These burns can result from acids, bases, solvents, or other corrosive substances. Depending on the severity of the exposure, chemical burns can range from mild irritation to deep tissue damage requiring medical intervention.

Common Causes of Chemical Burns

  1. Household Chemicals
    • Cleaning Products: Many common cleaning agents, such as bleach, drain cleaners, and oven cleaners, contain harsh chemicals that can cause burns upon skin contact.
    • Pesticides: Chemicals used in pesticides can also lead to burns, especially if they are handled improperly or without protective equipment.
  2. Industrial Chemicals
    • Acids and Bases: Strong acids (like sulfuric or hydrochloric acid) and strong bases (like sodium hydroxide) are common in various industrial settings and can cause severe burns.
    • Solvents: Organic solvents such as acetone and benzene can also cause chemical burns, particularly with prolonged exposure.
  3. Cosmetic Products
    • Hair Dye and Bleaches: Certain hair dyes and bleaching agents can cause chemical burns on the scalp or skin if not used properly.
    • Skin Care Products: Some skincare products containing alpha hydroxy acids (AHAs) or other active ingredients may lead to chemical burns, especially if used in excessive amounts.
  4. Laboratory Chemicals
    • Research and Education Settings: Laboratories often use various chemicals that can cause burns if mishandled or if protective gear is not worn.

Symptoms of Chemical Burns

The symptoms of a chemical burn can vary based on the chemical involved, the duration of exposure, and the extent of the injury. Common symptoms include:

  1. Redness and Inflammation: Initial signs often include redness, swelling, and warmth in the affected area.
  2. Pain and Discomfort: A burning sensation, pain, or tenderness may be felt immediately after contact.
  3. Blisters: Fluid-filled blisters may develop in more severe cases, indicating damage to the skin layers.
  4. Peeling Skin: As the burn heals, the affected skin may begin to peel.
  5. Dryness and Itching: The burned area may feel dry and itchy as it heals.
  6. Discoloration: The skin may appear darker or lighter than the surrounding areas as it heals.

Severe Symptoms

In cases of severe chemical burns, additional symptoms may occur, including:

  • Severe Pain: Intense pain that does not subside may indicate a deeper injury.
  • Necrosis: Tissue death in the affected area may occur, leading to blackened or charred skin.
  • Systemic Reactions: Exposure to highly toxic chemicals can cause systemic symptoms, such as nausea, vomiting, or difficulty breathing.

Treatment of Chemical Burns

The treatment of chemical burns depends on the severity of the burn, the type of chemical involved, and the duration of exposure. Here are steps to follow for effective treatment:

Immediate First Aid

  1. Remove the Source of Exposure:
    • Rinse Thoroughly: Immediately flush the affected area with copious amounts of lukewarm water for at least 15–20 minutes. This helps dilute and remove the chemical. If the chemical is in the eyes, rinse the eyes for at least 15 minutes while keeping the eyelids open.
    • Remove Contaminated Clothing: Take off any clothing or jewelry that has come into contact with the chemical to prevent further skin exposure.
  2. Assess the Severity:
    • Mild Burns: For minor chemical burns, after rinsing, gently pat the area dry and apply a sterile dressing or a non-stick bandage.
    • Severe Burns: If blisters develop, or if the burn covers a large area or is deep, seek immediate medical attention.

Medical Treatment

  1. Emergency Care:
    • In cases of severe burns, go to the emergency room or call emergency services. Provide details about the chemical involved, as this will help medical professionals determine the best course of action.
  2. Pain Management:
    • Over-the-counter pain relievers like ibuprofen or acetaminophen may be recommended to alleviate pain. Follow your healthcare provider’s advice regarding medication.
  3. Wound Care:
    • Medical professionals may clean the burn, remove dead tissue, and apply specialized dressings to promote healing.
    • Topical antibiotics may be prescribed to prevent infection.
  4. Monitoring and Follow-Up:
    • Regular follow-up appointments may be necessary to monitor healing and address any complications. In severe cases, physical therapy may be needed to restore function.

When to Seek Medical Attention

You should seek medical attention for a chemical burn if:

  • The burn is large (greater than the size of your palm).
  • The burn involves the face, hands, feet, or genitals.
  • Blisters develop or the burn appears deep.
  • You experience severe pain that does not improve.
  • You know or suspect that a dangerous chemical caused the burn.

Prevention of Chemical Burns

Preventing chemical burns is crucial to ensure safety when handling hazardous substances. Here are some effective strategies:

  1. Wear Protective Gear: Always use appropriate personal protective equipment (PPE), including gloves, goggles, and masks when handling chemicals.
  2. Read Labels and Safety Data Sheets (SDS): Familiarize yourself with the safety information provided on product labels and SDS documents to understand the risks and safe handling procedures.
  3. Store Chemicals Safely: Keep chemicals in secure, labeled containers out of reach of children and pets. Store incompatible substances separately to prevent reactions.
  4. Educate and Train: If you work in an environment that uses hazardous chemicals, ensure all personnel receive proper training on handling and emergency procedures.

Conclusion

Chemical burns can result from various common substances, leading to painful injuries that require prompt attention. By understanding the causes, recognizing the symptoms, and knowing how to treat chemical burns, you can effectively respond to these injuries and minimize their impact. Remember, prevention is the key to safety. Always take precautions when working with or around chemicals to protect yourself and others from potential harm. If you experience a chemical burn, seek appropriate medical care to ensure the best outcome for recovery.

Top 21 Herbs & Spices You Can Add to Your Skin Care Routine

Adding herbs and spices to your skincare routine can be a game-changer. They’re packed with vitamins, antioxidants, and natural healing properties that not only nourish your skin but also help address issues like acne, dryness, and aging. Using these natural ingredients can boost your skin’s health without the harsh side effects sometimes seen with chemical products. Here’s a detailed look at 21 powerful herbs and spices you can add to your skincare routine to promote a glowing, healthy complexion.


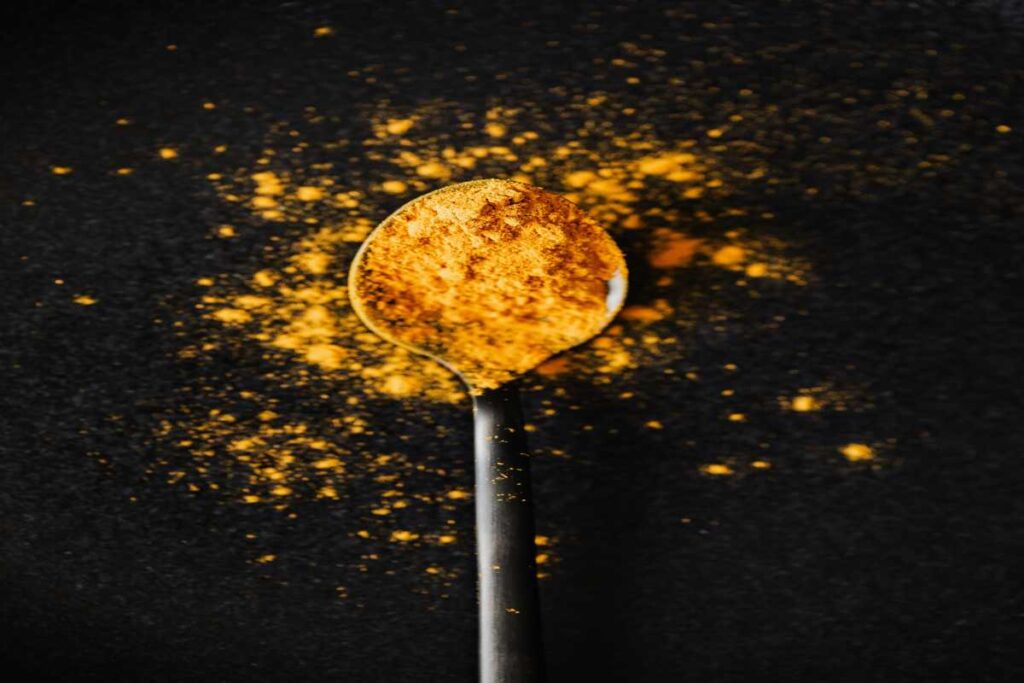
1. Turmeric

Turmeric has been a staple in skincare for centuries due to its anti-inflammatory and antibacterial qualities. The active compound, curcumin, fights free radicals, reduces inflammation, and brightens the skin, making it great for acne-prone and dull skin.

How to Use:

Mix a small amount of turmeric powder with yogurt or honey to create a face mask. Apply it for 10-15 minutes, then rinse off to reveal a brighter complexion. Be cautious as turmeric can stain, so rinse thoroughly.


2. Aloe Vera

Aloe Vera is known for its soothing and hydrating properties. It helps to lock moisture into the skin, calms inflammation, and speeds up healing, which makes it ideal for sunburns and sensitive skin.

How to Use:

Use fresh aloe gel from the leaf and apply it directly to your skin as a hydrating mask. It’s especially effective when used as an overnight mask for maximum hydration and soothing.


3. Chamomile

Chamomile is excellent for calming irritated skin and reducing redness due to its anti-inflammatory and antioxidant properties. It’s a go-to for sensitive skin and helps reduce eczema symptoms as well.

How to Use:

Brew chamomile tea and let it cool. Use it as a soothing toner or facial spray. Chamomile tea bags can also be applied directly under the eyes to reduce puffiness.


4. Lavender

Lavender is beloved for its calming scent, but it’s also a powerful antibacterial that helps reduce acne and soothes inflamed skin. It’s beneficial for both acne-prone and sensitive skin.

How to Use:

Mix a few drops of lavender essential oil into a carrier oil (like jojoba or almond oil) and apply it to your skin. Lavender oil can also be added to face masks to balance and calm the skin.


5. Green Tea

Green tea is packed with antioxidants, particularly EGCG, which helps combat signs of aging, reduces inflammation, and promotes a clearer complexion. It also helps regulate sebum production, making it excellent for oily skin.

How to Use:

Use cooled green tea as a toner or mist. You can also use green tea leaves in face masks to help reduce redness and improve elasticity.


6. Neem

Neem is known for its antibacterial properties and is especially helpful for acne-prone skin. It reduces inflammation, controls excess oil, and helps fade dark spots, providing a clearer complexion over time.

How to Use:

Mix neem powder with water to make a paste and apply it as a mask for 10-15 minutes. Rinse with warm water to reveal clearer skin. Neem oil can also be diluted and applied to stubborn acne spots.


7. Rosemary

Rosemary has antioxidants that fight free radicals and stimulate blood circulation, which can help improve the appearance of dull skin and give it a natural glow.

How to Use:

Add rosemary essential oil to your daily moisturizer or dilute it in a carrier oil to massage into the skin. You can also brew rosemary tea to use as a toner to refresh your skin.


8. Calendula

Calendula, also known as marigold, has powerful healing and anti-inflammatory properties, making it ideal for treating sensitive, dry, or irritated skin.

How to Use:

Brew calendula tea and use it as a toner, or apply calendula-infused oil to your skin as a gentle moisturizer. It can be especially soothing for eczema or sensitive skin types.


9. Saffron

Saffron is known for its brightening properties, helping to reduce pigmentation and lighten dark spots. This ancient beauty spice also improves skin texture and glow.

How to Use:

Add a few saffron strands to milk or rose water and let it sit for 10 minutes to infuse. Use a cotton ball to apply the mixture as a toner or leave-on serum.


10. Mint

Mint is refreshing and has antibacterial properties that help control oil and prevent acne. The menthol in mint provides a cooling effect, which can reduce inflammation and soothe skin.

How to Use:

Crush fresh mint leaves and mix with a little water to create a paste. Apply as a spot treatment on acne or use in a face mask to cool down inflamed skin.


11. Basil

Basil has natural antibacterial and anti-inflammatory benefits that make it helpful for acne and irritated skin. It’s known to purify and cleanse the skin, reducing breakouts.

How to Use:

Make a basil paste by grinding fresh basil leaves with water. Apply it to the face for 10-15 minutes to help clarify the skin.


12. Ginger

Ginger is packed with antioxidants that fight aging, improve circulation, and reduce hyperpigmentation, making it a wonderful ingredient for dull or tired-looking skin.

How to Use:

Add a small amount of ginger powder to honey or yogurt and use it as a brightening face mask. Ginger tea can also be used as a toner to help even out skin tone.


13. Holy Basil (Tulsi)

Tulsi is highly regarded in Ayurvedic medicine for its healing properties. It has antibacterial and detoxifying qualities that are ideal for acne-prone skin.

How to Use:

Use Tulsi powder in a face mask with honey or aloe vera gel, or brew Tulsi tea and use it as a natural toner.


14. Cinnamon

Cinnamon stimulates blood flow, reduces signs of aging, and has antimicrobial properties. It can plump up skin and is great for circulation but should be used sparingly as it can be strong.

How to Use:

Mix a tiny amount of cinnamon with honey and apply it as a mask. Leave it on for 5-10 minutes to avoid irritation, as cinnamon can be potent.


15. Peppermint

Peppermint has a cooling effect and helps control oil production, making it ideal for oily or acne-prone skin.

How to Use:

Use peppermint tea as a toner or mist, or dilute peppermint essential oil in a carrier oil for a refreshing and invigorating skin treatment.


16. Fenugreek

Fenugreek is rich in antioxidants and has anti-inflammatory properties, which can help prevent signs of aging and rejuvenate the skin.

How to Use:

Soak fenugreek seeds overnight, grind them into a paste, and use as a face mask. This helps firm the skin and reduce fine lines.


17. Licorice Root

Licorice root is renowned for its skin-brightening properties. It helps to reduce pigmentation and fade dark spots.

How to Use:

Licorice root extract can be used in serums or masks to even out skin tone and add brightness. Add licorice powder to your favorite face mask for added benefits.


18. Sage

Sage helps control oil and has antibacterial properties, making it excellent for oily and acne-prone skin.

How to Use:

Brew sage tea and use it as a toner, or add sage oil diluted in a carrier oil to your skincare for clearer, fresher skin.


19. Bay Leaf

Bay leaves contain vitamins and minerals that improve skin texture and reduce inflammation. They help cleanse the skin and keep it radiant.

How to Use:

Boil bay leaves in water, cool, and use the liquid as a toner. You can also add bay leaf powder to a DIY face mask for extra nourishment.


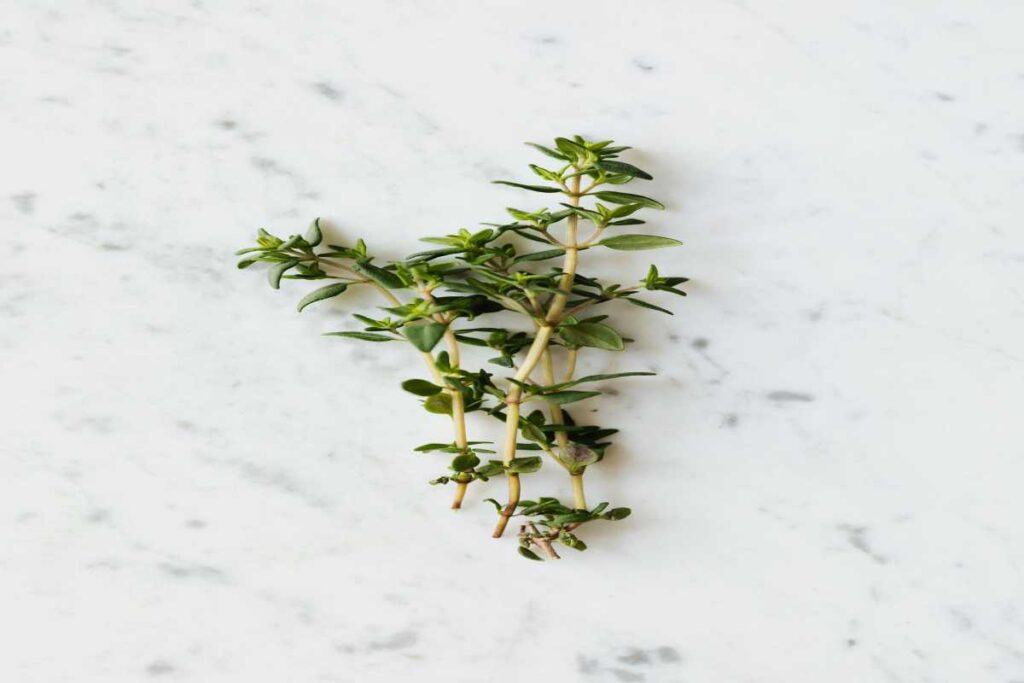
20. Thyme

Thyme has antibacterial properties that help fight acne and clear congested skin.

How to Use:

Thyme tea can be used as a toner to keep acne at bay, or dried thyme can be added to masks for a refreshing effect.


21. Oregano

Oregano is rich in antioxidants and has antiseptic properties, making it great for acne and inflammation.

How to Use:

Dilute oregano essential oil in a carrier oil and use it as a spot treatment on acne-prone areas for targeted care.


Conclusion

These herbs and spices offer powerful benefits when added to your skincare routine, providing natural remedies for everything from acne to aging. Patch-test any new ingredient before using it on your face to avoid irritation. Embrace these potent, natural skincare ingredients to enjoy healthier, more radiant skin!

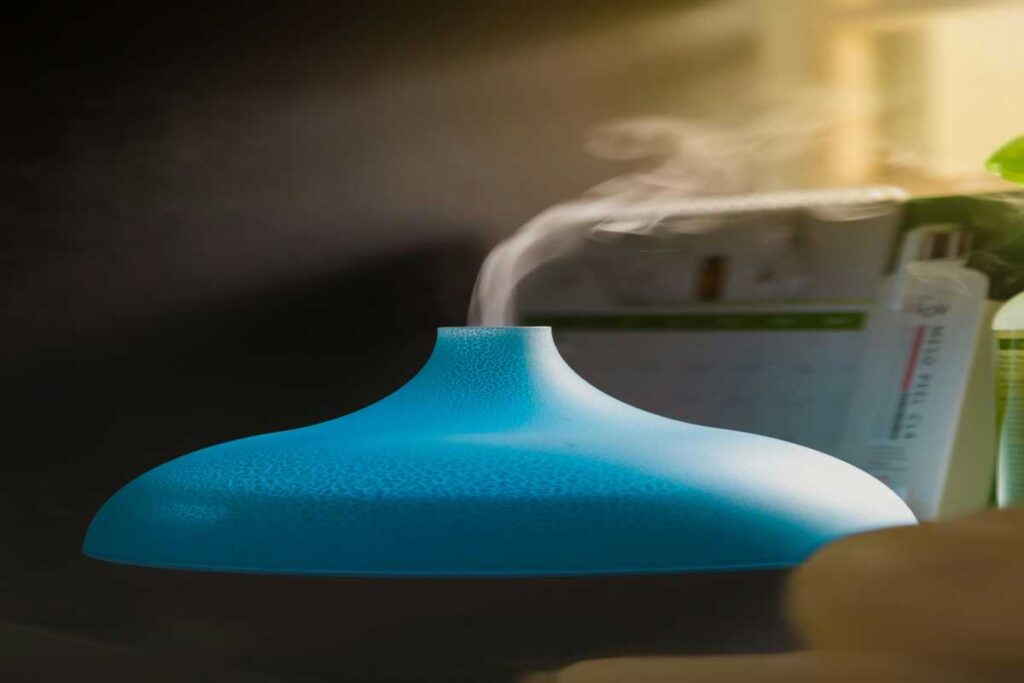
Humidifiers for Skin: Types, Benefits, Working, Risks, & Uses

Humidifiers are devices designed to increase humidity levels in the air, which can significantly impact skin health, particularly in dry or cold climates. With the rising popularity of these devices, many people are exploring how humidifiers can benefit their skin. In this blog, we’ll delve into the types of humidifiers, their benefits, how they work, potential risks, and their various uses for skin health.

1. Understanding Humidity and Skin Health

What is Humidity?

Humidity refers to the amount of moisture present in the air. The ideal indoor humidity level is typically between 30% and 50%. When humidity levels drop, particularly in winter months or dry climates, the skin can become dry, flaky, and irritated.

How Humidity Affects the Skin

  • Moisture Retention: Adequate humidity helps the skin retain moisture, preventing dryness and irritation.
  • Barrier Function: The skin barrier can weaken in low humidity, making it more susceptible to allergens, irritants, and infections.
  • Skin Conditions: Dry air can exacerbate skin conditions such as eczema, psoriasis, and dermatitis.

2. Types of Humidifiers

Humidifiers come in various types, each with its own benefits and mechanisms of operation. Here are the most common types:

1. Evaporative Humidifiers

  • How They Work: These humidifiers use a fan to blow air through a wet wick, filter, or pad, causing water to evaporate and increase humidity in the room.
  • Benefits: They are self-regulating, as they will only add moisture until the humidity reaches a certain level.

2. Ultrasonic Humidifiers

  • How They Work: Ultrasonic humidifiers use ultrasonic vibrations to create a fine mist of water that is released into the air.
  • Benefits: They are quiet, energy-efficient, and often come with built-in features like adjustable mist settings.

3. Steam Vaporizers

  • How They Work: These devices heat water to create steam, which is then cooled slightly before being released into the air.
  • Benefits: They can help with respiratory issues, but they should be used cautiously, as they can be hot to the touch.

4. Impeller Humidifiers

  • How They Work: Impeller humidifiers use a rotating disk to fling water into a diffuser, producing a cool mist.
  • Benefits: They are quieter than evaporative models and do not require filters.

5. Central Humidifiers

  • How They Work: These systems are built directly into home heating and air conditioning systems and are designed to humidify the entire house.
  • Benefits: They provide consistent humidity levels and require less maintenance.

3. Benefits of Using Humidifiers for Skin Health

Using a humidifier can provide several benefits for skin health:

1. Moisturizes the Skin

Humidifiers add moisture to the air, which can help keep your skin hydrated, preventing dryness and flakiness.

2. Enhances Skin Barrier Function

By maintaining optimal humidity levels, humidifiers help strengthen the skin’s barrier function, protecting it from environmental irritants and allergens.

3. Alleviates Skin Conditions

Individuals with eczema, psoriasis, and dry skin can experience significant relief from symptoms when using a humidifier, as it helps reduce irritation and inflammation.

4. Improves Comfort

Humidifiers can help alleviate discomfort associated with dry skin, such as tightness and itchiness, providing a more comfortable environment.

5. Enhances Overall Skin Appearance

Consistently using a humidifier can lead to a healthier, more radiant complexion by preventing dehydration and promoting skin elasticity.

4. How Humidifiers Work

Humidifiers work by releasing moisture into the air, which increases the humidity levels in a room. Here’s a brief overview of how different types of humidifiers operate:

  • Evaporative: Water is absorbed by a wick, and a fan blows air through it, causing evaporation.
  • Ultrasonic: High-frequency vibrations break water into tiny droplets, producing a cool mist.
  • Steam Vaporizer: Water is heated to produce steam, which is then cooled slightly before being released.
  • Impeller: A rotating disk flings water into a diffuser, creating a cool mist.

Setting Up a Humidifier

  1. Placement: Place the humidifier in the room where you spend the most time, ideally about three feet away from walls and furniture.
  2. Water Quality: Use distilled or purified water to prevent mineral buildup and reduce the risk of bacteria and mold growth.
  3. Maintenance: Regularly clean the humidifier according to the manufacturer’s instructions to ensure it functions properly and safely.

5. Risks and Considerations

While humidifiers offer many benefits, there are some risks and considerations to keep in mind:

1. Over-Humidification

Excess humidity can lead to condensation on surfaces, creating an environment conducive to mold growth, dust mites, and other allergens.

2. Bacteria and Mold Growth

If not cleaned regularly, humidifiers can become breeding grounds for bacteria and mold, which can be released into the air and potentially worsen respiratory issues.

3. Skin Irritation

Some individuals may experience skin irritation if humidity levels become too high. It’s essential to monitor humidity levels and adjust as needed.

4. Electric Hazards

Ensure that the humidifier is placed away from water sources and used according to the manufacturer’s safety guidelines.

6. Using Humidifiers for Optimal Skin Care

To maximize the benefits of a humidifier for skin health, consider the following tips:

1. Monitor Humidity Levels

Use a hygrometer to monitor indoor humidity levels and keep them between 30% and 50%.

2. Apply Moisturizer

For best results, apply moisturizer after using a humidifier to lock in hydration and enhance the skin’s barrier function.

3. Hydrate

Drink plenty of water to maintain overall hydration levels in your body, complementing the benefits of the humidifier.

4. Maintain Cleanliness

Regularly clean your humidifier as recommended to prevent any buildup of harmful microorganisms.

7. Conclusion

Humidifiers can be a valuable addition to your skincare routine, especially in dry environments or during winter months. By understanding the different types of humidifiers, their benefits, and how to use them safely, you can enhance your skin health and overall comfort. However, it’s crucial to monitor humidity levels and maintain cleanliness to reap the maximum benefits while minimizing potential risks. Whether you’re dealing with dry skin, eczema, or simply want to maintain a healthy glow, a humidifier can be an effective tool in your skincare arsenal.

How to Get Rid of Hard Pimples: Home Remedies & Treatments

Hard pimples, also known as cystic acne, can be one of the most frustrating and painful skin issues to deal with. These deep, inflamed bumps are often red and tender, and they can take longer to heal than typical pimples. Understanding their causes and exploring effective home remedies and treatments can help you manage and reduce hard pimples effectively. In this blog, we will cover everything from prevention to treatment options.

1. Understanding Hard Pimples

What Are Hard Pimples?

Hard pimples form when hair follicles become clogged with oil, dead skin cells, and bacteria. This blockage leads to inflammation, resulting in painful, swollen nodules under the skin. Unlike regular pimples, which often come to a head, hard pimples remain beneath the surface and can be more challenging to treat.

Causes of Hard Pimples

Several factors can contribute to the formation of hard pimples:

  • Hormonal Changes: Fluctuations in hormones, particularly during puberty, menstruation, or pregnancy, can lead to increased oil production and clogged pores.
  • Diet: Consuming high-glycemic foods, dairy, and processed sugars can trigger acne in some individuals.
  • Stress: Stress can lead to hormonal changes that exacerbate acne.
  • Poor Skincare Habits: Inadequate cleansing, over-exfoliating, or using harsh products can irritate the skin and lead to breakouts.

2. Home Remedies for Hard Pimples

If you’re dealing with hard pimples, several effective home remedies can help reduce inflammation, unclog pores, and promote healing.

1. Warm Compress

Applying a warm compress can help soothe hard pimples and encourage drainage.

  • How to Use: Soak a clean cloth in warm water, wring out the excess, and place it on the affected area for 10-15 minutes. Repeat several times a day.

2. Tea Tree Oil

Tea tree oil is known for its antibacterial and anti-inflammatory properties, making it a popular remedy for acne.

  • How to Use: Dilute tea tree oil with a carrier oil (like jojoba or coconut oil) at a ratio of 1:9. Apply it to the affected area with a cotton swab and leave it on for at least 30 minutes before rinsing off.

3. Aloe Vera

Aloe vera has soothing properties that can help reduce inflammation and redness.

  • How to Use: Apply fresh aloe vera gel directly to the hard pimple. Leave it on overnight for the best results.

4. Honey

Honey has antibacterial properties and can help reduce swelling and redness.

  • How to Use: Apply a small amount of raw honey to the pimple and leave it on for 30 minutes before rinsing with lukewarm water.

5. Witch Hazel

Witch hazel is a natural astringent that can help reduce inflammation and promote healing.

  • How to Use: Soak a cotton ball in witch hazel and apply it to the affected area twice a day.

6. Apple Cider Vinegar

Apple cider vinegar can help balance the skin’s pH and has antibacterial properties.

  • How to Use: Mix one part apple cider vinegar with three parts water. Apply the mixture to the hard pimple using a cotton ball and leave it on for 15-20 minutes before rinsing.

7. Baking Soda

Baking soda can help exfoliate the skin and absorb excess oil.

  • How to Use: Mix baking soda with water to form a paste. Apply it to the hard pimple and leave it on for 10-15 minutes before rinsing.

3. Over-the-Counter Treatments

In addition to home remedies, several over-the-counter treatments can effectively manage hard pimples:

1. Benzoyl Peroxide

Benzoyl peroxide helps kill acne-causing bacteria and reduce inflammation. Look for products with 2.5% to 10% benzoyl peroxide.

2. Salicylic Acid

Salicylic acid is a beta hydroxy acid (BHA) that helps exfoliate the skin and unclog pores. It is effective for treating various types of acne, including hard pimples.

3. Retinoids

Over-the-counter retinoid creams or gels can help promote cell turnover and prevent clogged pores. Start with a lower concentration to avoid irritation.

4. Lifestyle Changes to Prevent Hard Pimples

While treating existing hard pimples is essential, preventing future breakouts is equally important. Here are some lifestyle changes to consider:

1. Maintain a Healthy Diet

  • Eat a balanced diet rich in fruits, vegetables, whole grains, and lean proteins. Limit processed foods, sugar, and dairy, which may trigger acne in some individuals.

2. Stay Hydrated

  • Drink plenty of water to keep your skin hydrated and help flush out toxins.

3. Practice Good Skincare

  • Cleanse your skin twice a day with a gentle cleanser. Avoid over-exfoliating or using harsh products that can irritate the skin.

4. Manage Stress

  • Engage in stress-reducing activities like yoga, meditation, or exercise to help balance hormones and reduce acne.

5. Avoid Touching Your Face

  • Keep your hands away from your face to prevent transferring bacteria and oils that can contribute to breakouts.

5. When to See a Dermatologist

If you have tried home remedies and over-the-counter treatments without success, or if your hard pimples are severe or recurrent, it’s essential to consult a dermatologist. They can evaluate your skin condition and may recommend prescription treatments, such as topical or oral medications, to help manage your acne.

6. Conclusion

Dealing with hard pimples can be challenging, but with the right knowledge and remedies, you can effectively manage and reduce them. By incorporating home remedies, over-the-counter treatments, and lifestyle changes, you can improve your skin’s health and prevent future breakouts. Remember, patience is key, as it may take time to see significant improvements. If in doubt, don’t hesitate to seek professional guidance to find the best approach for your skin.