Petroleum Jelly: What Is It and How to Use It

Petroleum jelly is a versatile and affordable skincare product that has been a staple in many households for over a century. Known for its soothing and protective properties, it’s used for a variety of applications, from healing chapped lips to moisturizing dry skin. In this blog, we will explore what petroleum jelly is, its benefits, and how you can incorporate it into your daily routine.


1. What is Petroleum Jelly?

Definition:

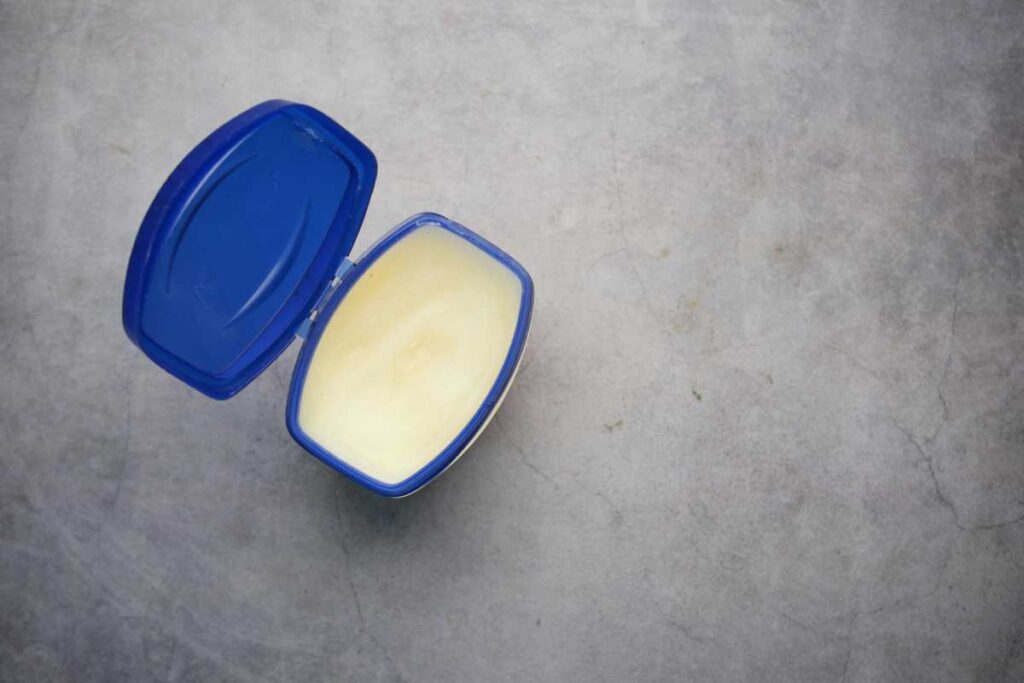
Petroleum jelly, commonly known by the brand name Vaseline, is a semi-solid mixture of hydrocarbons derived from petroleum. It was discovered in the 19th century and has since become a popular product in beauty and skincare.

Composition:

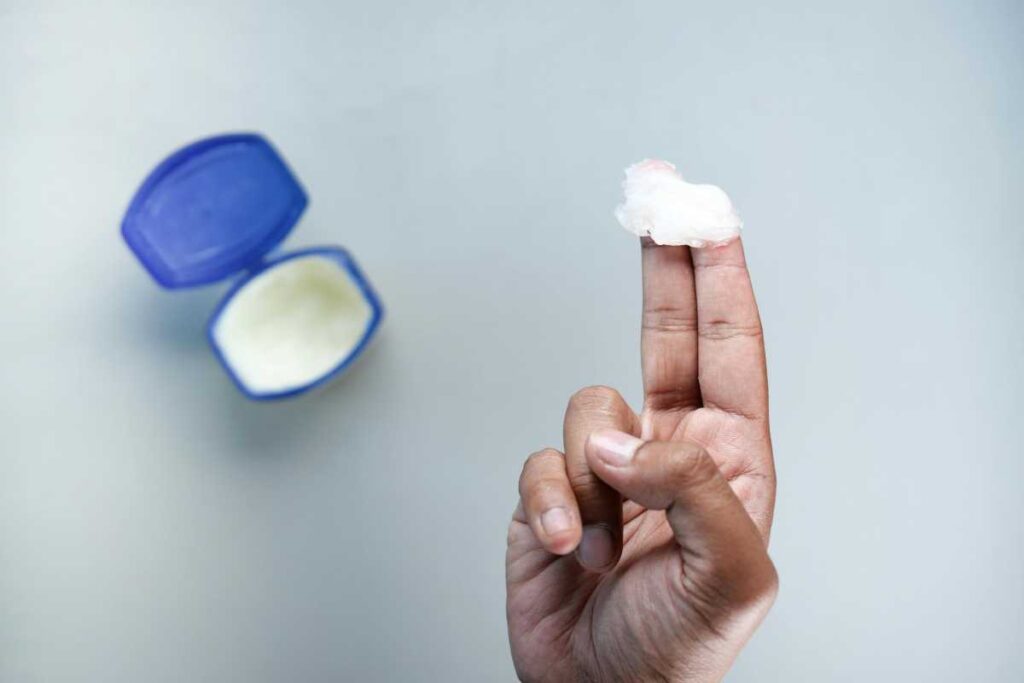
Petroleum jelly consists mainly of mineral oils and waxes. It has a smooth texture and is colorless or slightly yellow. It is non-toxic and hypoallergenic, making it safe for most skin types.


2. Benefits of Petroleum Jelly

Moisturizing Properties:

One of the primary uses of petroleum jelly is its ability to lock in moisture. It forms a protective barrier on the skin, preventing water loss and keeping the skin hydrated. This makes it particularly beneficial for dry or cracked skin.

Wound Healing:

Petroleum jelly can help promote healing by creating a moist environment for minor cuts, scrapes, and burns. It can protect the skin from external irritants and prevent scabbing, which can lead to scarring.

Lip Care:

Using petroleum jelly on chapped lips can provide instant relief and hydration. It helps seal moisture in, keeping your lips soft and smooth.

Skin Protection:

Petroleum jelly is often used to protect the skin against harsh weather conditions, such as wind and cold. It can act as a barrier on exposed skin areas to prevent dryness and irritation.

Makeup Application:

It can also be used as a makeup primer for a dewy finish. Applying a thin layer of petroleum jelly before foundation can give your skin a radiant glow.


3. How to Use Petroleum Jelly

1. For Chapped Lips:

  • Apply a small amount of petroleum jelly to your lips as needed. This will provide immediate moisture and protection.

2. For Dry Skin:

  • Apply petroleum jelly to dry patches on your body, such as elbows, knees, and heels, before bed. For best results, follow up with cotton socks or gloves to lock in moisture overnight.

3. For Wound Care:

  • Clean the affected area with soap and water, pat dry, and then apply a thin layer of petroleum jelly to protect and promote healing. Cover with a bandage if necessary.

4. For Makeup Removal:

  • Use petroleum jelly on a cotton pad to gently remove makeup. It can effectively dissolve makeup without drying out your skin.

5. For Hair Care:

  • Apply a small amount to your hair ends to tame frizz and add shine. Be cautious not to use too much, as it can weigh down your hair.

6. For Preventing Skin Irritation:

  • Apply a layer of petroleum jelly to areas prone to chafing, such as thighs or underarms, before physical activity.

7. As a Nail Care Product:

  • Rub petroleum jelly on your cuticles and nails to moisturize and prevent hangnails.
4. Precautions When Using Petroleum Jelly

While petroleum jelly is generally safe for most people, it’s important to keep the following points in mind:

  • Avoid Open Wounds: Do not apply petroleum jelly to deep cuts or puncture wounds, as it may trap bacteria and cause infections.
  • Sensitive Skin: If you have sensitive skin or are prone to breakouts, perform a patch test before widespread use, as petroleum jelly can be comedogenic (clogging pores).
  • Use Sparingly: A little goes a long way. Using too much can leave a greasy residue and may cause skin irritation.

5. Conclusion: The Versatile Power of Petroleum Jelly

Petroleum jelly is a multifunctional product that can be used in various ways to support skin health and beauty routines. Whether you’re dealing with dry skin, chapped lips, or minor wounds, this affordable remedy is a must-have in your skincare arsenal. Its protective and moisturizing properties make it a reliable solution for many everyday skin concerns.

Incorporate petroleum jelly into your self-care routine to experience its many benefits, and enjoy soft, hydrated skin all year round!

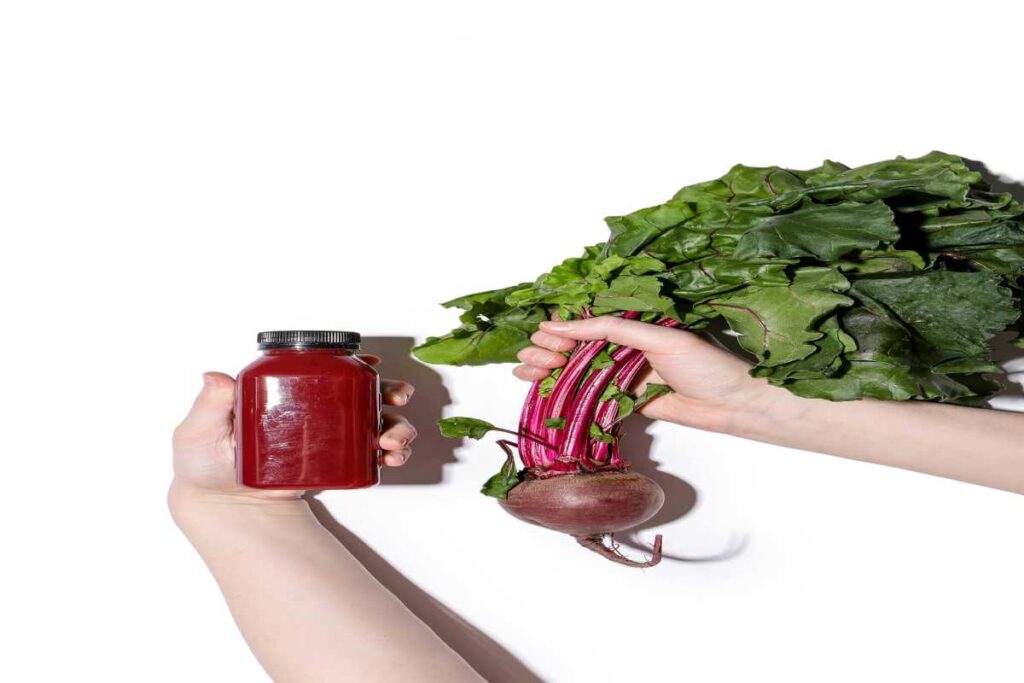
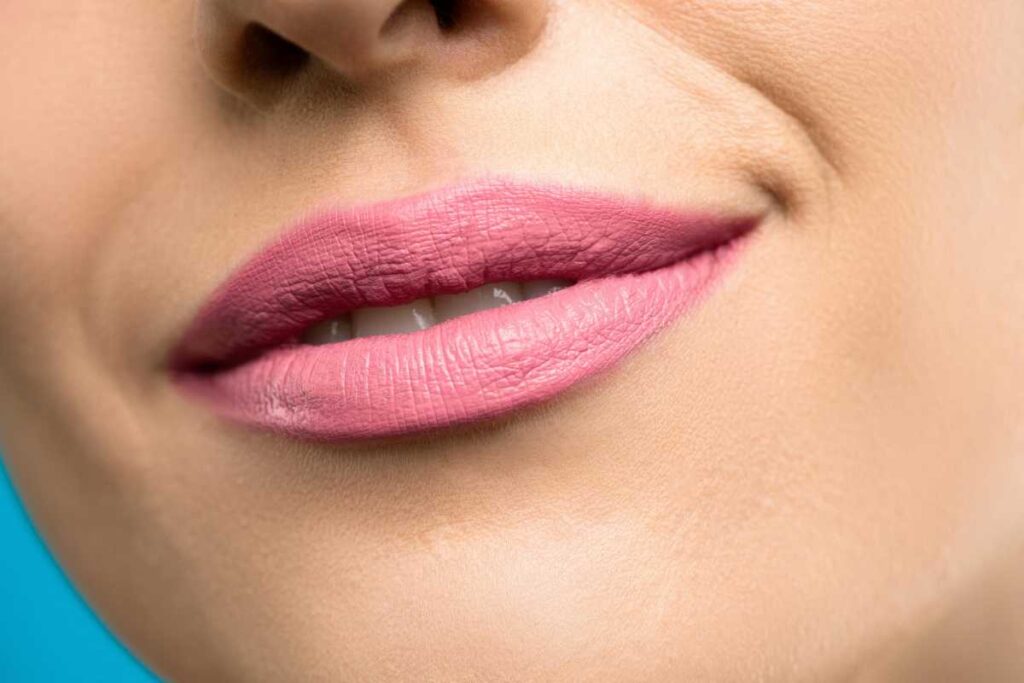
DIY – How to Colour Your Lips Pink with Beetroot

Beetroot is not just a nutritious vegetable; it’s also a fantastic natural dye that can give your lips a beautiful, rosy tint. This DIY guide will show you how to use beetroot to create a stunning lip color that’s free from harmful chemicals and additives. With its vibrant pigments and nourishing properties, beetroot not only enhances your natural beauty but also nourishes your lips. Let’s explore how to create your own pink lip tint using this versatile root vegetable!


1. The Benefits of Using Beetroot on Your Lips

Natural Colorant:

Beetroot contains betalains, which are natural pigments that give it its deep red color. These pigments can be used to create a beautiful, rosy hue for your lips without the use of synthetic dyes.

Nutritional Properties:

In addition to its vibrant color, beetroot is rich in vitamins and antioxidants. It contains Vitamin C, which can help to nourish and rejuvenate your lips while providing a natural glow.

Moisturizing Effects:

Beetroot juice has hydrating properties that can help keep your lips soft and smooth. This makes it an excellent ingredient for a DIY lip tint that not only colors but also nourishes.


2. What You’ll Need

Ingredients:

  • Fresh Beetroot: One medium-sized beetroot will suffice for a few applications.
  • Carrier Oil: Coconut oil, almond oil, or olive oil can be used to enhance the moisturizing properties of your lip tint.
  • Optional Add-Ins:
    • Honey: For added sweetness and hydration.
    • Essential Oils: For fragrance (like peppermint or vanilla).

Tools:

  • Grater or blender
  • Strainer or cheesecloth
  • Small bowl or container for mixing
  • Lip balm container or small jar for storage

3. How to Prepare Your Beetroot Lip Tint

Step 1: Extracting Beetroot Juice

  • Grate or Blend: Peel and grate the beetroot, or chop it into small pieces and blend it until smooth.
  • Strain: Place the grated or blended beetroot in a strainer or cheesecloth over a bowl. Squeeze or press to extract the juice, leaving you with a concentrated beetroot liquid.

Step 2: Mixing Your Lip Tint

  • Combine Ingredients: In a small bowl, mix 1 tablespoon of beetroot juice with 1 teaspoon of your chosen carrier oil. If you’re adding honey or essential oils, include them now.
  • Stir Well: Mix until you achieve a consistent color and texture.

Step 3: Storage

  • Transfer to Container: Pour the mixture into a lip balm container or a small jar. Make sure it is airtight to keep your tint fresh.
  • Refrigerate (Optional): You can store your beetroot lip tint in the fridge for an extra cooling effect when applied.

4. How to Apply Your Beetroot Lip Tint

Step 1: Prepare Your Lips

Before applying the lip tint, ensure your lips are clean and dry. Gently exfoliate your lips with a lip scrub or a damp washcloth to remove any dead skin.

Step 2: Apply the Tint

Using your fingertip or a lip brush, apply the beetroot tint directly to your lips. Start with a small amount and build up the color to your desired intensity.

Step 3: Blend and Finish

For a more natural look, you can blend the tint lightly with your fingers. This will help achieve an even application. If desired, finish with a touch of clear lip balm for added shine and moisture.


5. Tips for Using Beetroot Lip Tint

Patch Test:

Before applying beetroot juice to your lips, do a patch test on your skin to ensure you don’t have any allergic reactions.

Layering:

You can layer the tint for a more intense color. Just wait a minute for the first layer to dry before applying a second.

Remove Easily:

To remove the tint, use a gentle makeup remover or natural oil like coconut oil. This will help break down the pigments without harsh scrubbing.


6. Conclusion: Embrace Natural Beauty with Beetroot

Creating your own beetroot lip tint is a simple and rewarding DIY project that not only enhances your natural beauty but also nourishes your lips. By using fresh ingredients and avoiding synthetic dyes, you’re choosing a healthier option for your lip care routine.

With its rich color and beneficial properties, beetroot is the perfect ingredient for a homemade lip tint that’s as good for your skin as it is beautiful. Experiment with the recipes and find the perfect shade that suits you, embracing the vibrant hues of nature for your lips.

So go ahead, indulge in this natural beauty hack, and enjoy the delightful results of your DIY beetroot lip tint!

Happy tinting!

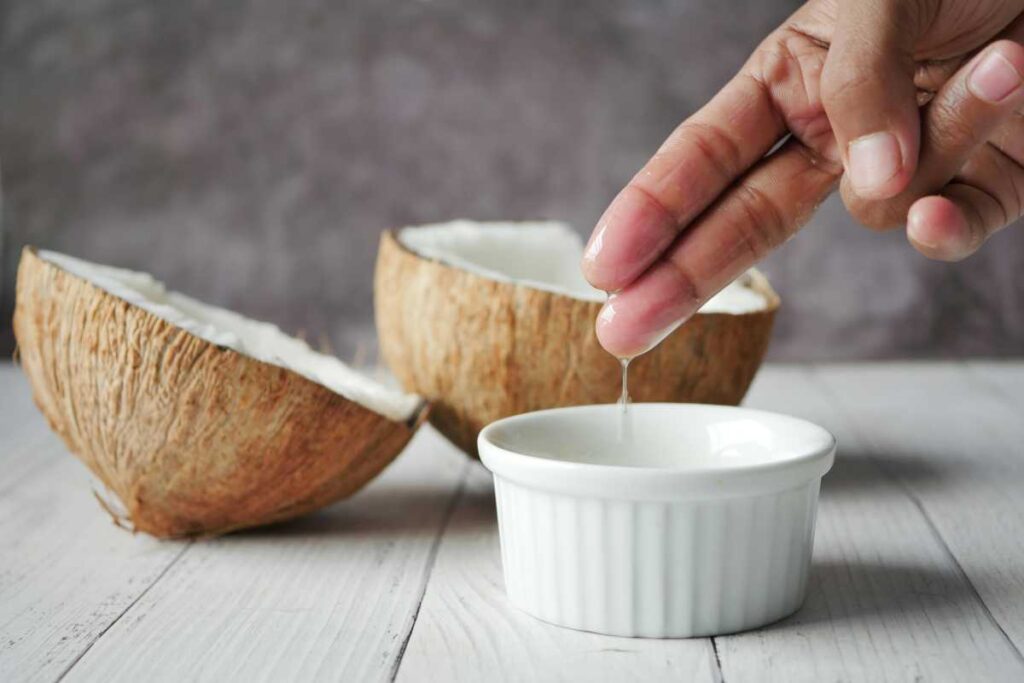
10 DIY Coconut Oil Lip Balms

Coconut oil is a versatile ingredient that offers numerous benefits for skin and hair, and its moisturizing properties make it an excellent choice for lip care. Making your own lip balm allows you to customize the ingredients to suit your preferences while ensuring you’re using natural, skin-friendly products. In this guide, we’ll explore 10 delightful DIY coconut oil lip balm recipes that will leave your lips feeling soft, hydrated, and luscious.


1. Why Choose Coconut Oil for Lip Balms?

Natural Moisturizer:

Coconut oil is known for its deep moisturizing properties. Its fatty acids help to lock in moisture and prevent dry, chapped lips. Unlike many commercial lip balms that contain artificial ingredients, coconut oil is a natural alternative that nourishes your skin.

Antibacterial and Antifungal Properties:

Coconut oil has natural antibacterial and antifungal properties, making it a great choice for maintaining healthy lips. It can help protect your lips from infections and promote healing for cracked or chapped skin.

Rich in Nutrients:

Coconut oil is rich in vitamins and antioxidants that can enhance the overall health of your lips, keeping them soft and youthful.


2. Essential Ingredients for Your DIY Lip Balms

Base Ingredients:

For all of the recipes below, you will need a few basic ingredients:

  • Coconut Oil: The star ingredient that provides moisture and nourishment.
  • Beeswax: Helps to solidify the balm and provide a protective barrier.
  • Essential Oils: For added fragrance and therapeutic benefits. Choose your favorite scents like peppermint, lavender, or vanilla.

Optional Add-Ins:

You can also customize your lip balm with additional ingredients:

  • Colorants: Natural colorants like beetroot powder or cocoa powder for tinted balms.
  • Flavorings: Natural flavorings like vanilla extract or citrus zest for a tasty touch.
  • Other Oils: Add nourishing oils like almond oil, jojoba oil, or vitamin E oil for extra hydration.

3. 10 DIY Coconut Oil Lip Balm Recipes

1. Classic Coconut Lip Balm

Ingredients:

  • 2 tablespoons coconut oil
  • 1 tablespoon beeswax pellets
  • 5-10 drops of peppermint essential oil (or your choice)

Instructions:

  1. Melt the coconut oil and beeswax in a double boiler.
  2. Stir in the essential oil.
  3. Pour into small containers and let it cool.

2. Lavender Vanilla Lip Balm

Ingredients:

  • 2 tablespoons coconut oil
  • 1 tablespoon beeswax pellets
  • 5 drops lavender essential oil
  • 5 drops vanilla extract

Instructions:

  1. Melt coconut oil and beeswax together.
  2. Add lavender oil and vanilla extract.
  3. Pour into containers and allow to set.

3. Sweet Orange Citrus Balm

Ingredients:

  • 2 tablespoons coconut oil
  • 1 tablespoon beeswax
  • 10 drops sweet orange essential oil

Instructions:

  1. Melt coconut oil and beeswax over low heat.
  2. Stir in the sweet orange oil.
  3. Pour into lip balm tubes or small tins to cool.

4. Chocolate Mint Lip Balm

Ingredients:

  • 2 tablespoons coconut oil
  • 1 tablespoon beeswax
  • 5 drops peppermint essential oil
  • 1 teaspoon cocoa powder

Instructions:

  1. Melt the coconut oil and beeswax together.
  2. Whisk in the cocoa powder and peppermint oil.
  3. Pour into containers and let cool.

5. Honey Almond Lip Balm

Ingredients:

  • 2 tablespoons coconut oil
  • 1 tablespoon beeswax
  • 1 tablespoon almond oil
  • 1 teaspoon honey

Instructions:

  1. Melt coconut oil and beeswax.
  2. Stir in almond oil and honey until well combined.
  3. Pour into small jars and allow to set.

6. Berry Tinted Balm

Ingredients:

  • 2 tablespoons coconut oil
  • 1 tablespoon beeswax
  • 1 teaspoon beetroot powder

Instructions:

  1. Melt coconut oil and beeswax.
  2. Mix in beetroot powder for color.
  3. Pour into containers and let it harden.

7. Green Tea Lip Balm

Ingredients:

  • 2 tablespoons coconut oil
  • 1 tablespoon beeswax
  • 1 teaspoon green tea leaves (dried)
  • 5 drops mint essential oil

Instructions:

  1. Melt coconut oil and beeswax.
  2. Add green tea leaves and mint oil.
  3. Pour into tins and cool completely.

8. Coconut Lime Lip Balm

Ingredients:

  • 2 tablespoons coconut oil
  • 1 tablespoon beeswax
  • 5 drops lime essential oil

Instructions:

  1. Melt the oils and beeswax together.
  2. Stir in lime oil.
  3. Pour into small containers and allow to set.

9. Rose and Geranium Lip Balm

Ingredients:

  • 2 tablespoons coconut oil
  • 1 tablespoon beeswax
  • 5 drops rose essential oil
  • 5 drops geranium essential oil

Instructions:

  1. Melt coconut oil and beeswax.
  2. Add the essential oils and mix well.
  3. Pour into containers and let cool.

10. Calming Chamomile Balm

Ingredients:

  • 2 tablespoons coconut oil
  • 1 tablespoon beeswax
  • 5 drops chamomile essential oil

Instructions:

  1. Melt coconut oil and beeswax together.
  2. Stir in chamomile oil.
  3. Pour into small jars and allow to cool.

4. Tips for Making Your DIY Lip Balms

Storage:

Store your lip balms in a cool, dry place. Use small jars, tins, or lip balm tubes for easy application and portability.

Labeling:

If you make multiple flavors, label each container with the name of the lip balm and the date it was made.

Experimentation:

Don’t hesitate to experiment with different essential oils, flavorings, and colors to create your unique lip balms.

Shelf Life:

DIY lip balms can last for several months if stored properly, but it’s best to use them within six months for optimal freshness.


5. Conclusion: The Joy of Making Your Own Lip Balm

Making your own coconut oil lip balms is a fun and rewarding project that allows you to take control of what you put on your lips. With just a few simple ingredients, you can create moisturizing, natural lip balms tailored to your preferences.

Whether you choose classic scents or experiment with unique flavors, these DIY lip balms not only nourish your lips but also provide a satisfying sense of accomplishment. Embrace the art of lip care with these delightful recipes, and enjoy the benefits of soft, healthy lips all year round!

Happy crafting!

Top 7 Beauty Recipes with Potato Juice for Glowing Skin

Potato juice is a powerful natural remedy that has been used for generations in skincare. Packed with vitamins, minerals, and antioxidants, it can help brighten skin, reduce dark circles, and promote an even complexion. In this blog, we’ll explore the top seven beauty recipes using potato juice that can enhance your skincare routine and help you achieve radiant skin.


Benefits of Potato Juice for Skin

  1. Brightening Properties: Potato juice contains natural bleaching agents that can lighten dark spots and improve skin tone.
  2. Anti-Aging: The antioxidants in potato juice help combat free radicals, reducing the appearance of fine lines and wrinkles.
  3. Moisturizing: It can hydrate the skin and prevent dryness, making it suitable for various skin types.
  4. Soothing Irritation: Potato juice has anti-inflammatory properties that can soothe irritated skin and reduce redness.
  5. Acne Control: Its antibacterial properties may help prevent acne breakouts and clear existing blemishes.

Top 7 Beauty Recipes with Potato Juice

1. Potato Juice for Dark Circles

Ingredients:

  • 1 medium-sized potato
  • Cotton pads

Instructions:

  1. Peel and grate the potato.
  2. Squeeze the grated potato to extract the juice.
  3. Soak cotton pads in the potato juice and place them over your eyes.
  4. Leave them on for 15-20 minutes, then rinse your face with cool water.

Benefits: This treatment helps reduce dark circles and puffiness around the eyes, leaving them looking refreshed.

2. Potato Juice and Lemon Mask for Brightening

Ingredients:

  • 1 medium-sized potato
  • 1 teaspoon lemon juice

Instructions:

  1. Extract juice from the grated potato as mentioned above.
  2. Mix the potato juice with lemon juice in a bowl.
  3. Apply the mixture to your face and neck using a cotton ball.
  4. Leave it on for 15-20 minutes, then rinse with lukewarm water.

Benefits: This mask brightens the skin and helps reduce dark spots.

3. Potato Juice and Honey Face Pack for Hydration

Ingredients:

  • 1 medium-sized potato
  • 1 tablespoon honey

Instructions:

  1. Extract the juice from the potato.
  2. Combine the potato juice with honey in a bowl.
  3. Apply the mixture evenly on your face and leave it on for 20 minutes.
  4. Rinse with warm water.

Benefits: This face pack hydrates and nourishes the skin, leaving it soft and supple.

4. Potato Juice for Acne Treatment

Ingredients:

  • 1 medium-sized potato
  • 1 teaspoon turmeric powder

Instructions:

  1. Extract the potato juice.
  2. Mix in the turmeric powder to form a paste.
  3. Apply the paste to the affected areas of your skin.
  4. Leave it on for 15-20 minutes and rinse off with lukewarm water.

Benefits: This treatment helps reduce acne and prevent future breakouts due to the antibacterial properties of turmeric.

5. Potato Juice Scrub for Exfoliation

Ingredients:

  • 1 medium-sized potato
  • 2 tablespoons sugar

Instructions:

  1. Grate the potato and extract the juice.
  2. Mix the potato juice with sugar to create a scrub.
  3. Gently massage the mixture onto your face in circular motions for a few minutes.
  4. Rinse with warm water.

Benefits: This scrub exfoliates dead skin cells, revealing a brighter complexion.

6. Potato Juice and Cucumber Mask for Soothing Skin

Ingredients:

  • 1 medium-sized potato
  • 1/2 cucumber

Instructions:

  1. Peel and blend the potato and cucumber together to make a smooth paste.
  2. Apply the mixture to your face and neck.
  3. Leave it on for 20-30 minutes, then rinse with cool water.

Benefits: This mask soothes irritated skin and provides hydration, making it ideal for sunburned or sensitive skin.

7. Potato Juice and Aloe Vera Gel for Anti-Aging

Ingredients:

  • 1 medium-sized potato
  • 2 tablespoons aloe vera gel

Instructions:

  1. Extract the juice from the potato.
  2. Mix the potato juice with aloe vera gel until well combined.
  3. Apply the mixture to your face and neck.
  4. Leave it on for 20-30 minutes and rinse with lukewarm water.

Benefits: This anti-aging mask hydrates the skin and reduces the appearance of fine lines and wrinkles.

Conclusion

Potato juice is a versatile and effective ingredient that can enhance your skincare routine and help you achieve glowing skin. With these seven beauty recipes, you can harness the natural benefits of potato juice to address various skin concerns, from dark circles to dryness. Remember to perform a patch test before trying new recipes and enjoy the process of nurturing your skin naturally!

How to Make a Lemon and Baking Soda Face Mask

Lemon and baking soda are two natural ingredients that have gained popularity in skincare for their potential benefits. When combined, they create a face mask that can brighten the skin, reduce acne, and promote a healthy glow. In this blog, we’ll explore the benefits of using a lemon and baking soda face mask, provide a simple recipe, and offer tips for applying it safely and effectively.


Benefits of Lemon and Baking Soda for Your Skin

  1. Lemon:
    • Brightening Properties: Lemon juice is rich in vitamin C and citric acid, which can help lighten dark spots and even out skin tone.
    • Antibacterial Qualities: Its natural antibacterial properties make it effective against acne-causing bacteria.
    • Exfoliation: The acidic nature of lemon helps exfoliate dead skin cells, revealing brighter skin underneath.
  2. Baking Soda:
    • Exfoliation: Baking soda acts as a gentle exfoliant, helping to remove dead skin cells and unclog pores.
    • Balancing pH: It can help balance the skin’s pH levels, making it suitable for various skin types.
    • Soothing Irritation: Baking soda has soothing properties that can calm irritated skin and reduce redness.

Precautions

Before you start making and applying the face mask, here are a few precautions to keep in mind:

  • Patch Test: Always perform a patch test before applying any new product to your face. Apply a small amount of the mixture on a discreet area of skin and wait 24 hours to see if any adverse reactions occur.
  • Sensitivity: Lemon juice can make your skin sensitive to sunlight. It’s best to use this mask in the evening and avoid sun exposure afterward.
  • Skin Type: This mask may not be suitable for very dry or sensitive skin types. If you have eczema, rosacea, or other skin conditions, consult with a dermatologist before using it.

How to Make a Lemon and Baking Soda Face Mask

Ingredients:

  • 1 tablespoon of fresh lemon juice (about half a lemon)
  • 1 tablespoon of baking soda
  • Optional: 1 teaspoon of honey (for added moisture and antibacterial benefits)

Instructions:

  1. Gather Your Ingredients:
    • Ensure you have fresh lemons, baking soda, and honey if you choose to use it. You’ll also need a small bowl and a spoon for mixing.
  2. Prepare the Lemon Juice:
    • Squeeze the juice from half a lemon into the bowl, making sure to remove any seeds.
  3. Mix the Ingredients:
    • Add 1 tablespoon of baking soda to the lemon juice. If using honey, add it to the mixture as well.
    • Stir the mixture until it forms a smooth paste. You may notice fizzing as the baking soda reacts with the lemon juice; this is normal!
  4. Application:
    • Start with a clean, dry face. Use your fingers or a clean brush to apply the mask evenly over your face, avoiding the eye area and any open wounds.
    • Leave the mask on for about 10–15 minutes. You may feel a slight tingling sensation, which is normal, but if it becomes uncomfortable, wash it off immediately.
  5. Rinse Off:
    • After the designated time, rinse your face with warm water, gently massaging in a circular motion to exfoliate your skin. Follow up with cold water to close your pores.
  6. Moisturize:
    • Pat your face dry with a clean towel and apply your favorite moisturizer to hydrate your skin. This is important as the mask may leave your skin feeling slightly dry.

Tips for Best Results

  • Frequency: Use this face mask once a week for the best results. Overuse can lead to skin irritation due to the acidity of lemon juice.
  • Stay Hydrated: Drink plenty of water and maintain a balanced diet to support healthy skin from the inside out.
  • Sun Protection: Always apply sunscreen during the day if you’ve used this mask, as lemon juice can increase sun sensitivity.

Conclusion

A lemon and baking soda face mask can be a simple yet effective way to brighten your complexion and promote clearer skin. By understanding the benefits and following the steps outlined above, you can incorporate this natural remedy into your skincare routine safely. Remember to listen to your skin and adjust your usage accordingly. Enjoy your radiant, glowing skin!

How to Use Olive Oil to Get Tanned Skin

With summer around the corner or a sunny vacation on the horizon, many people look forward to achieving a beautiful tan. While sun exposure can give your skin a lovely bronzed look, it’s essential to do so safely to avoid sunburn and skin damage. Olive oil, a natural moisturizer, has gained popularity for its potential to enhance tanning while providing nourishment to the skin. In this blog, we will explore how to use olive oil effectively for tanning, its benefits, and safety precautions to consider.


Benefits of Using Olive Oil for Tanning

  1. Natural Moisturizer: Olive oil is rich in fatty acids and antioxidants, which help keep the skin hydrated and prevent dryness that often comes with sun exposure.
  2. Nutrient-Rich: Packed with vitamins A, D, E, and K, olive oil nourishes the skin, promoting a healthy glow while you tan.
  3. Enhanced Tan: The natural oils in olive oil can help enhance and deepen your tan, giving you a more even and radiant color.
  4. Soothing Properties: Olive oil has anti-inflammatory properties that can help soothe sunburned skin and reduce redness.

How to Use Olive Oil for Tanning

To safely use olive oil for tanning, follow these steps:

1. Choose the Right Olive Oil

Opt for extra virgin olive oil, as it is the least processed and retains the highest levels of nutrients and antioxidants. Look for cold-pressed varieties for the best quality.

2. Prepare Your Skin

  • Exfoliate: Before applying olive oil, gently exfoliate your skin to remove dead skin cells. This helps achieve a more even tan. You can use a homemade scrub made of sugar and olive oil or a store-bought exfoliant.
  • Cleanse: Make sure your skin is clean and dry before applying olive oil. Shower and pat your skin dry with a towel.

3. Apply Olive Oil

  • Use as a Base: Pour a small amount of olive oil into your hands and rub them together. Apply it evenly across your body, focusing on areas that will be exposed to the sun, such as your arms, legs, and shoulders. Make sure to cover all areas evenly.
  • Massage Gently: Massage the oil into your skin using circular motions. This not only ensures even coverage but also helps the oil absorb better.

4. Sun Exposure

  • Timing: To achieve a tan, spend time in the sun during peak hours (usually between 10 AM and 4 PM), but be mindful of the risks of prolonged exposure. Start with short periods (15-30 minutes) and gradually increase as your skin becomes accustomed to the sun.
  • Reapply as Needed: Reapply olive oil every hour or after swimming or sweating to maintain hydration and tanning benefits.

5. Aftercare

  • Cool Down: After tanning, rinse off any excess olive oil with cool water. This helps to soothe the skin and remove any oil that may have attracted too much heat.
  • Moisturize: Follow up with a moisturizer or after-sun lotion to keep your skin hydrated and prolong your tan. Products with aloe vera or coconut oil work well for this.

Safety Precautions

While using olive oil for tanning can be beneficial, it’s essential to prioritize skin safety:

  • Limit Sun Exposure: Excessive sun exposure can lead to skin damage and increase the risk of skin cancer. Aim for short, controlled sessions in the sun.
  • Use Sunscreen: Consider using a broad-spectrum sunscreen with at least SPF 30 on your face and any areas that may be more sensitive. You can still use olive oil, but a layer of sunscreen will provide extra protection.
  • Know Your Skin Type: If you have fair or sensitive skin, be cautious with sun exposure, as you may burn more easily.
  • Monitor Your Skin: Pay attention to how your skin reacts. If you notice redness or irritation, reduce your sun exposure and take a break from tanning.

Conclusion

Using olive oil as a natural tanning aid can enhance your sun-kissed glow while nourishing and hydrating your skin. By following the steps outlined in this guide and taking necessary precautions, you can achieve a beautiful tan safely and effectively. Remember to listen to your skin, limit your sun exposure, and enjoy the sunny days ahead! With proper care, you’ll be able to showcase a healthy, radiant tan that complements your natural beauty.

8 Homemade Egg White Face Masks for Clear Skin

Egg whites have long been celebrated in skincare for their ability to tighten, tone, and improve the overall appearance of the skin. Rich in protein and vitamins, egg whites can help reduce the appearance of pores, control oil production, and provide a natural glow. In this blog, we will explore eight different homemade egg white face masks that you can easily create in your kitchen to achieve clear, healthy skin.


Benefits of Egg Whites for Your Skin

Before diving into the recipes, let’s highlight the key benefits of using egg whites in your skincare routine:

  1. Tightening Effect: Egg whites can help tighten the skin, reducing the appearance of fine lines and wrinkles.
  2. Oil Control: They are effective in absorbing excess oil, making them ideal for oily and acne-prone skin.
  3. Pore Minimization: Egg whites can help shrink the size of pores, giving the skin a smoother appearance.
  4. Nutrient-Rich: They contain proteins, vitamins, and minerals that nourish and rejuvenate the skin.

Precautions

Before using egg whites on your skin, keep these precautions in mind:

  • Allergy Test: Conduct a patch test by applying a small amount of egg white on your inner arm to check for any allergic reactions.
  • Freshness Matters: Use fresh, organic eggs whenever possible to ensure the best quality and effectiveness.
  • Avoid Open Wounds: Do not apply egg whites to broken or irritated skin, as it may cause further irritation.

8 Homemade Egg White Face Masks

1. Basic Egg White Mask

Ingredients:

  • 1 egg white

Instructions:

  1. Whisk the egg white until frothy.
  2. Apply it directly to your clean face using your fingers or a brush.
  3. Leave it on for 15–20 minutes until it dries.
  4. Rinse with warm water.

2. Egg White and Lemon Juice Mask

Benefits: Brightens skin and reduces oiliness.

Ingredients:

  • 1 egg white
  • 1 teaspoon lemon juice

Instructions:

  1. Mix the egg white and lemon juice until well combined.
  2. Apply to the face and leave on for 15 minutes.
  3. Rinse with cool water to close pores.

3. Egg White and Honey Mask

Benefits: Hydrates and nourishes the skin.

Ingredients:

  • 1 egg white
  • 1 tablespoon honey

Instructions:

  1. Whisk the egg white and honey together.
  2. Apply to your face and neck.
  3. Leave on for 20 minutes before rinsing with warm water.

4. Egg White and Yogurt Mask

Benefits: Exfoliates and brightens skin tone.

Ingredients:

  • 1 egg white
  • 2 tablespoons plain yogurt

Instructions:

  1. Combine the egg white and yogurt in a bowl.
  2. Apply the mixture to your face and let it sit for 15 minutes.
  3. Rinse off with lukewarm water.

5. Egg White and Cucumber Mask

Benefits: Refreshes and soothes irritated skin.

Ingredients:

  • 1 egg white
  • 1/2 cucumber (blended)

Instructions:

  1. Blend half a cucumber until smooth and mix with the egg white.
  2. Apply the mixture to your face and let it sit for 15–20 minutes.
  3. Rinse with cool water.

6. Egg White and Oatmeal Mask

Benefits: Exfoliates and absorbs excess oil.

Ingredients:

  • 1 egg white
  • 2 tablespoons finely ground oatmeal

Instructions:

  1. Mix the egg white with the ground oatmeal until you have a paste.
  2. Apply to your face and leave on for 15 minutes.
  3. Rinse with warm water, gently scrubbing to exfoliate.

7. Egg White and Aloe Vera Mask

Benefits: Calms and hydrates the skin.

Ingredients:

  • 1 egg white
  • 1 tablespoon aloe vera gel

Instructions:

  1. Combine the egg white with aloe vera gel in a bowl.
  2. Apply to your face and let it sit for 20 minutes.
  3. Rinse off with cool water.

8. Egg White and Tea Tree Oil Mask

Benefits: Fights acne and soothes inflammation.

Ingredients:

  • 1 egg white
  • 3 drops of tea tree oil

Instructions:

  1. Mix the egg white and tea tree oil.
  2. Apply to affected areas or your entire face.
  3. Leave on for 15 minutes and rinse with warm water.

How Often to Use Egg White Masks

For best results, use these egg white masks 1–2 times a week. Overuse can lead to dryness, so pay attention to how your skin responds and adjust accordingly.

Conclusion

Egg whites are a versatile and effective ingredient for creating homemade face masks that promote clear and healthy skin. With these eight recipes, you can easily incorporate egg whites into your skincare routine and enjoy their many benefits. Remember to perform patch tests, use fresh ingredients, and most importantly, have fun experimenting with these natural remedies! Your skin will thank you for it.

White Bumps on Lips: Types, Causes, Symptoms, & Home Remedies

Discovering white bumps on your lips can be concerning, as they may signal various conditions. While some bumps may be harmless, others might require attention. Understanding the types, causes, symptoms, and home remedies for white bumps on the lips is crucial for effective management. In this blog, we will explore everything you need to know about this common issue.

Types of White Bumps on Lips

  1. Milia
    • Description: Small, pearly white cysts that often appear on the lips or around the eyes. They occur when keratin (a protein in the skin) becomes trapped beneath the surface.
    • Common in: People of all ages, often in newborns.
  2. Fordyce Spots
    • Description: Small, painless, pale white or yellowish spots caused by enlarged oil glands. They are usually harmless and do not require treatment.
    • Common in: Both men and women, typically appearing during puberty.
  3. Cold Sores (Herpes Simplex Virus)
    • Description: Fluid-filled blisters that can appear on the lips or around the mouth. They often start as red, swollen areas before developing into white or yellowish blisters.
    • Common in: Individuals with a history of herpes simplex virus infections.
  4. Canker Sores
    • Description: Small, shallow ulcers with a white or grayish center and a red halo. They can be painful and make eating or speaking uncomfortable.
    • Common in: Individuals under stress or with certain dietary deficiencies.
  5. Oral Thrush
    • Description: A fungal infection caused by Candida yeast, leading to white patches on the lips, tongue, and inside the mouth. It can cause discomfort and may have a cottony texture.
    • Common in: Individuals with weakened immune systems or those taking antibiotics.

Causes of White Bumps on Lips

  1. Skin Conditions
    Conditions like eczema or psoriasis can cause inflammation and white bumps on the lips.
  2. Hormonal Changes
    Hormonal fluctuations, especially during puberty or pregnancy, can lead to the development of Fordyce spots.
  3. Infections
    Viral infections, such as the herpes simplex virus, can cause cold sores, while fungal infections can lead to oral thrush.
  4. Allergic Reactions
    Allergies to certain foods, cosmetics, or dental products can trigger inflammation and white bumps.
  5. Nutritional Deficiencies
    Lack of essential nutrients, such as vitamin B12, folate, or iron, may contribute to the formation of canker sores.
  6. Irritation
    Irritation from lip products, excessive sun exposure, or physical trauma (like biting your lip) can lead to bumps.

Symptoms Associated with White Bumps on Lips

  • Itching or Burning Sensation: Some bumps may cause discomfort or itching.
  • Pain or Tenderness: Especially with cold sores and canker sores.
  • Redness or Swelling: Surrounding areas may appear inflamed.
  • Difficulty Eating or Speaking: Especially with painful sores.
  • Flaking or Peeling Skin: In cases of dry lips or dermatitis.

Home Remedies for White Bumps on Lips

  1. Warm Compress
    • How it Helps: Applying a warm compress can soothe pain and reduce swelling. It can also help with the drainage of any fluid-filled bumps.
    • Method: Soak a clean cloth in warm water, wring it out, and place it on the affected area for 10-15 minutes.
  2. Aloe Vera Gel
    • How it Helps: Known for its soothing and anti-inflammatory properties, aloe vera can help heal sores and reduce irritation.
    • Method: Apply fresh aloe vera gel directly to the affected area.
  3. Honey
    • How it Helps: Honey has natural antibacterial and healing properties that can help soothe and protect the skin.
    • Method: Apply a thin layer of honey to the bumps and leave it on for 20-30 minutes before rinsing.
  4. Coconut Oil
    • How it Helps: Coconut oil is a natural moisturizer that can help prevent dryness and promote healing.
    • Method: Apply a small amount of coconut oil to your lips several times a day.
  5. Salt Water Rinse
    • How it Helps: Salt can help reduce inflammation and kill bacteria, making it beneficial for canker sores.
    • Method: Mix 1 teaspoon of salt in a cup of warm water and use it as a mouth rinse.
  6. Avoid Irritants
    • How it Helps: Reducing exposure to irritants like certain foods or lip products can prevent further irritation.
    • Method: Identify and avoid products that trigger your symptoms.
  7. Vitamin Supplements
    • How it Helps: If your bumps are due to nutritional deficiencies, taking a multivitamin or specific vitamins (like B12) can help.
    • Method: Consult a healthcare provider for advice on appropriate supplements.
  8. Over-the-Counter Treatments
    • How it Helps: Products containing benzoyl peroxide or hydrocortisone can help reduce inflammation and heal bumps.
    • Method: Follow the instructions on the packaging and apply as directed.

When to See a Doctor

While many white bumps on the lips are harmless and can be treated at home, it’s essential to seek medical advice if you experience:

  • Persistent bumps that do not improve with home treatment.
  • Severe pain or discomfort.
  • Signs of infection, such as increased redness, swelling, or pus.
  • Frequent outbreaks of cold sores or canker sores.

Conclusion

White bumps on the lips can stem from various causes, ranging from harmless conditions to those requiring medical attention. Understanding the types, causes, symptoms, and available home remedies can empower you to manage this issue effectively. By following preventive measures and practicing good lip care, you can keep your lips healthy and minimize the risk of developing white bumps. If you have persistent or concerning symptoms, don’t hesitate to consult a healthcare professional for a thorough evaluation and personalized treatment.